1. Featured results
Start from one shot and create a new perspective
Open a storyboard shot as a 3D scene and direct it by editing the characters and camera. The edited scene is used to generate video with SceneGen, and the final frame of the generated video can be added to the CineV storyboard.
From the original shot to 3D scene direction
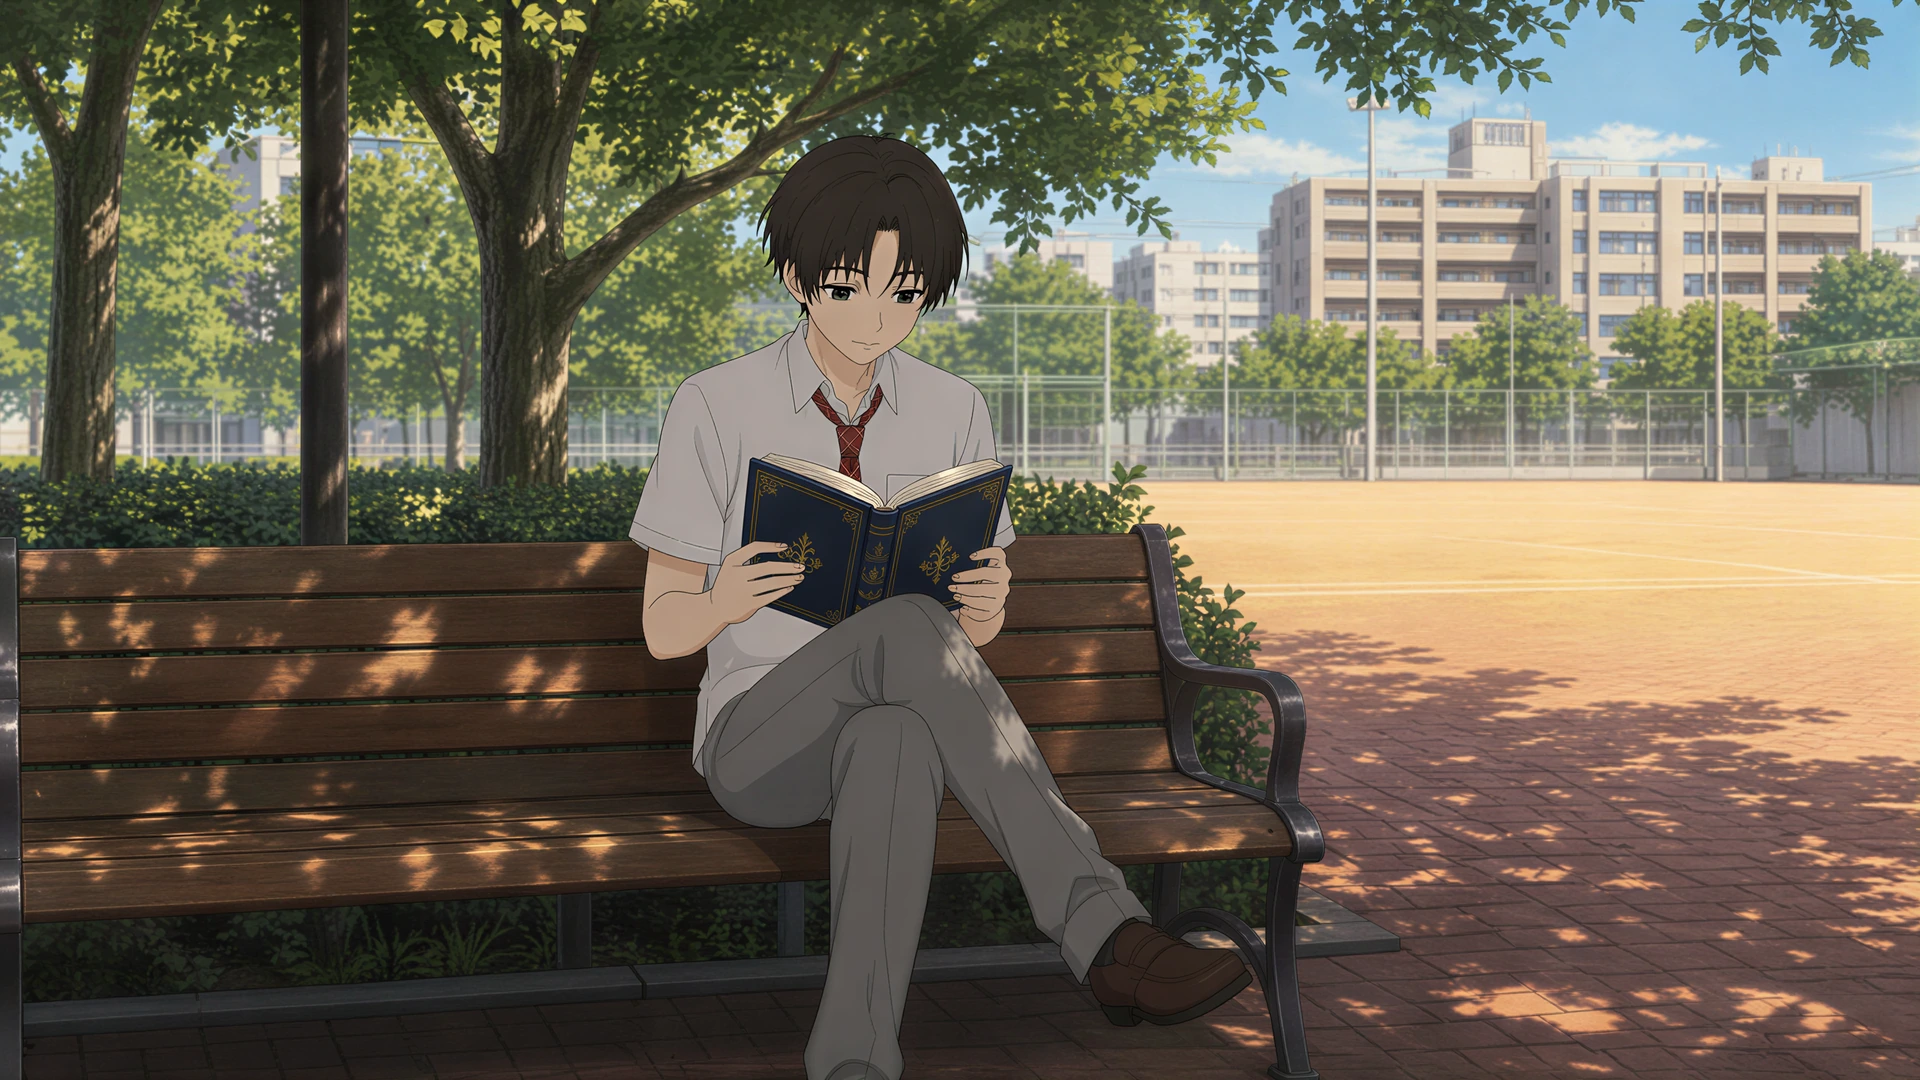
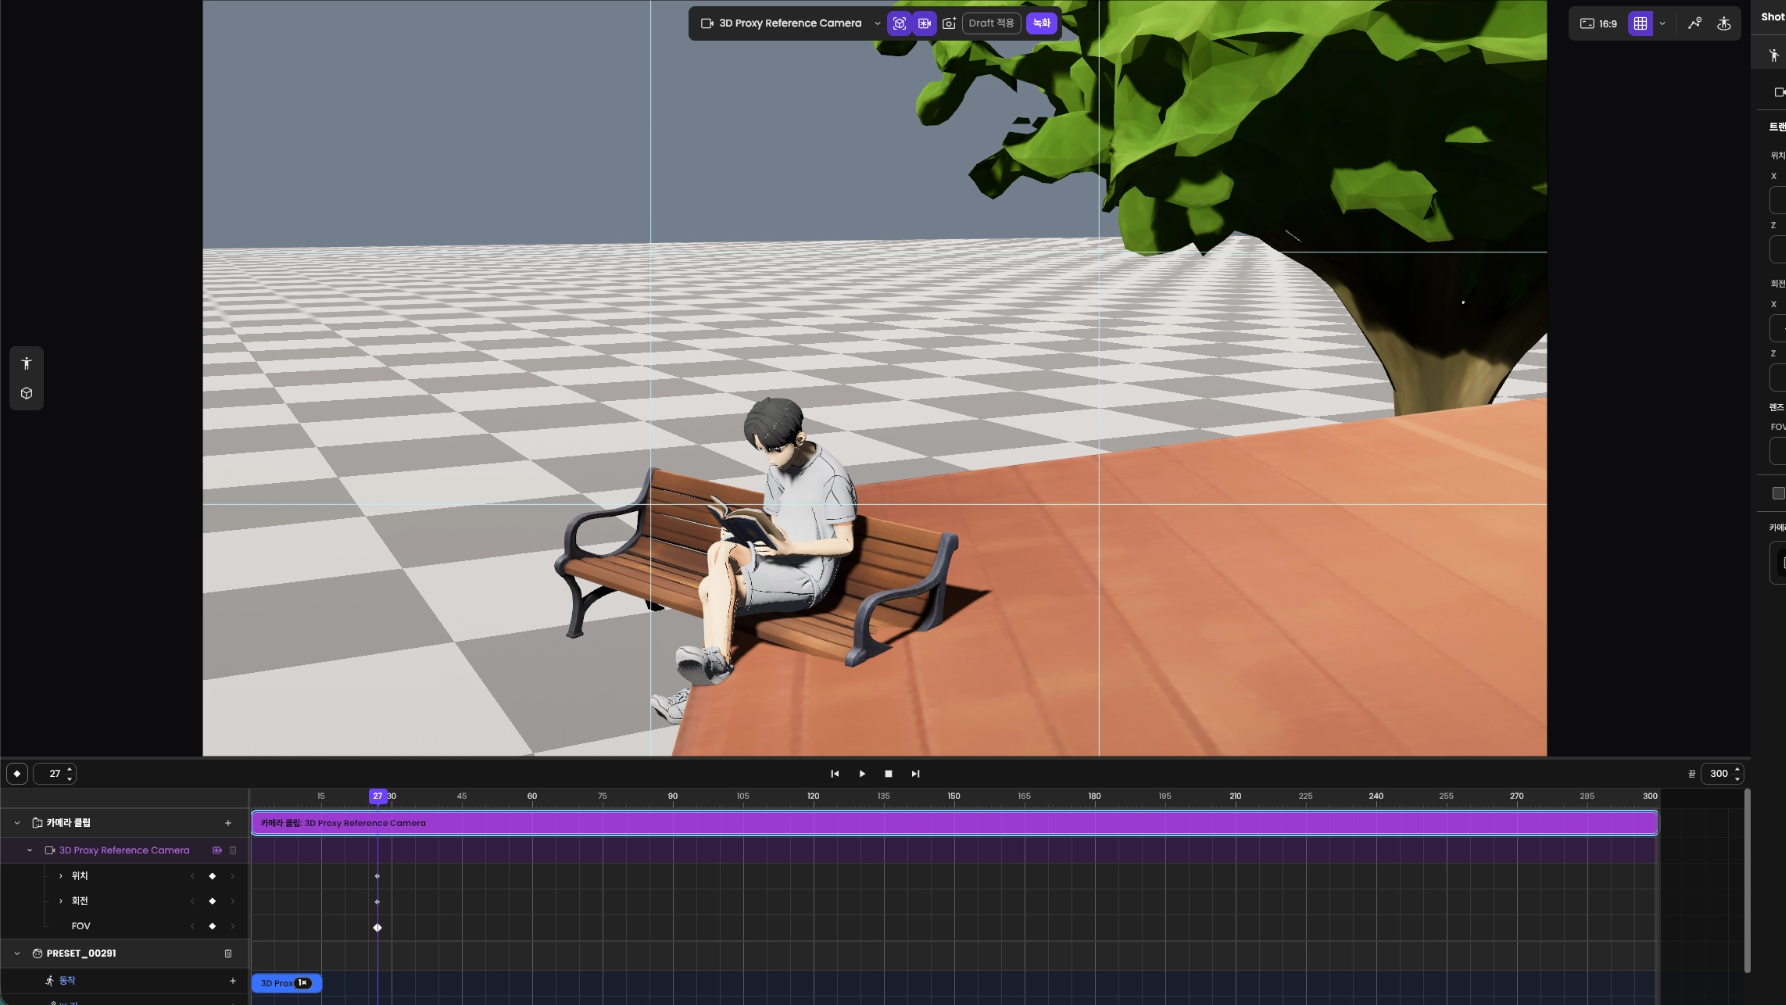
In this example, the camera was changed from a close view of the character to a composition showing the surrounding space. The video above was generated from the edited scene using SceneGen.
Edit poses, motion, and cameras to create video
Follow the process of editing a character's poses and actions and the camera composition within one scene, then generating a video with SceneGen.
Detailed instructions: 4.3 Create character actions · 4.4 Direct the camera · 4.7 Connect SceneGen results to CineV
2. The product's role
Shotloom is a 3D scene direction tool for editing character actions and camera composition.
Place characters, generate desired actions and apply them to the timeline, then design camera compositions that change over time. Play the scene to review the direction, save your work, and return to editing later.
CineV shots can be edited, or you can start by building a scene directly in Shotloom. Export your edits as camera images or video, or connect them to generation through SceneGen and production on the CineV storyboard.
- Scene composition: Adjust the position and orientation of characters and props.
- Direction over time: Build character actions and camera movements on the timeline.
- Use the results: Keep editable work and use it for image and video export and
CineVintegration.
3. The complete production workflow
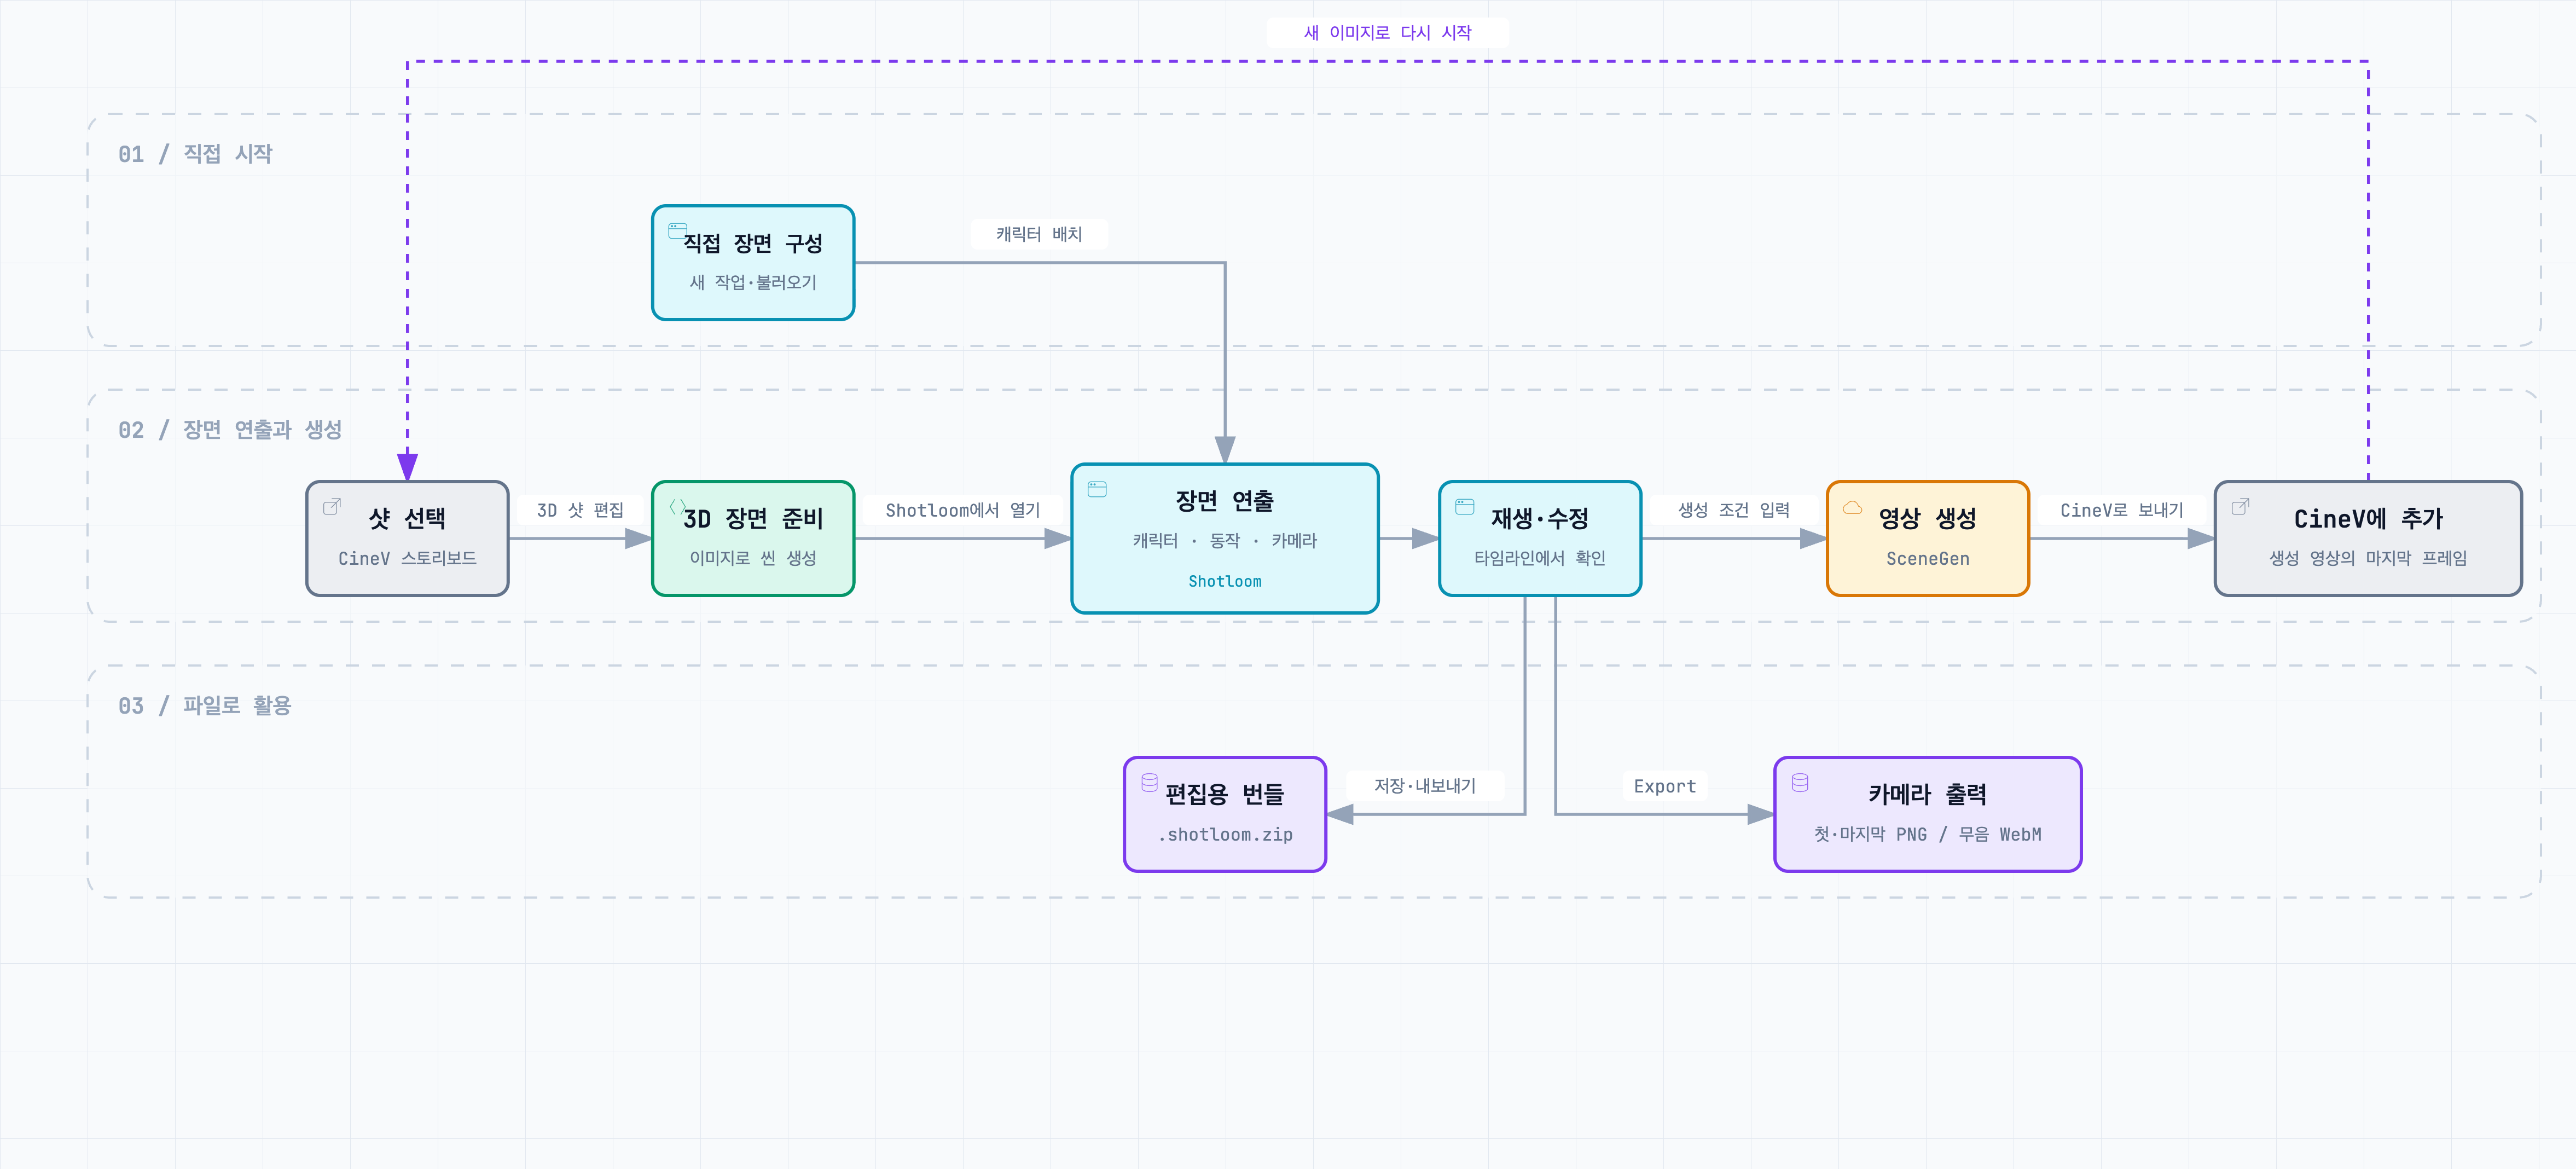
Prepare a scene → Edit characters and cameras → Play and refine → Use the results
Open CineV shots as 3D scenes, or build a scene directly in Shotloom. Edit character actions and camera composition, then play the result to review it. Keep the work as an editable bundle and continue with the output suited to your purpose.
| Using the results | Workflow | Output |
|---|---|---|
| Keep editable work | Save → Export bundle → Reopen | An editable .shotloom.zip bundle |
| Camera export | Camera Export → Export complete | First- and last-frame PNGs and silent WebM |
| CineV integration | Generate in SceneGen → Review result → Send to CineV | A storyboard with the generated video's final frame added |
Camera Export outputs the camera view of the edited 3D scene. SceneGen generates video based on the scene and generation settings, while Send to CineV transfers the final-frame image of the generated video.
4. Detailed feature guide
CineV integration is covered in 4.1 and 4.7, and Shotloom's standalone editing tools in 4.2–4.6. Each workflow can be used independently on a prepared Shot. A Shot is one scene-editing unit; a bundle stores work so it can be reopened and edited.
4.1 Open a CineV shot in Shotloom
Select a storyboard shot, generate a 3D scene, and start editing it in Shotloom.
Open a project and review the storyboard
Open the project you want to edit in CineV and review its storyboard.
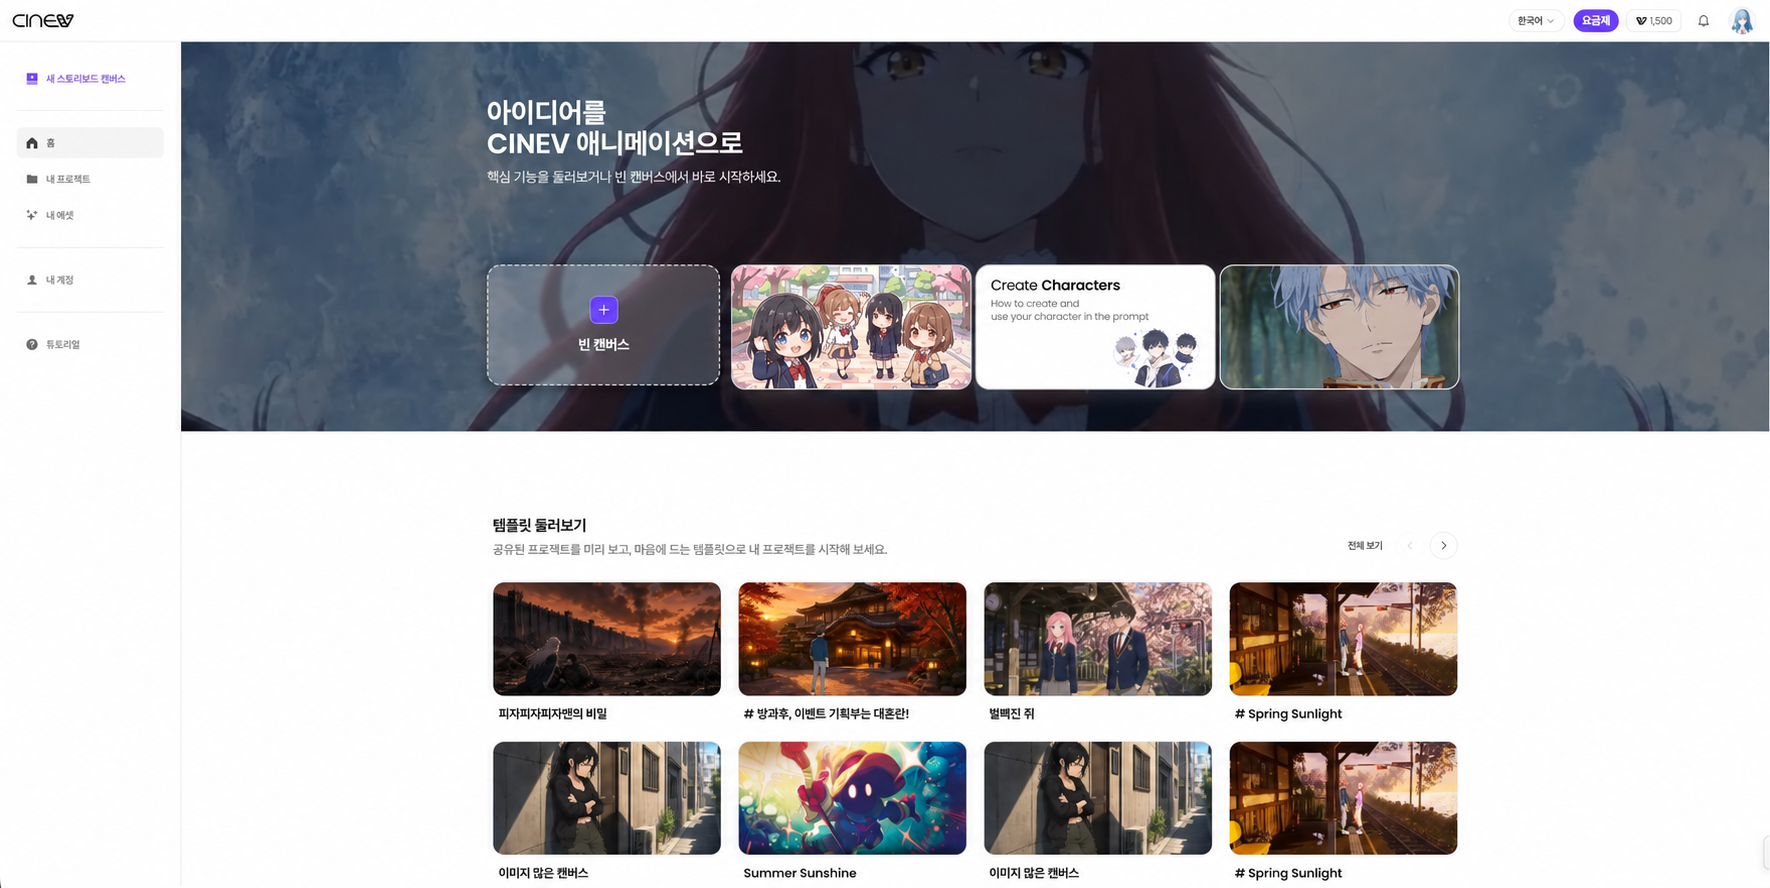
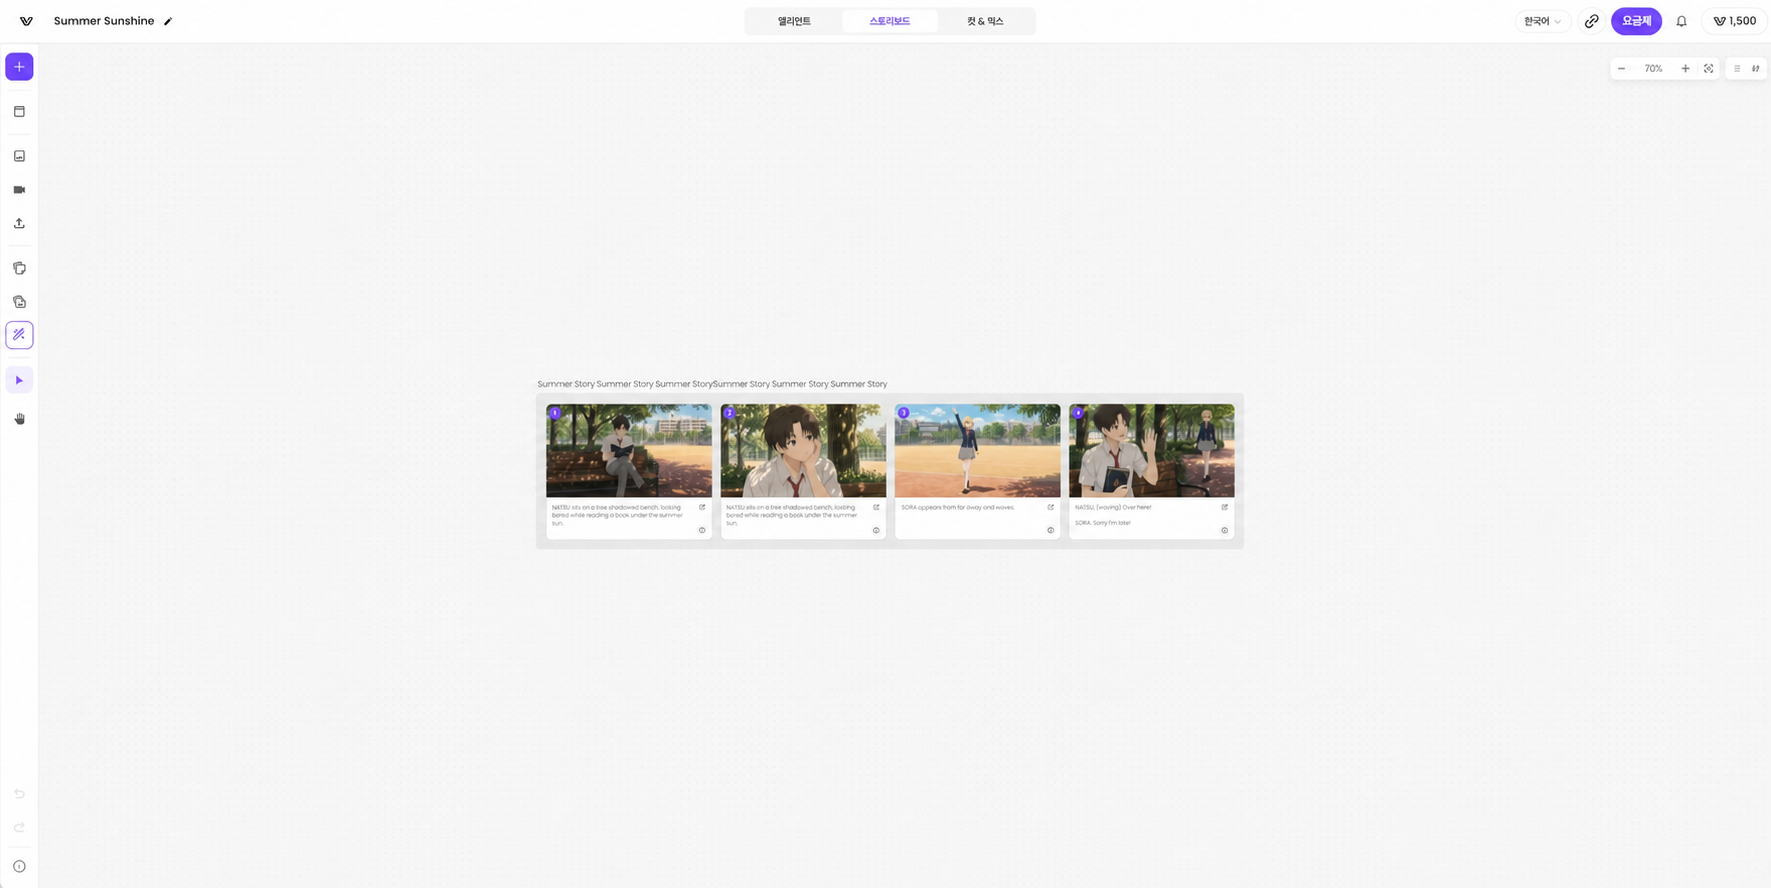
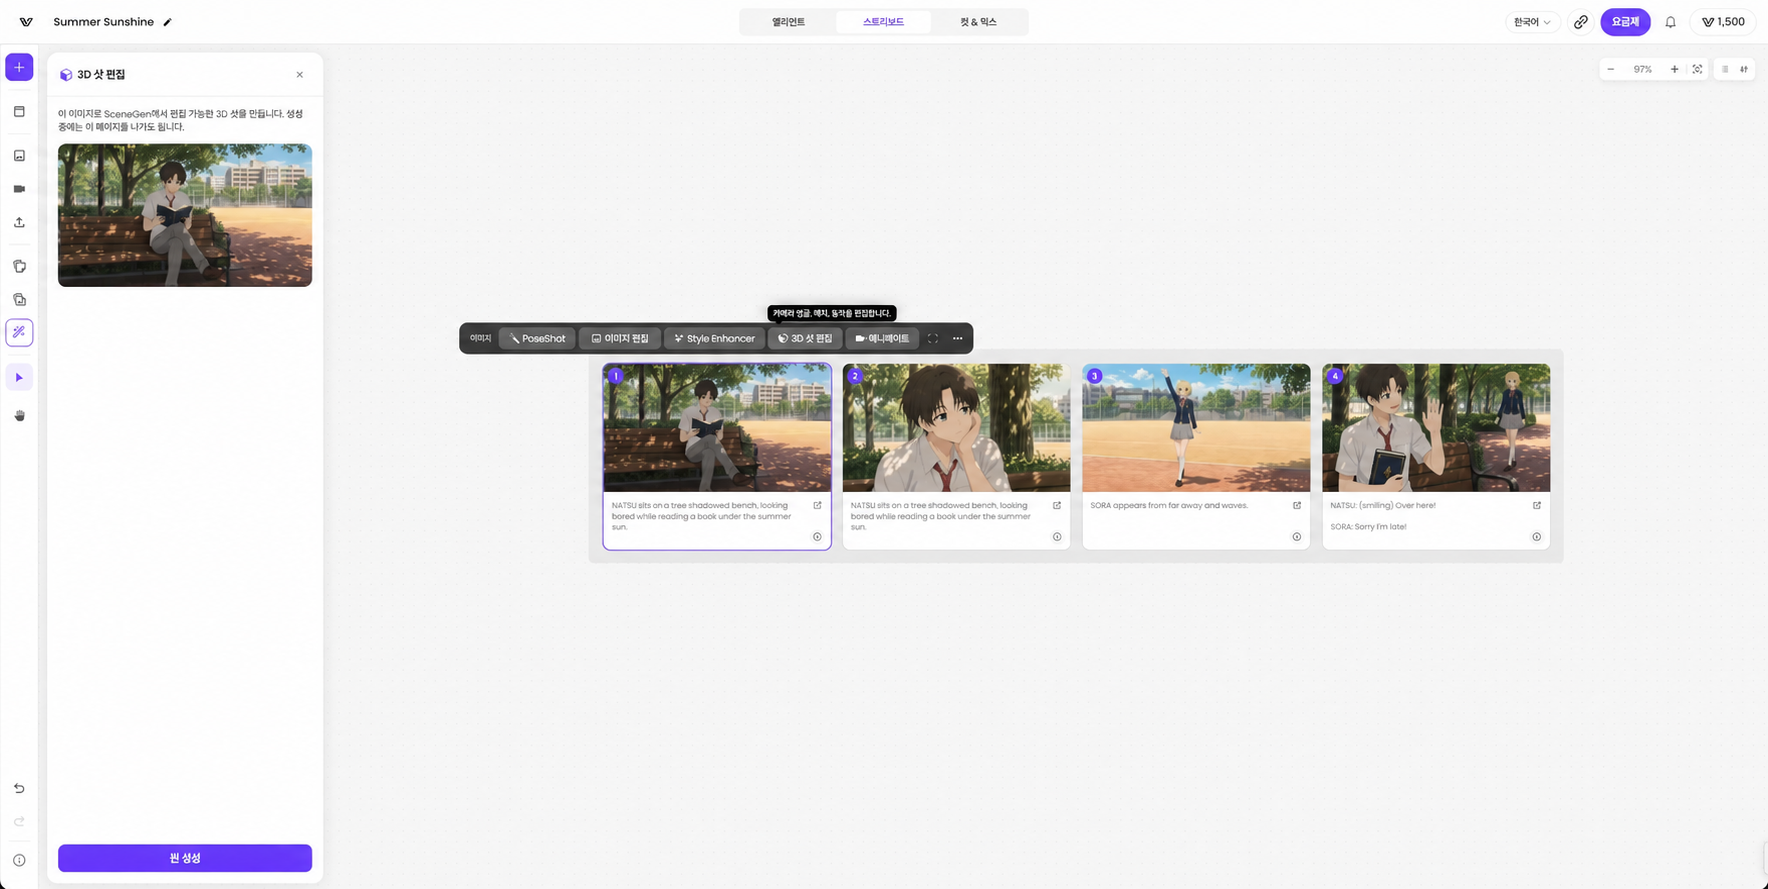
1. Select a shot to edit — In the toolbar, click 3D Shot Edit. The selected shot image and scene generation panel open on the left.
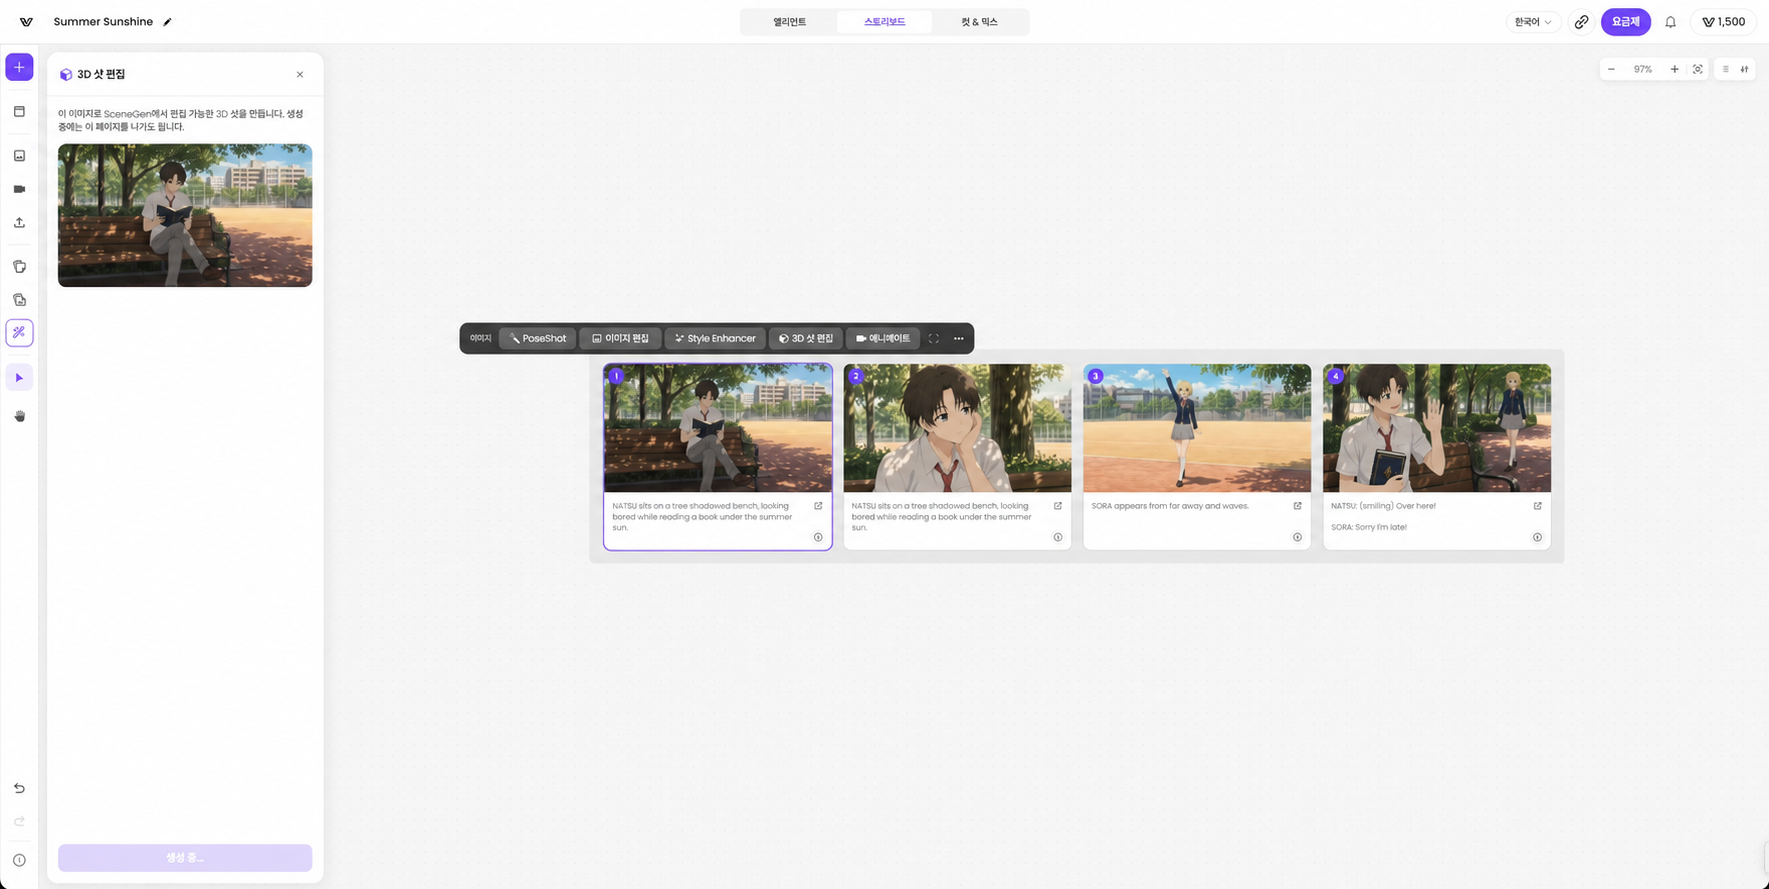
2. Generate a 3D scene — In the left panel, click Generate Scene and wait for generation to finish.
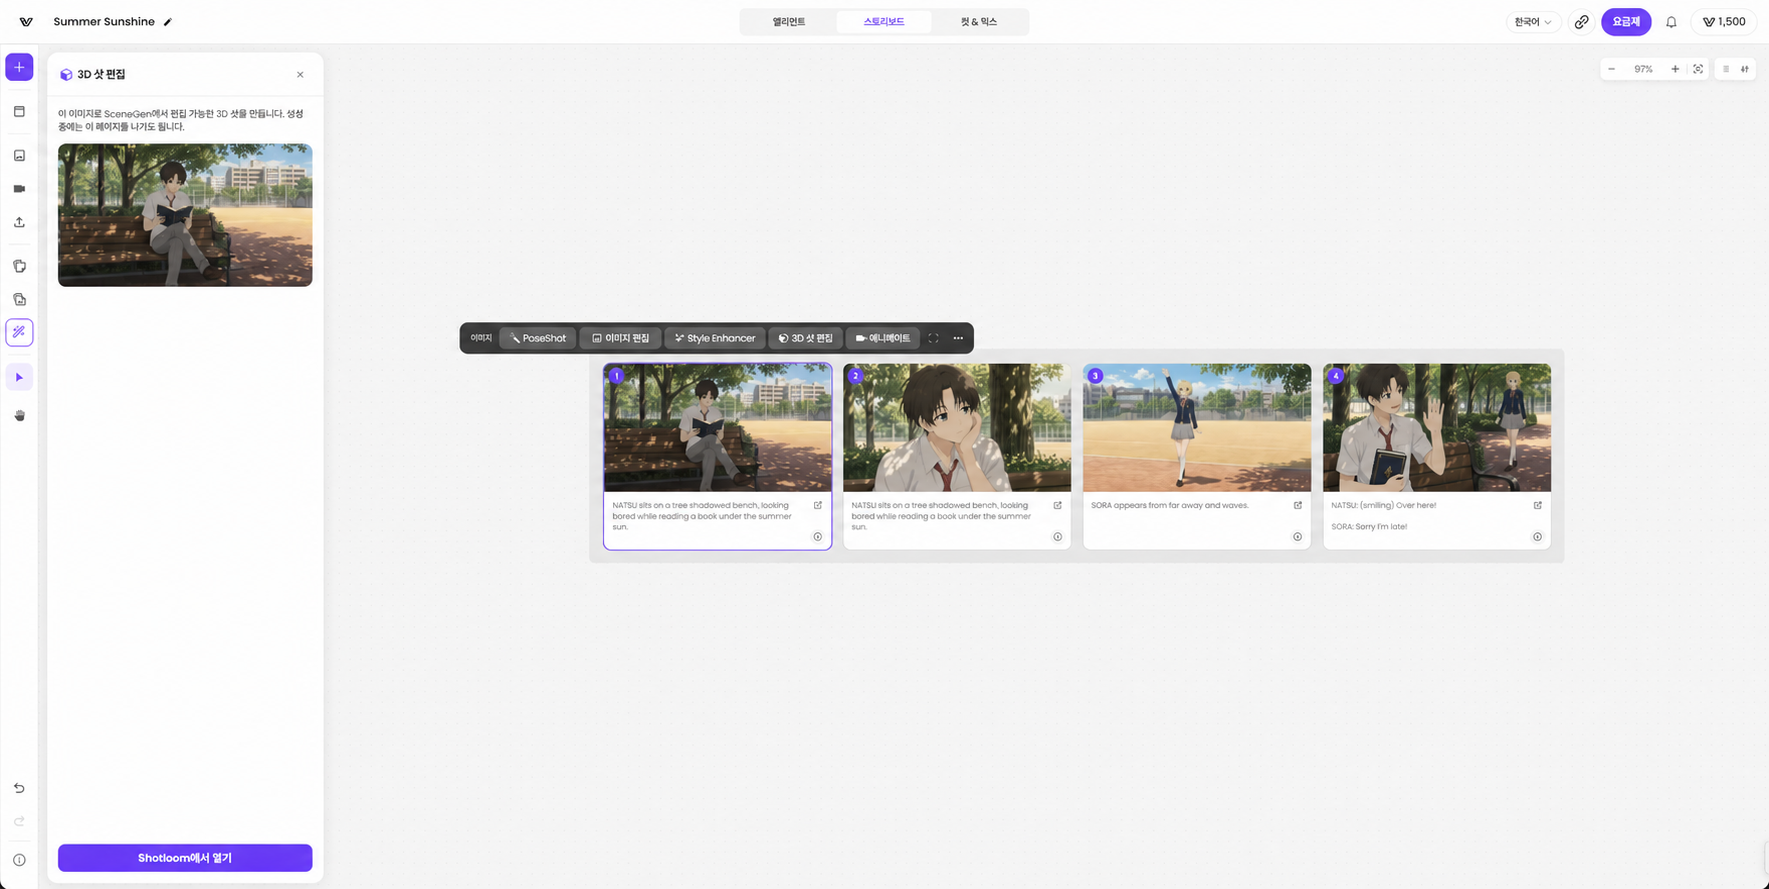
3. Open in Shotloom — When generation finishes, click the now-enabled Open in Shotloom button.
4. Review the generated scene — Review how characters and space have been reconstructed from the original shot.
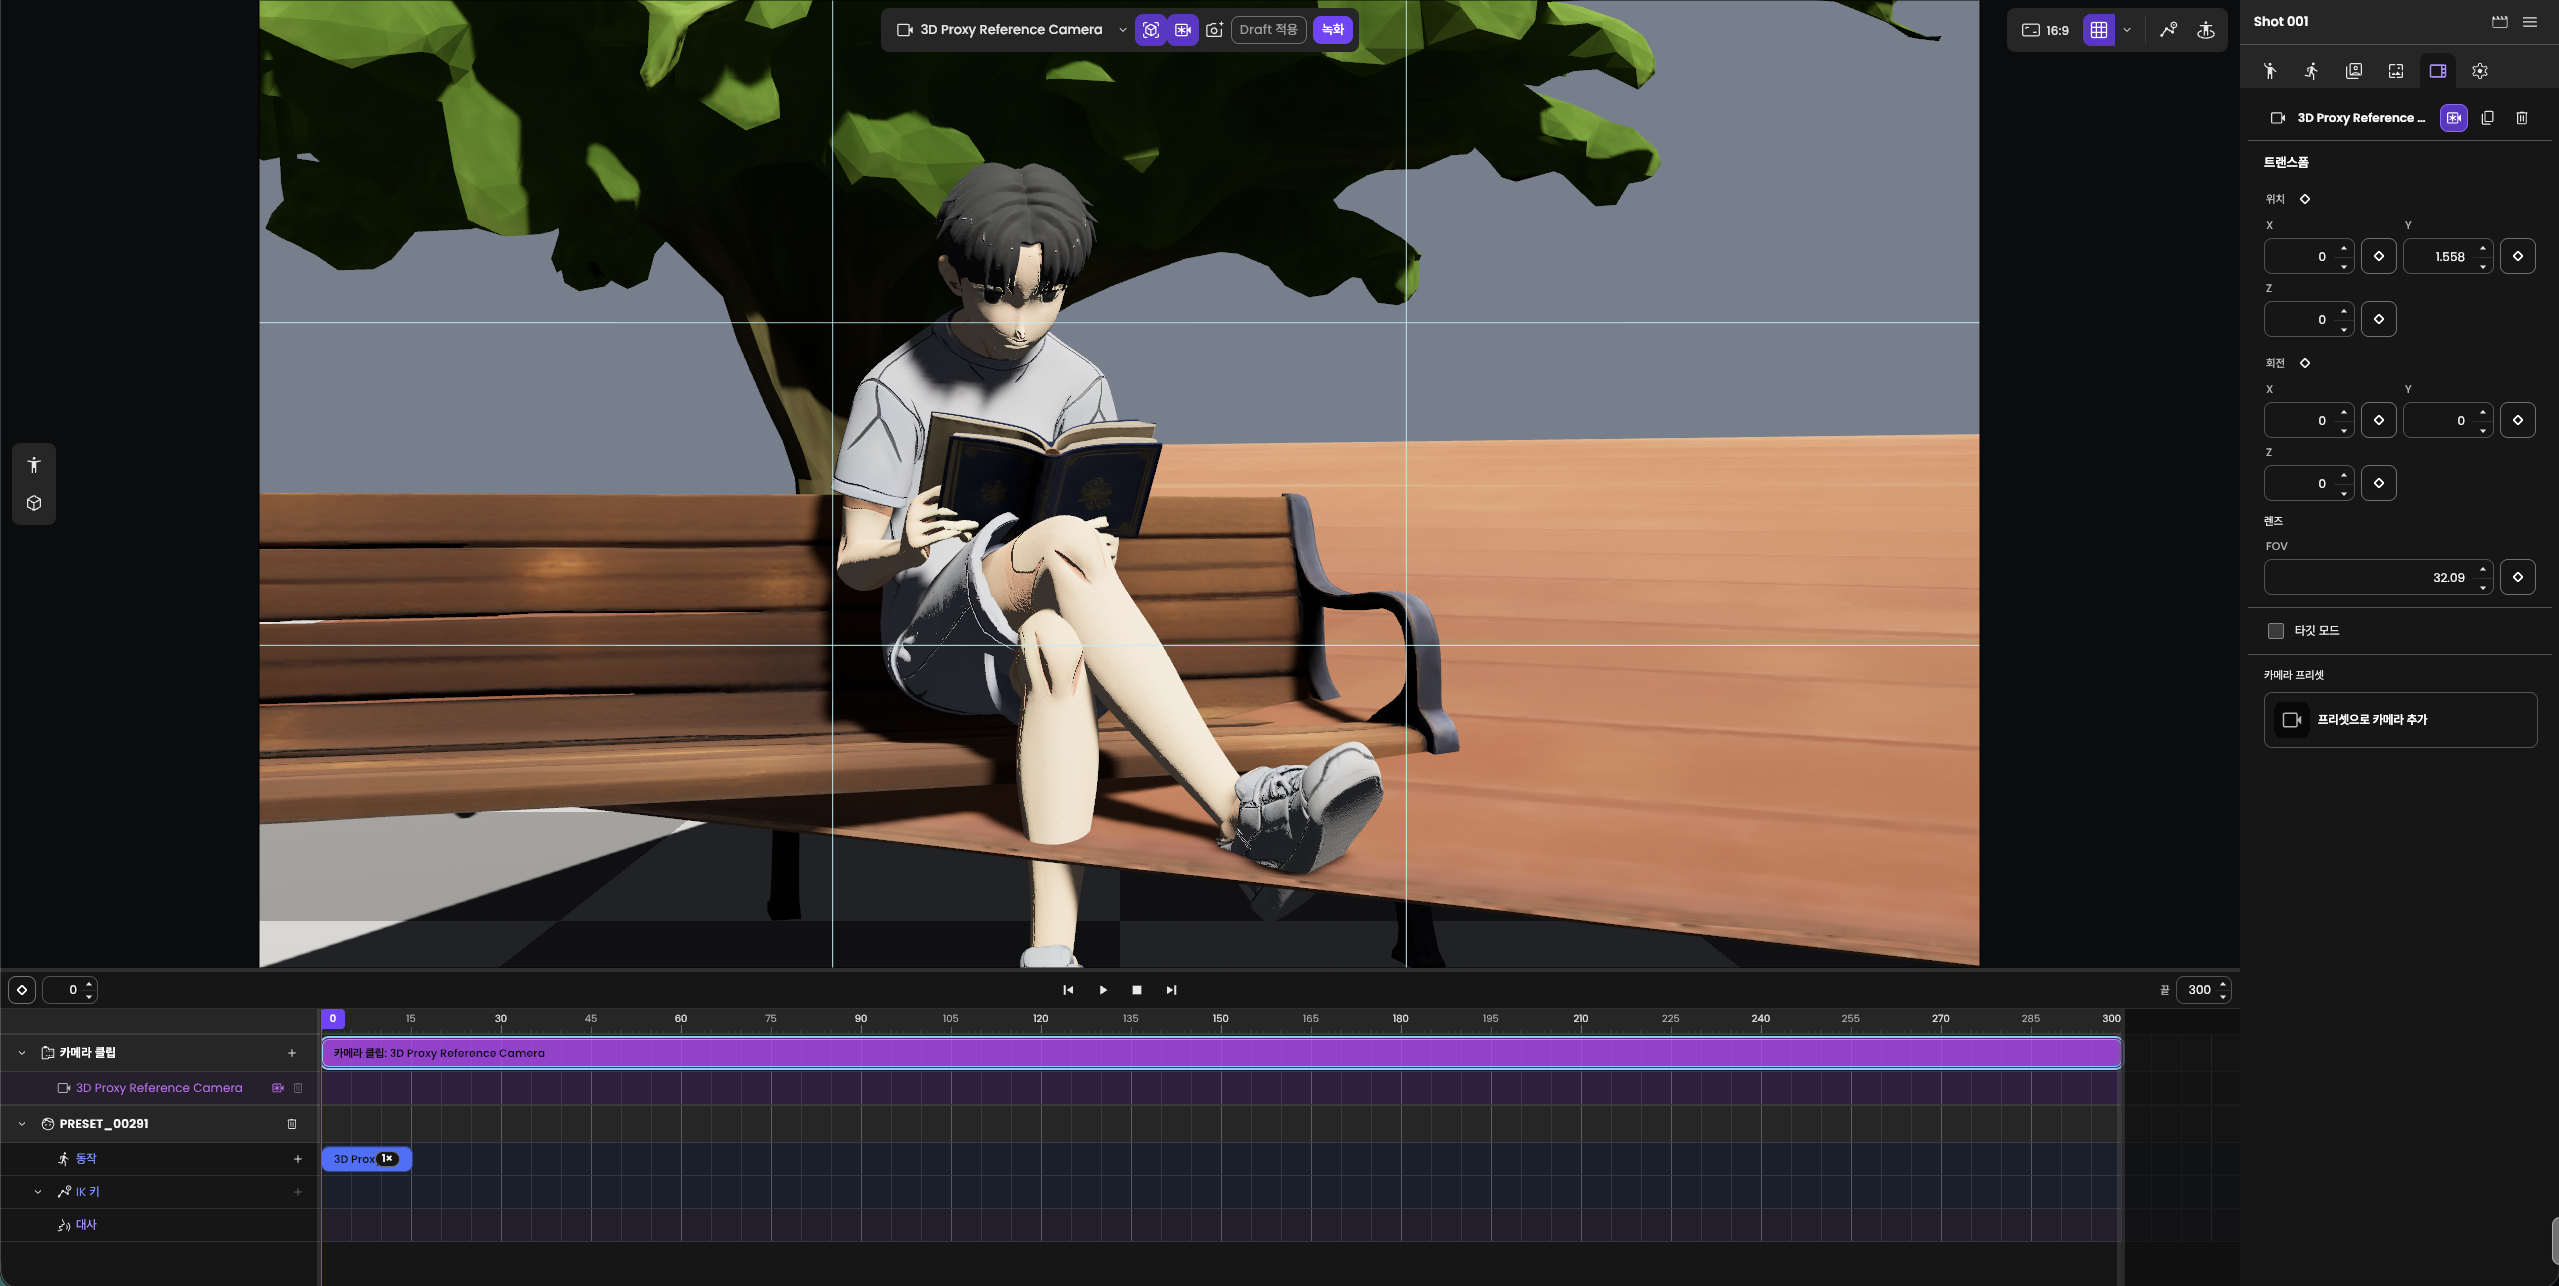
4.2 Compose a scene
Add characters and adjust their positions and orientations to compose the scene you will edit.
1. Add a character — Add the character you want to use. The image below shows a character already added to the scene.
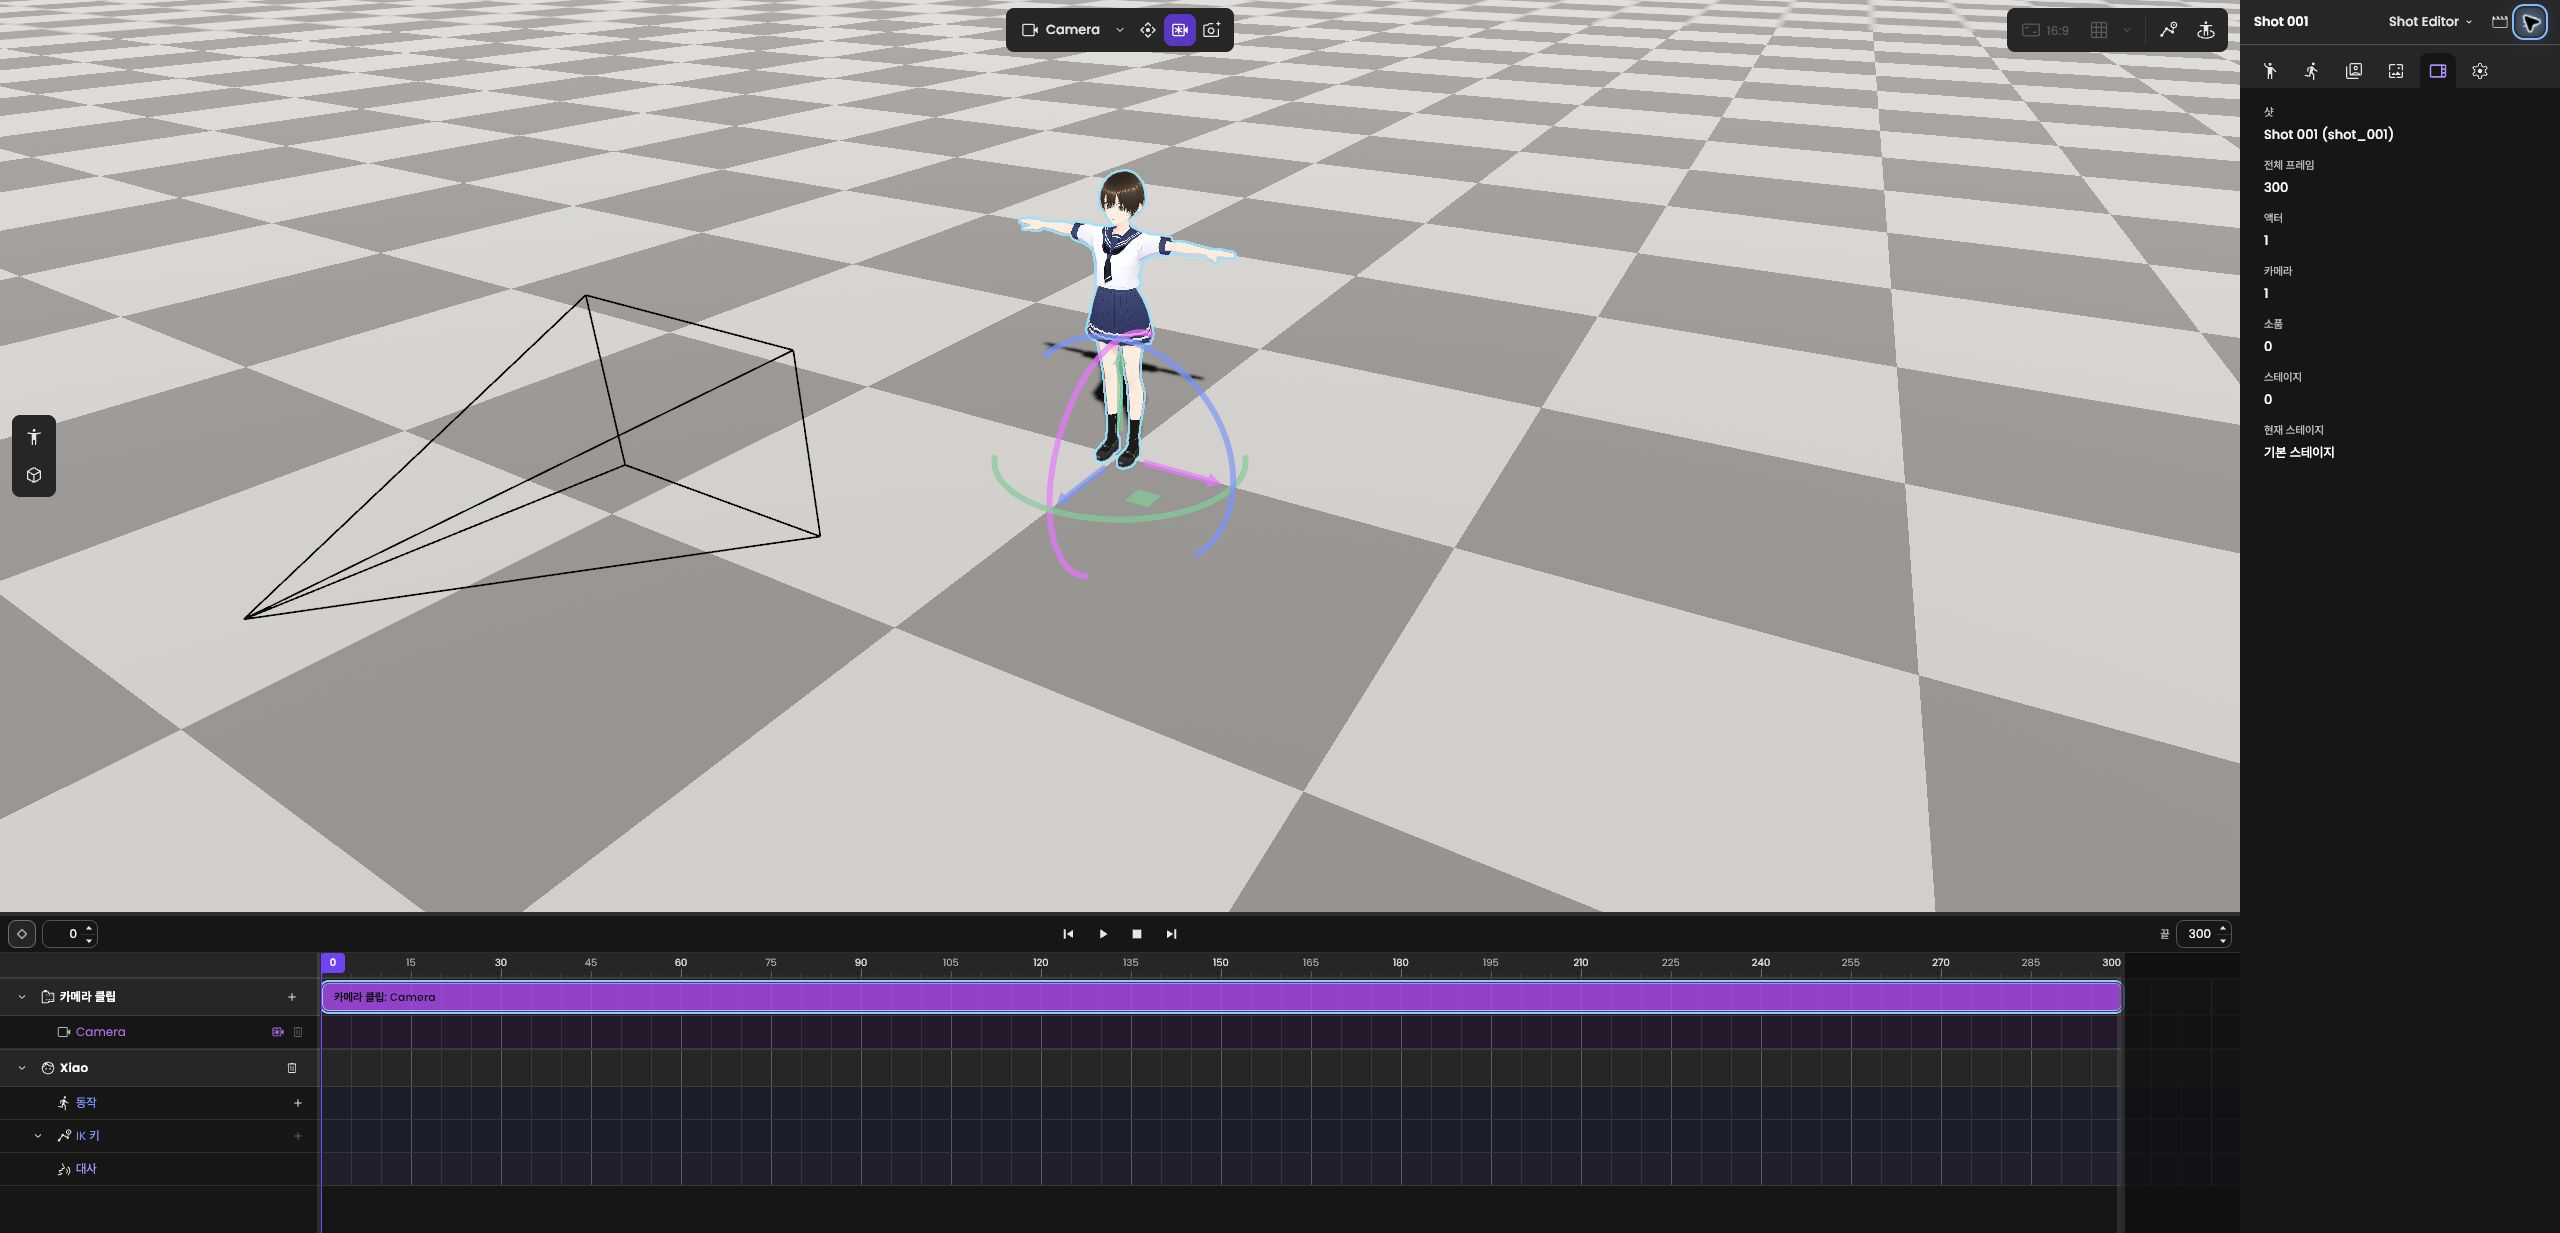
2. Adjust position and orientation — Select a character and place it appropriately in the scene.
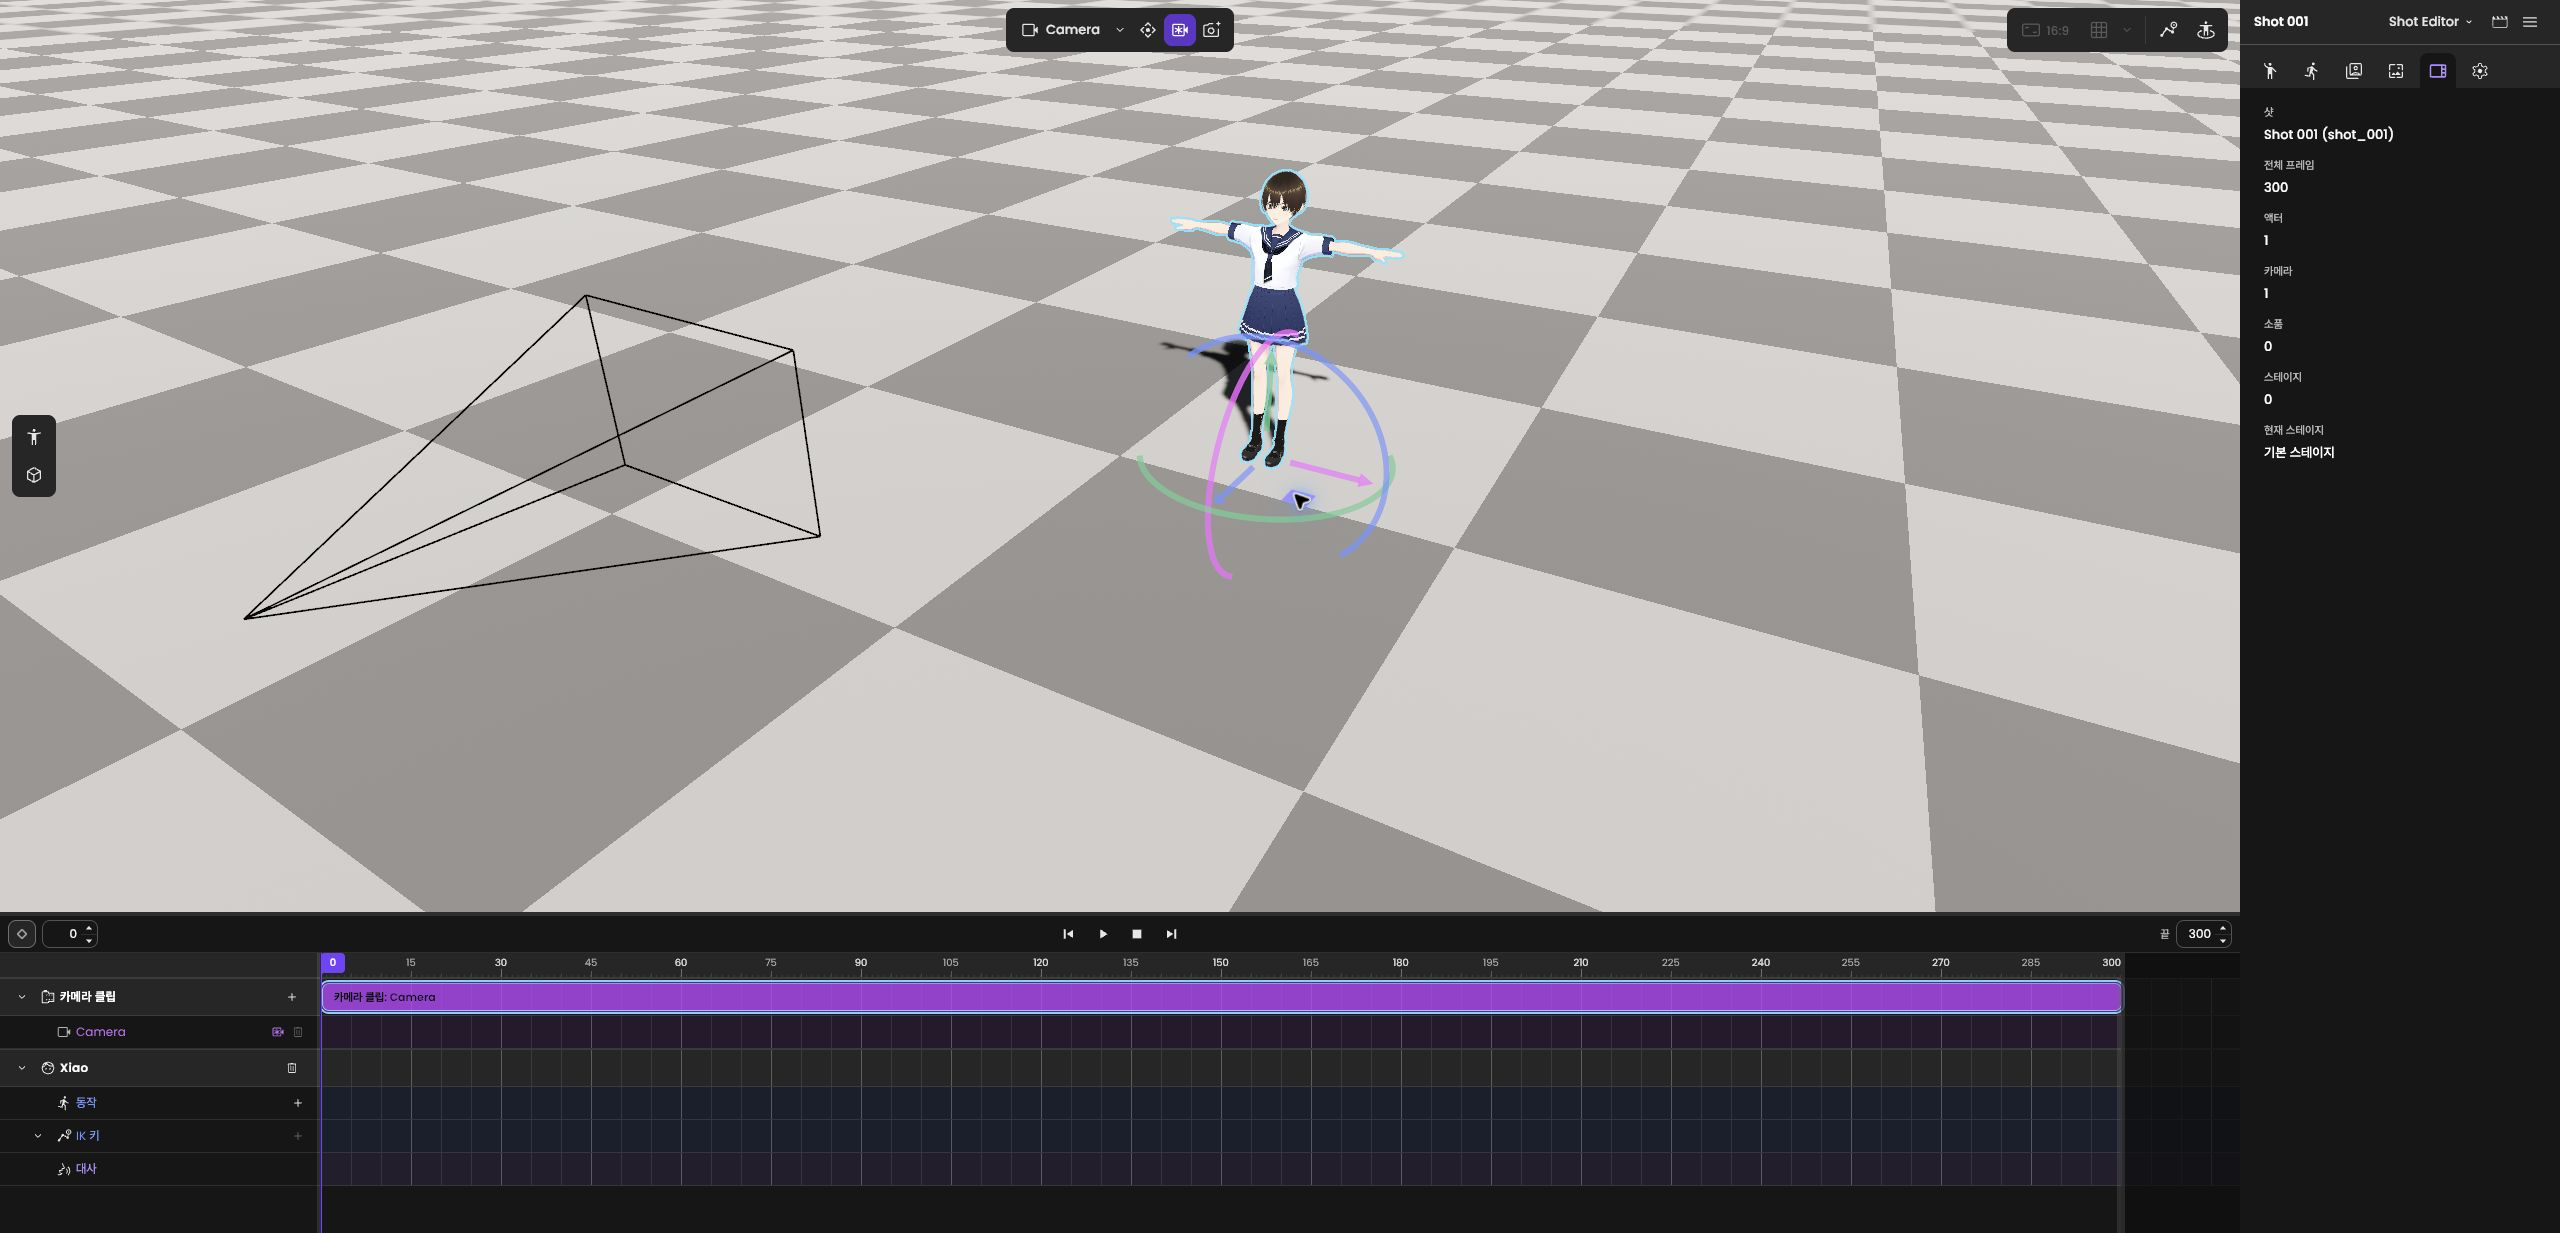
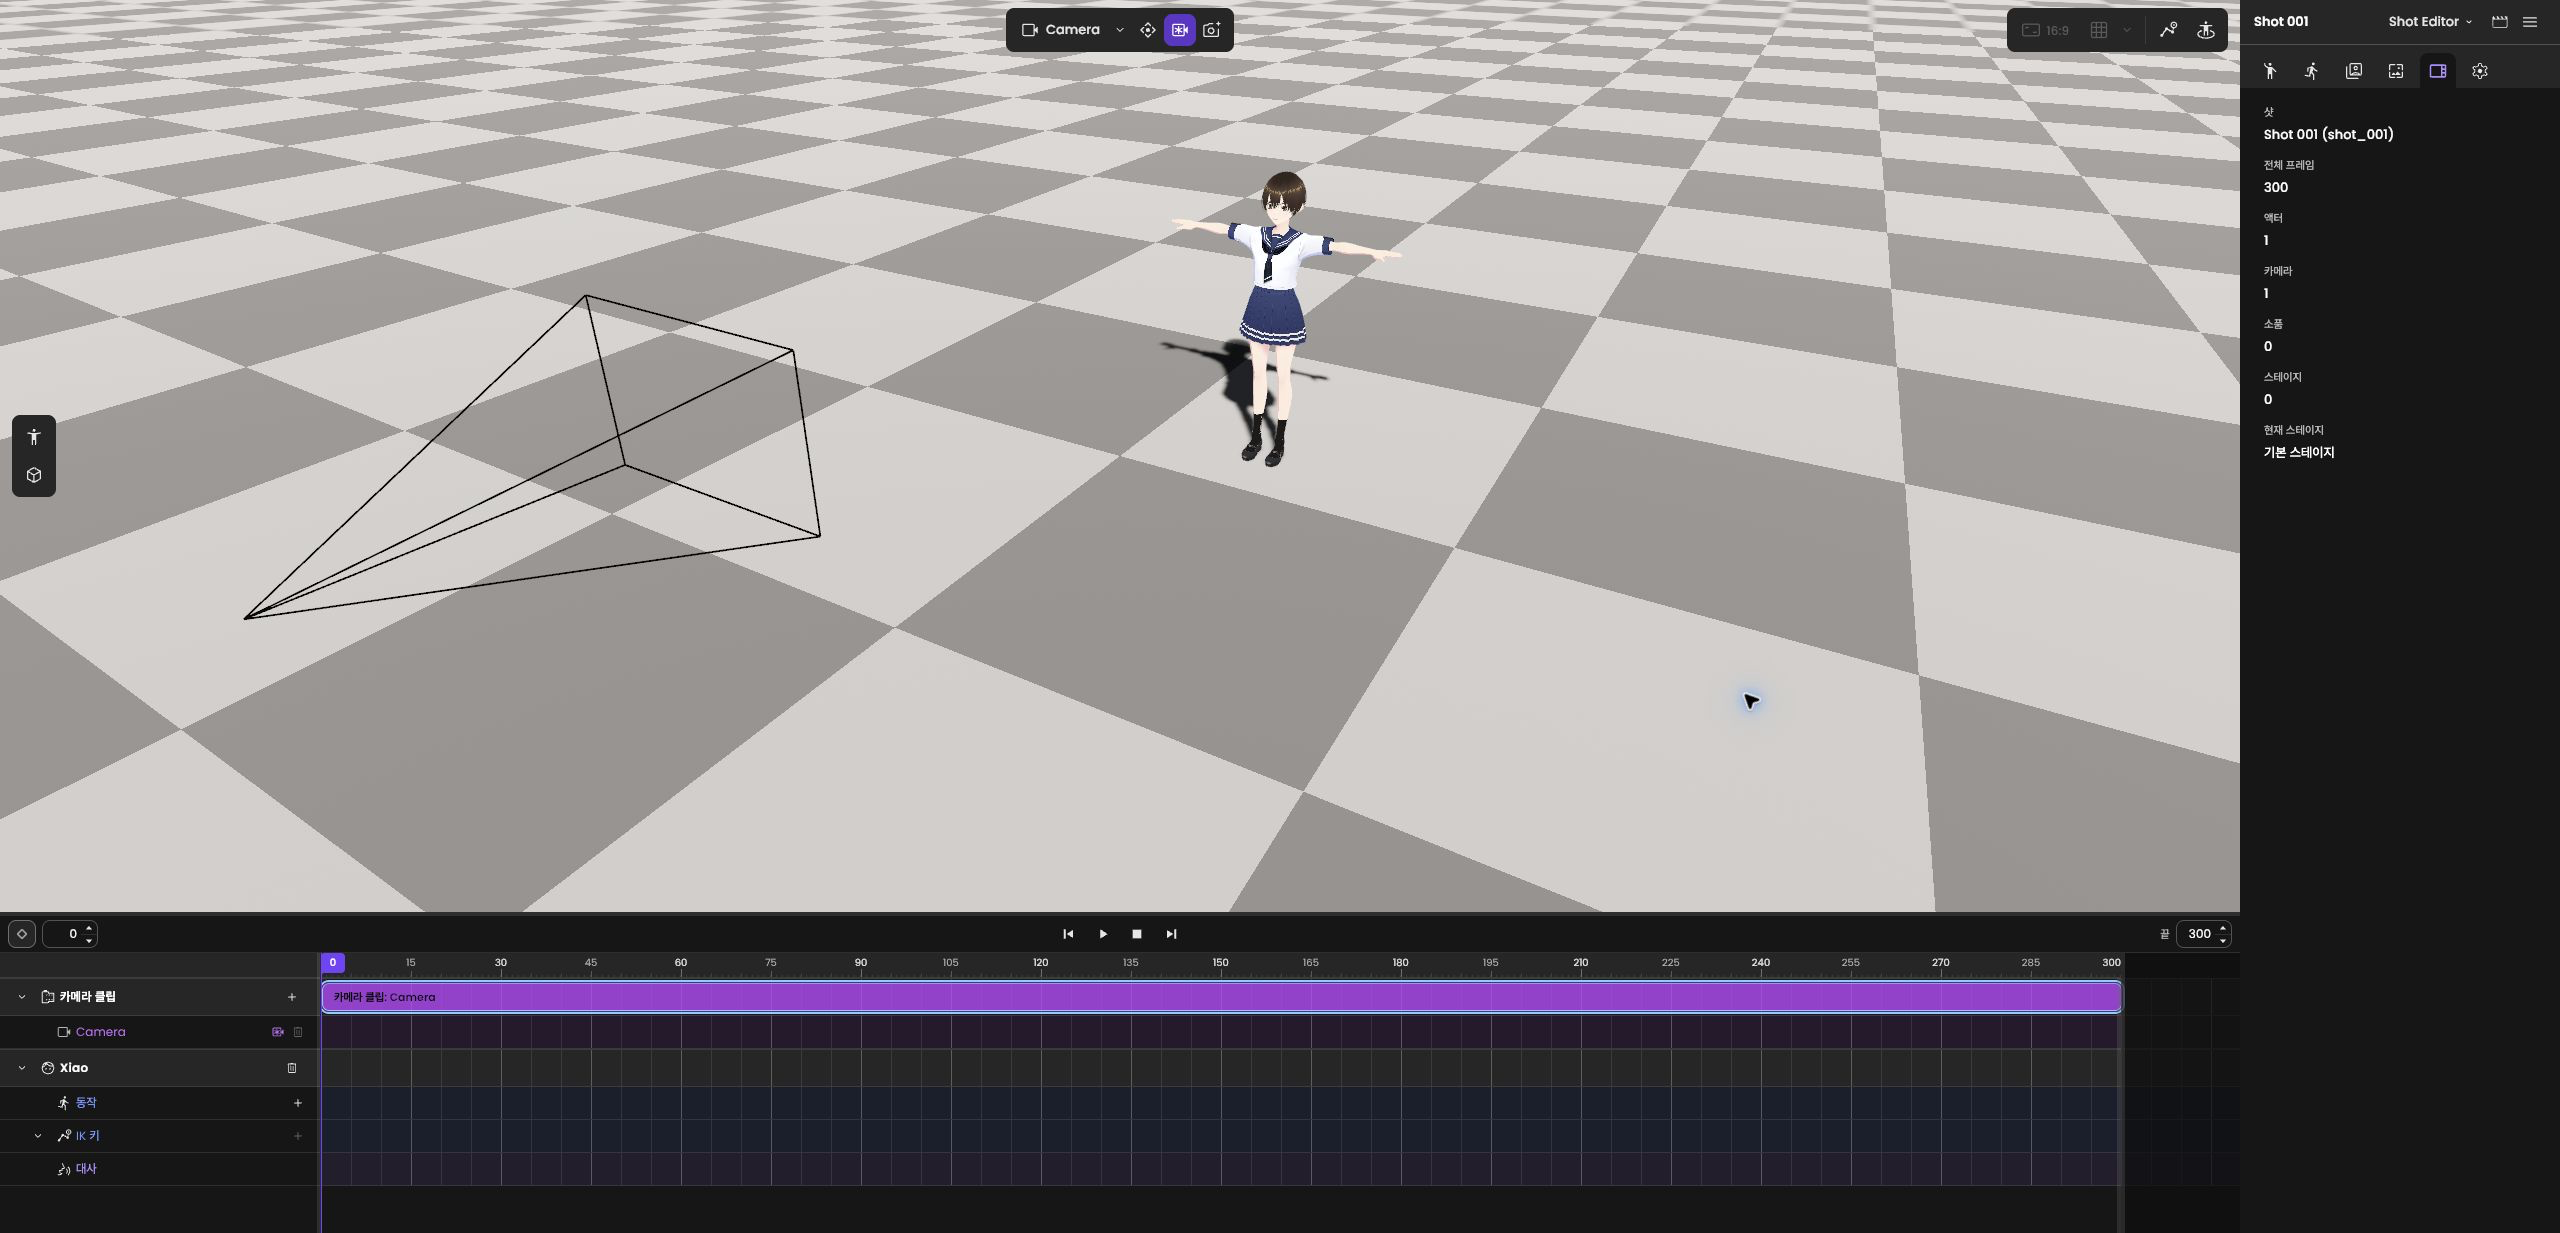
3. Check the placement — Review the full scene to confirm that the character is in the intended position and facing the right direction.
Starting conditions and prop placement
Start with a new bundle or an existing Shot open.
If the scene needs props, add them and adjust their positions and orientations too. The example above shows character placement.
4.3 Create character actions
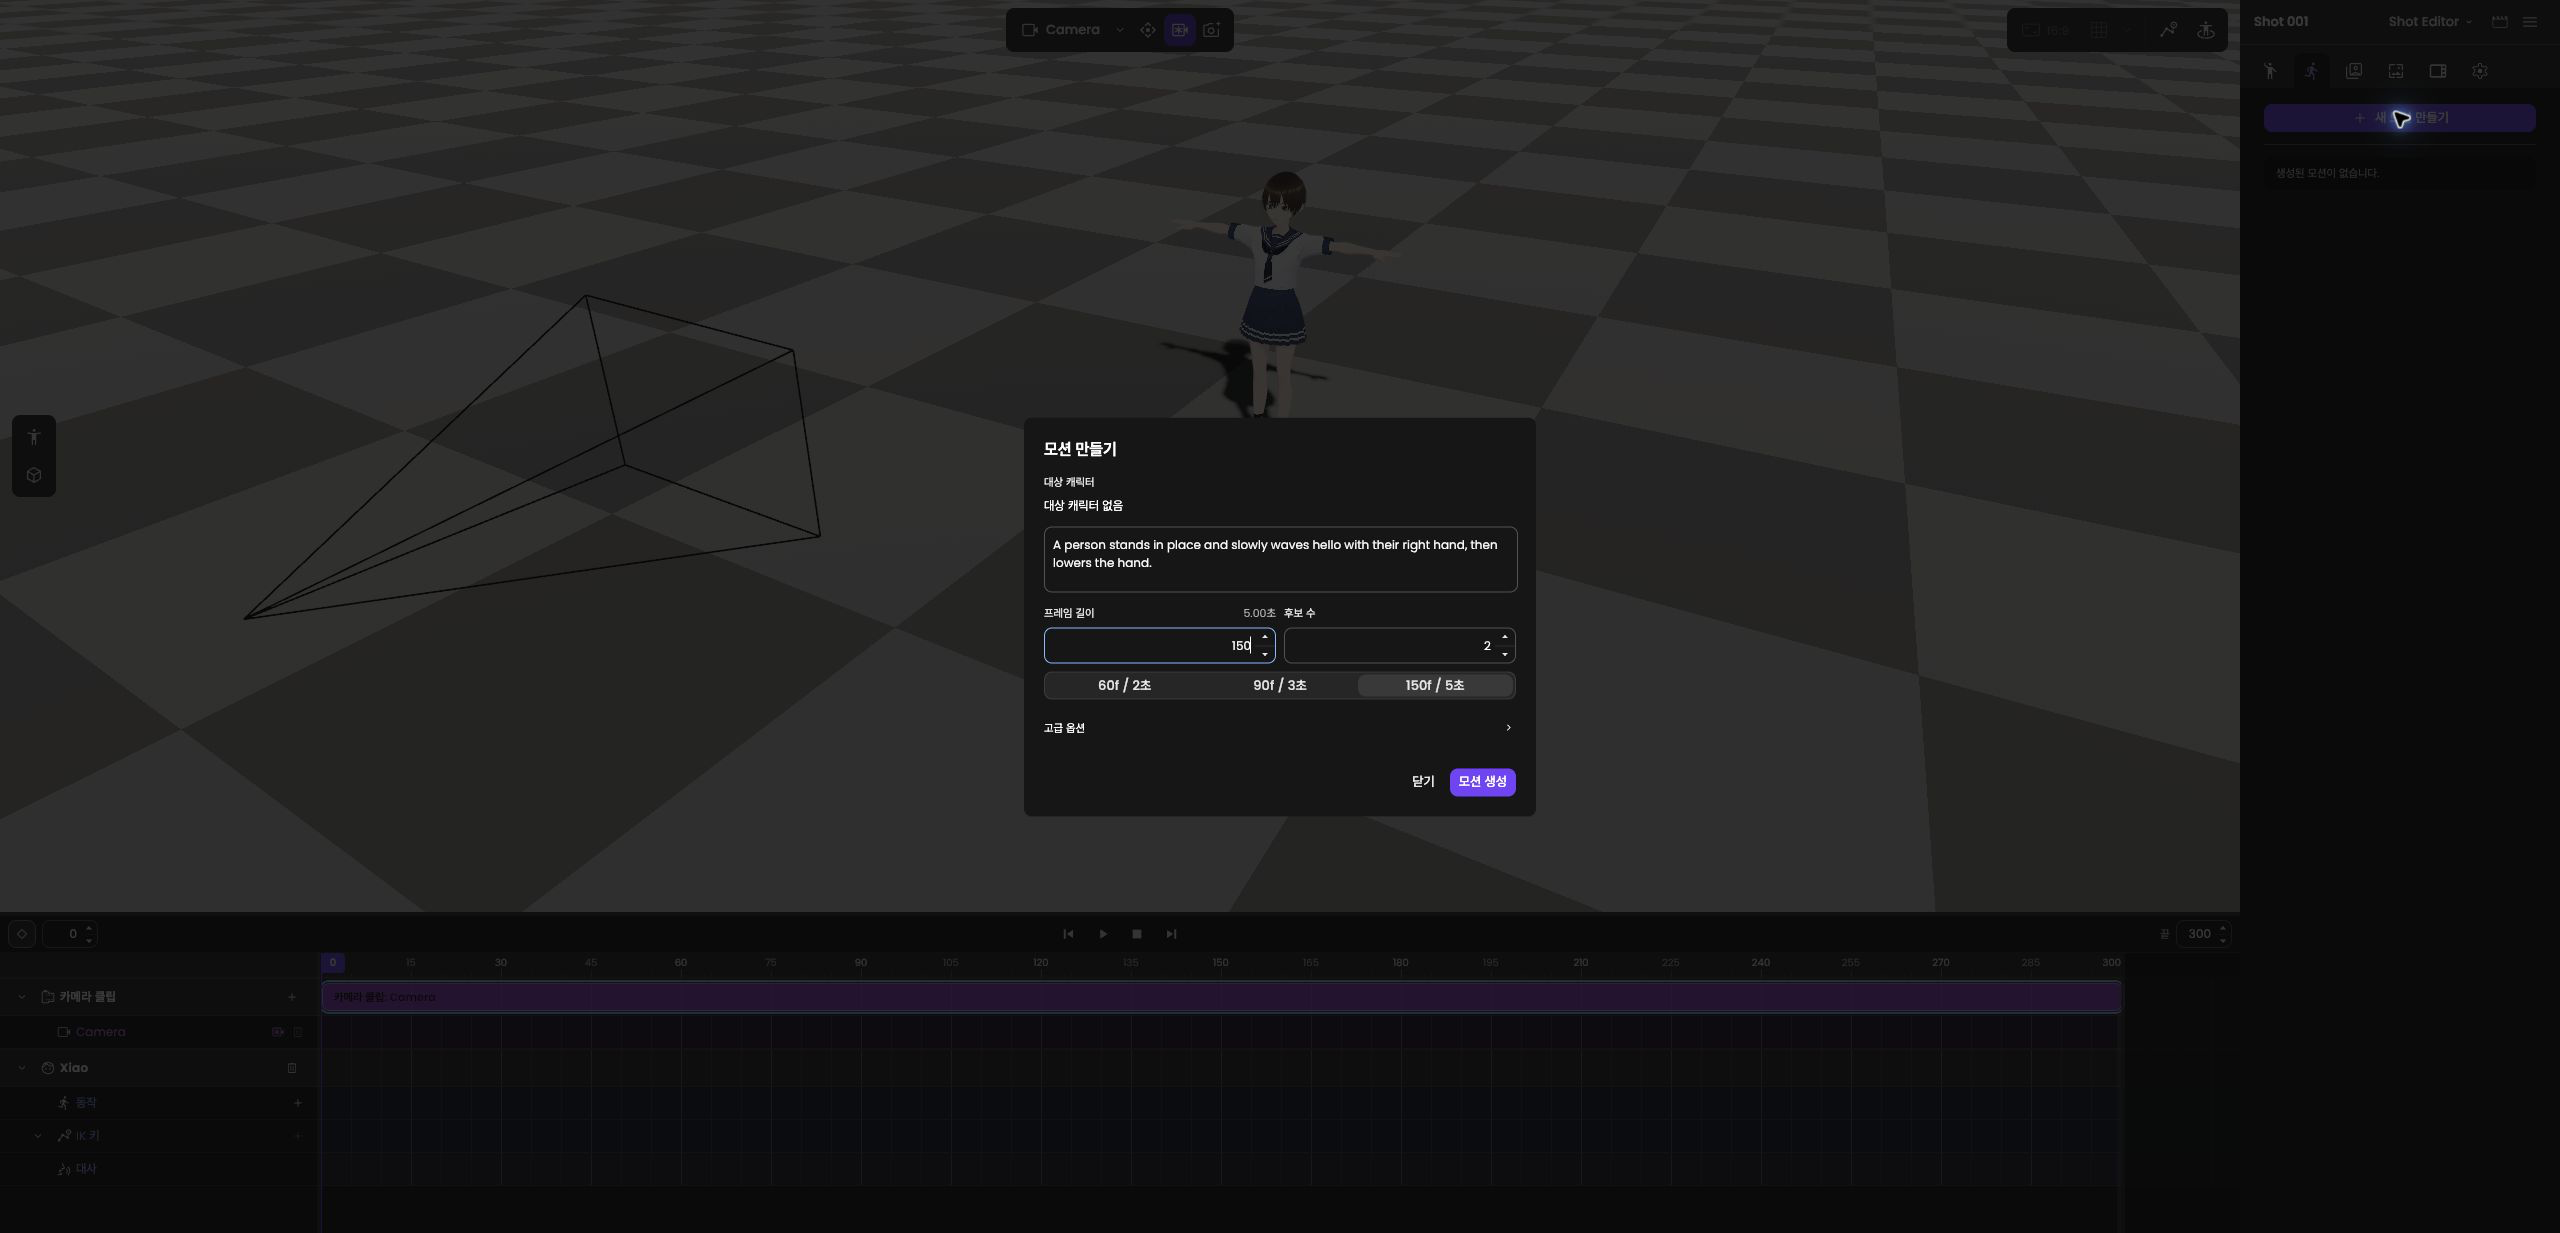
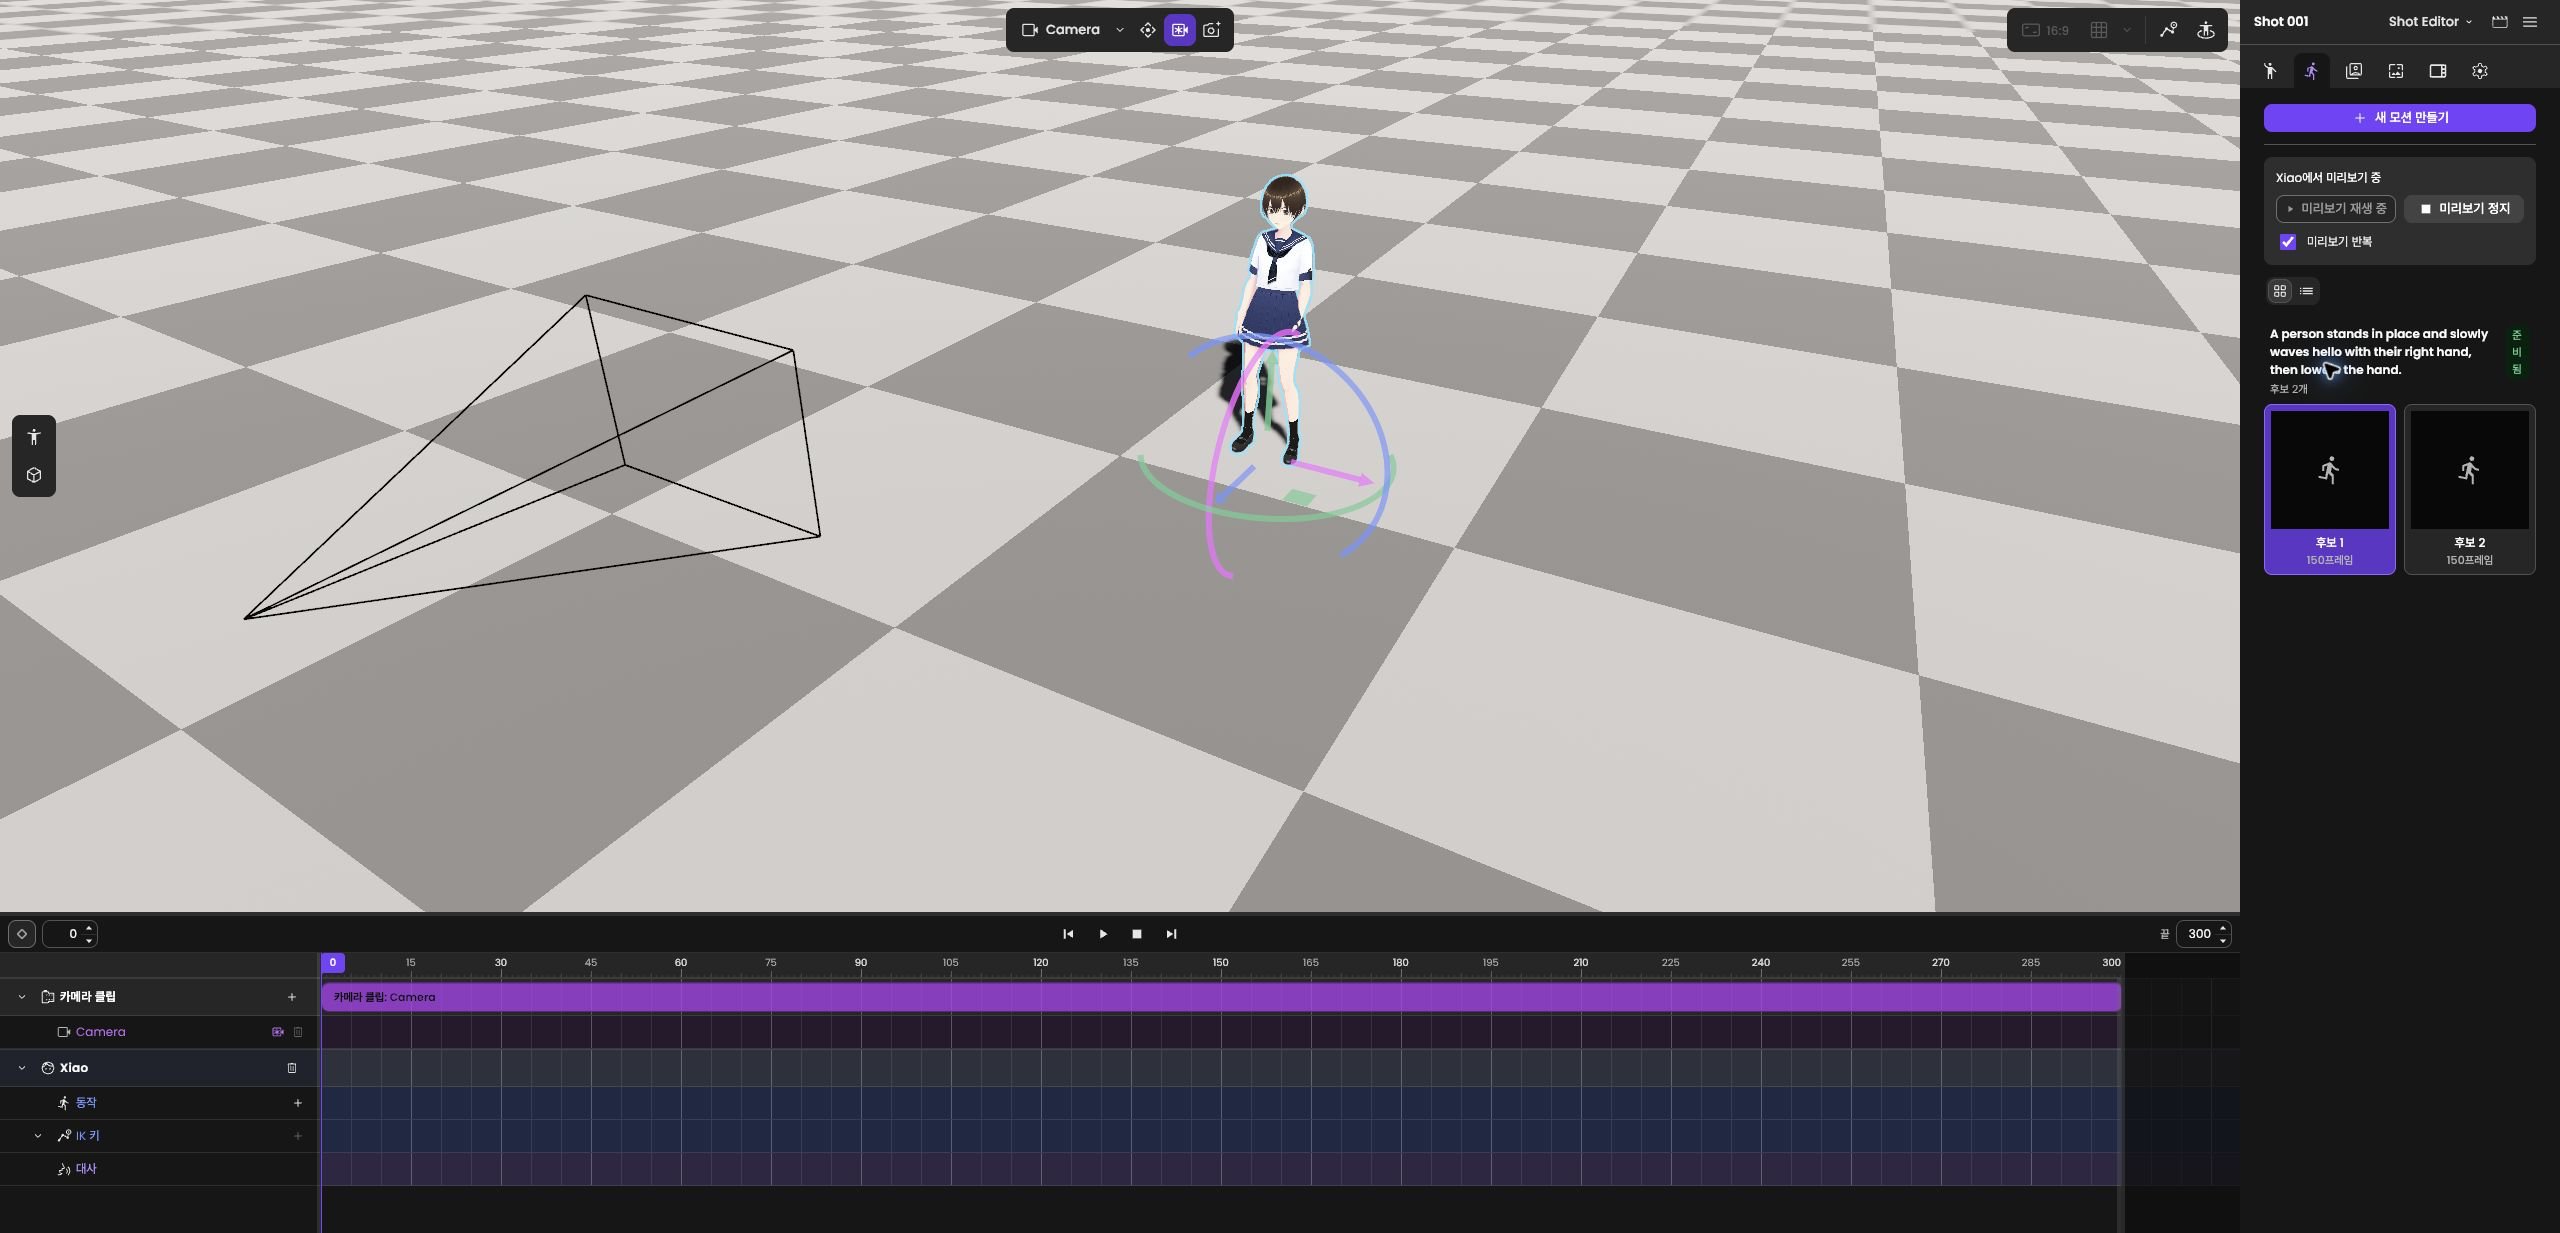
Describe the desired action in a sentence, compare generated candidates, and apply one to the character's timeline.
1. Generate an action — In the Motion tab, open Create New Motion and enter the action description and settings. Example: Slowly wave your right hand while standing in place.
2. Compare candidates — Select a generated candidate to preview it on the character. Use Play Preview to review it again if needed.
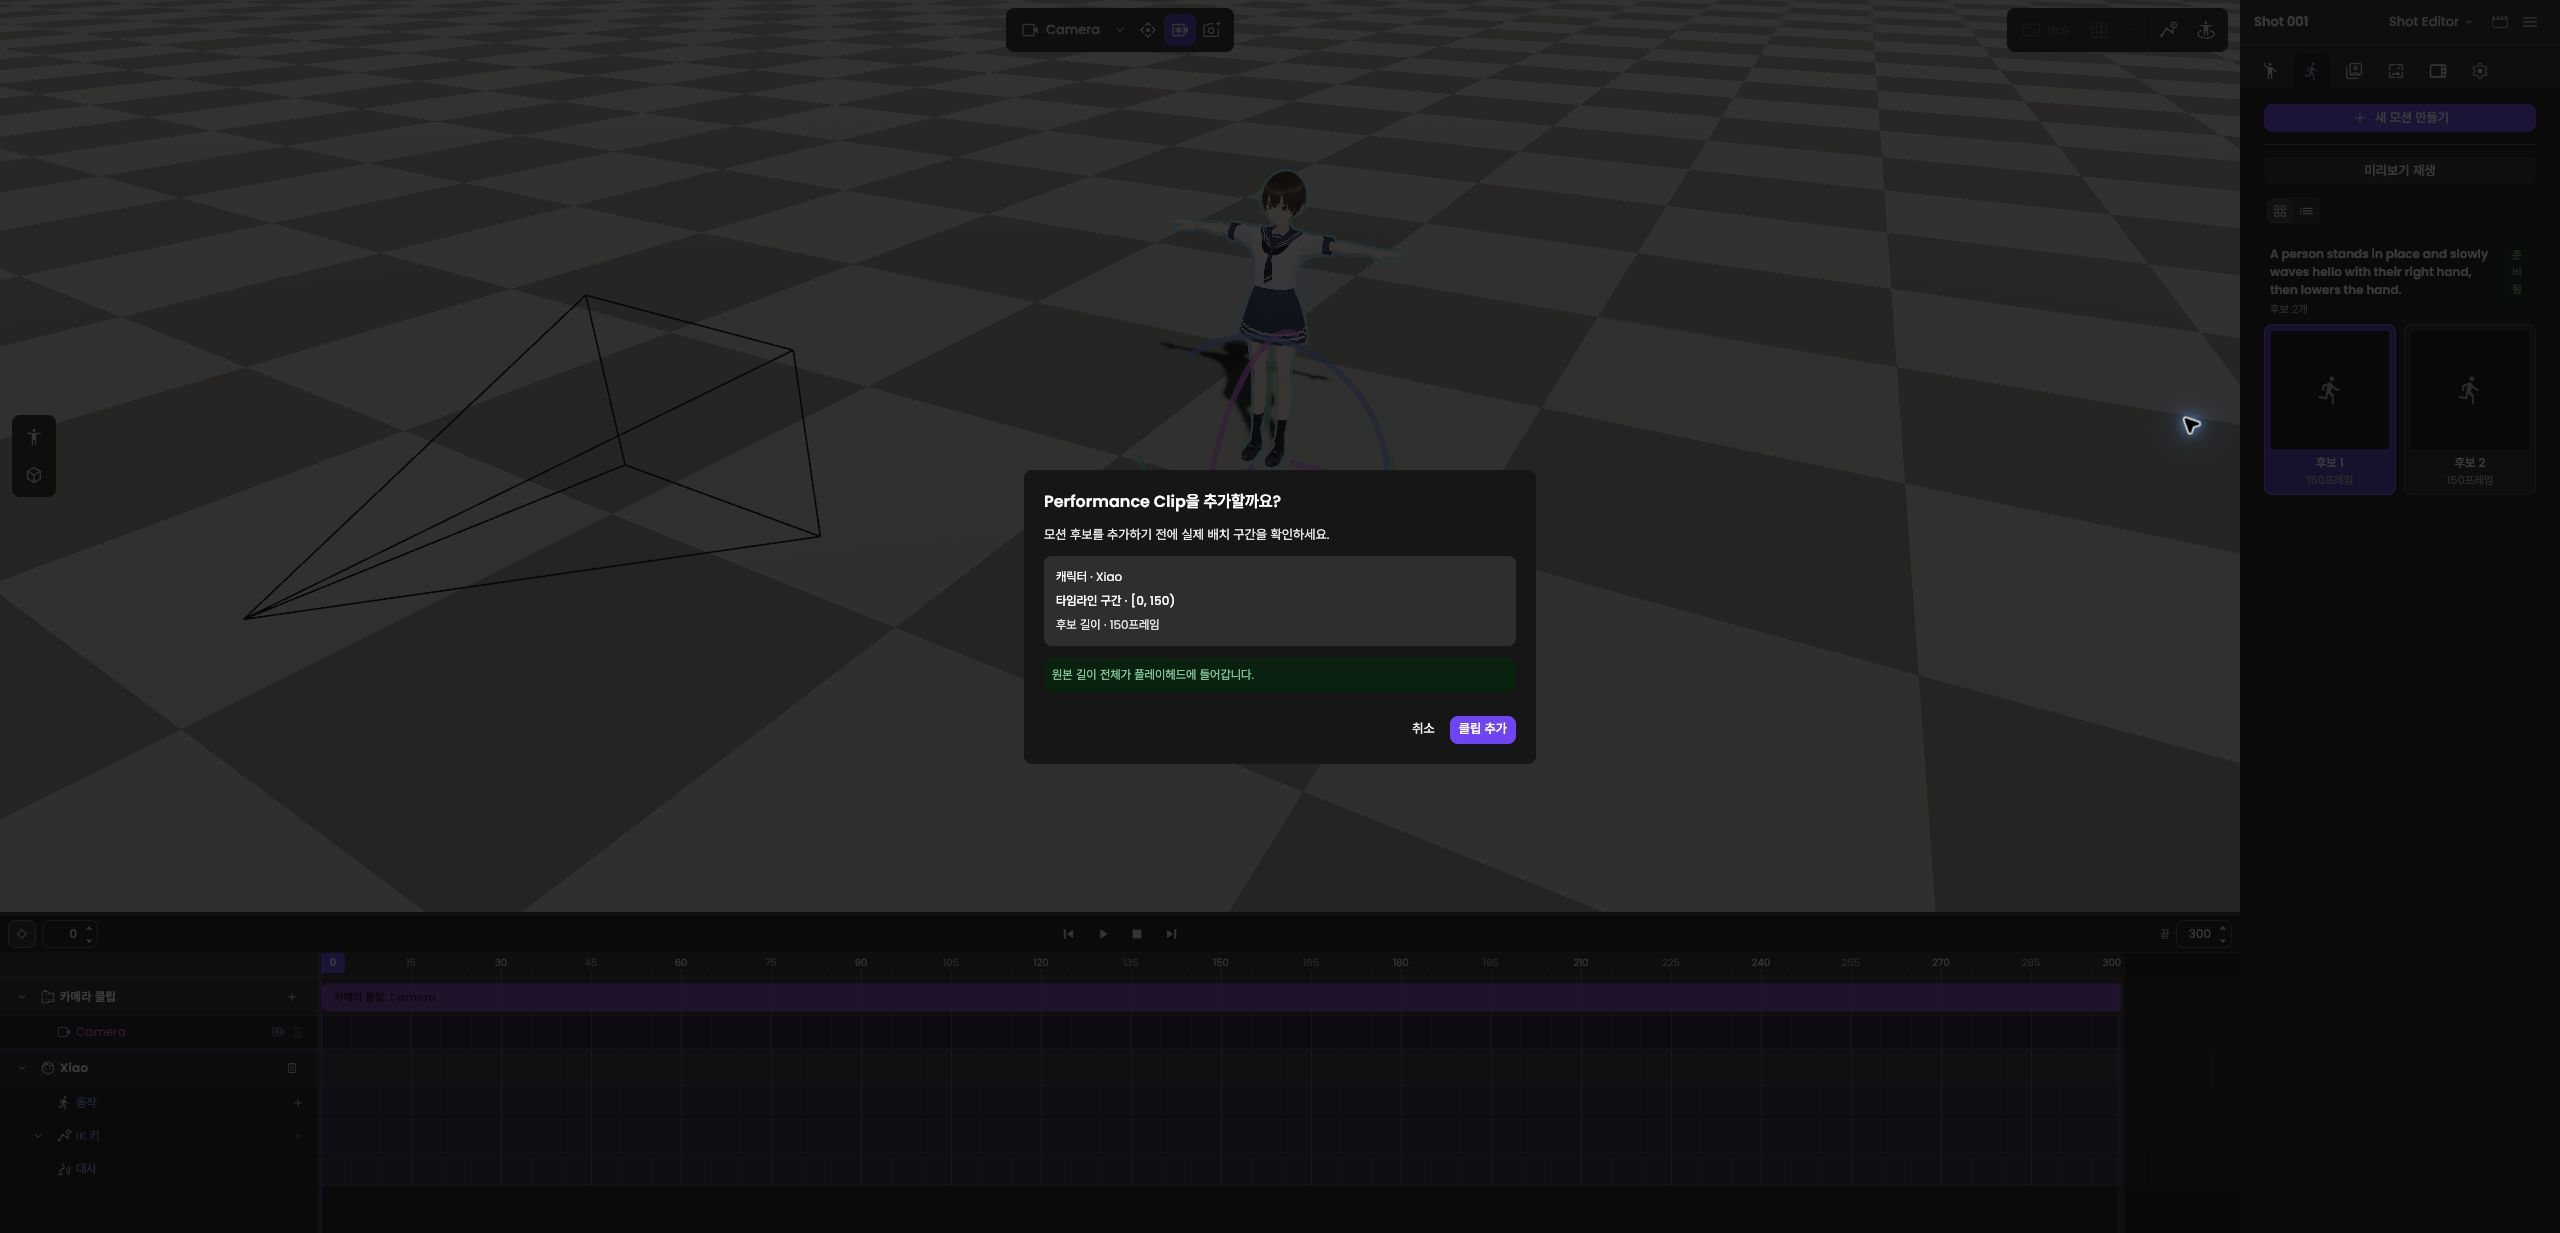
3. Apply to the timeline — Run Add Performance Clip on the candidate. A Performance Clip is an action clip applied to a character's timeline. Confirm the target character and application range, then click Add Clip button.
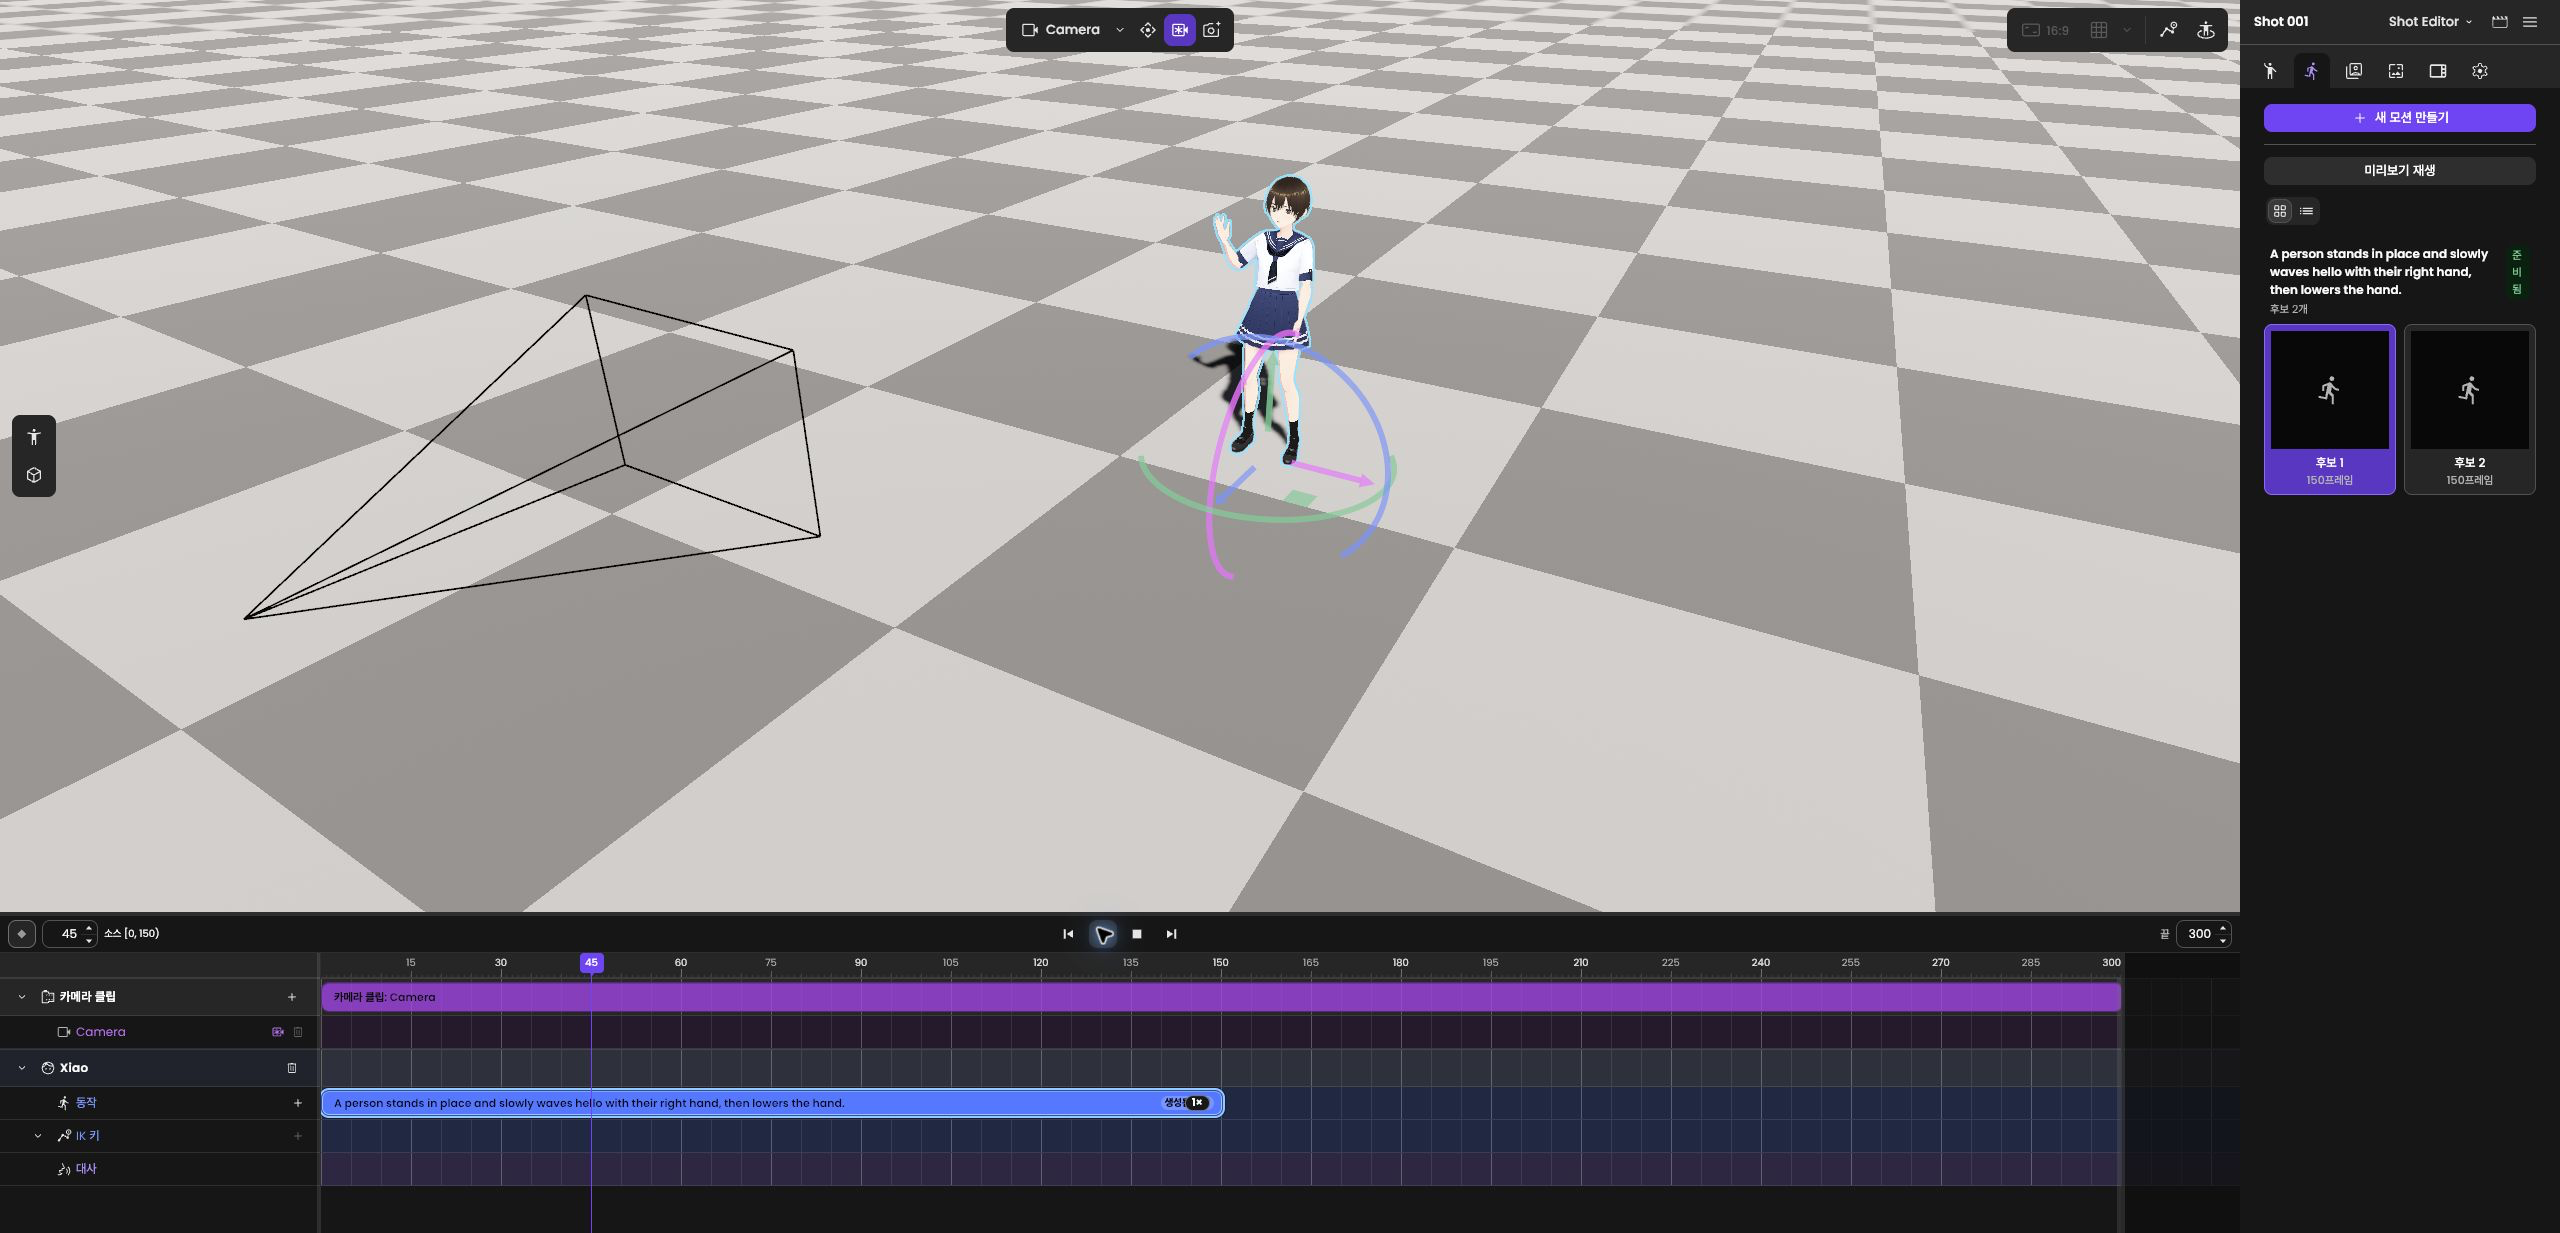
4. Play the applied result — Exit the candidate preview and play the actual timeline clip. Confirm that the selected character performs the desired action during the specified interval.
Candidate previews, clip application, and poses
The Shot must contain a character, and motion generation must be available.
Generating and previewing a candidate alone does not add it to the timeline. You must specify a target character and interval, then add the clip.
To apply a pose, open the Pose tab, select a candidate, and specify the target character.
4.4 Direct the camera
Place camera keys to change the composition over time and play the scene to review the movement. A camera key stores the camera composition at a particular frame.
1. Select a camera and composition — Select the camera to edit and compose the shot in pilot view. Pilot view lets you edit a scene while looking through the selected camera.
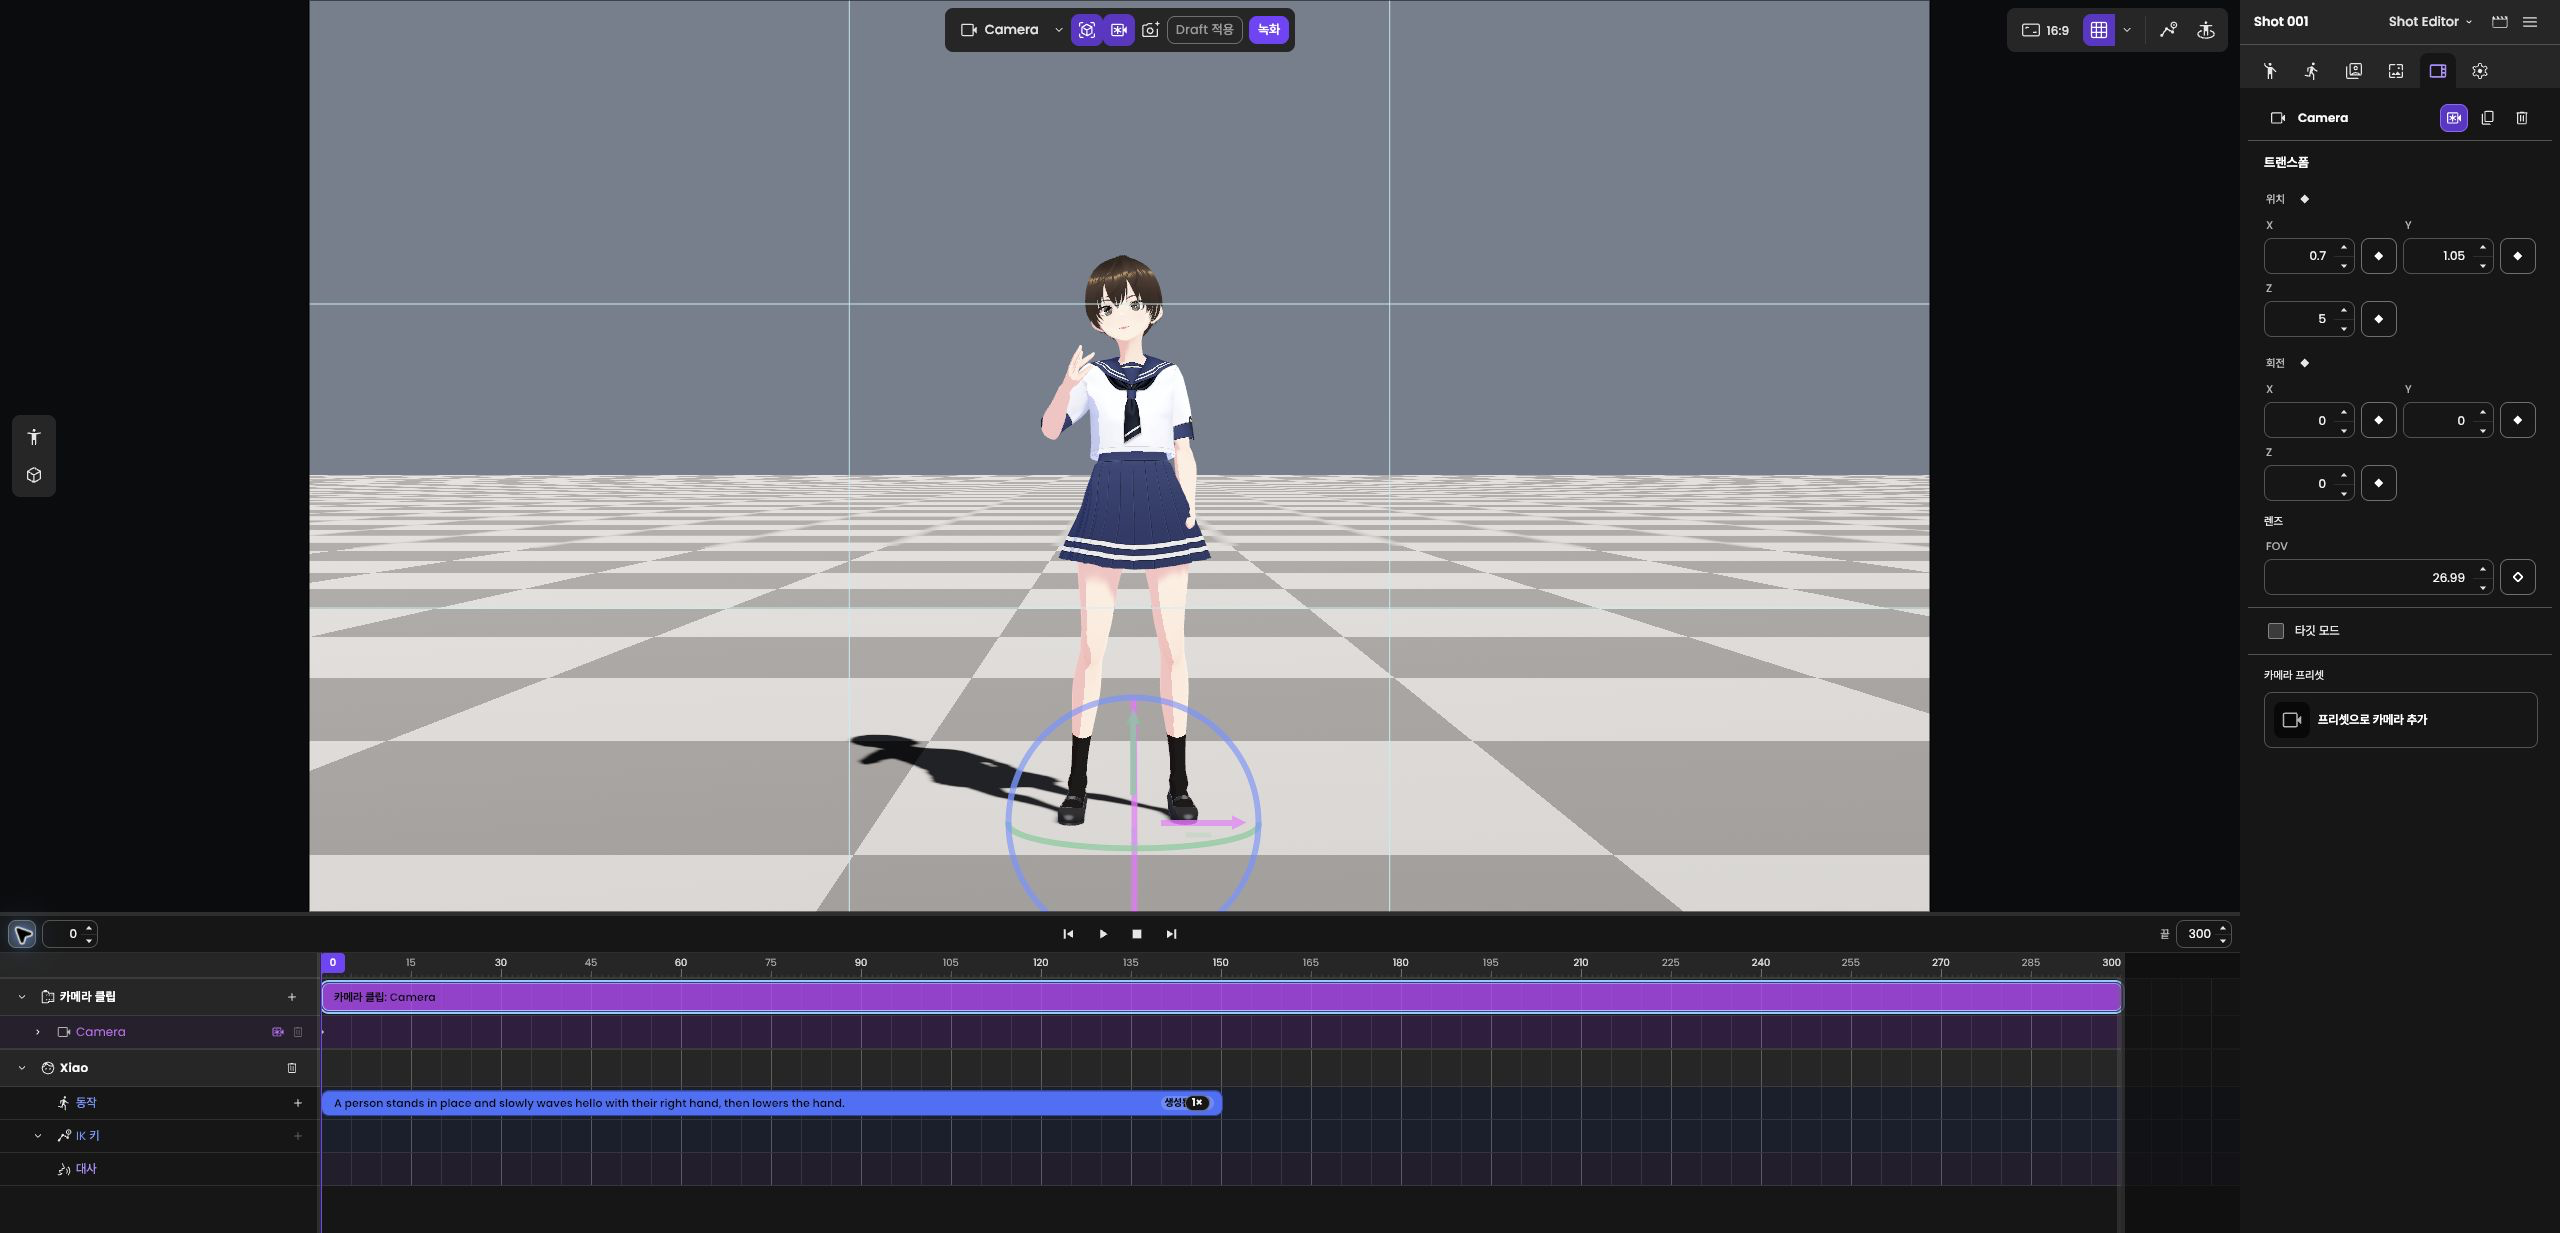
2. Save the starting composition — Go to the starting frame, adjust the composition, and save a camera key. After entering values, you must also execute the key-save action.
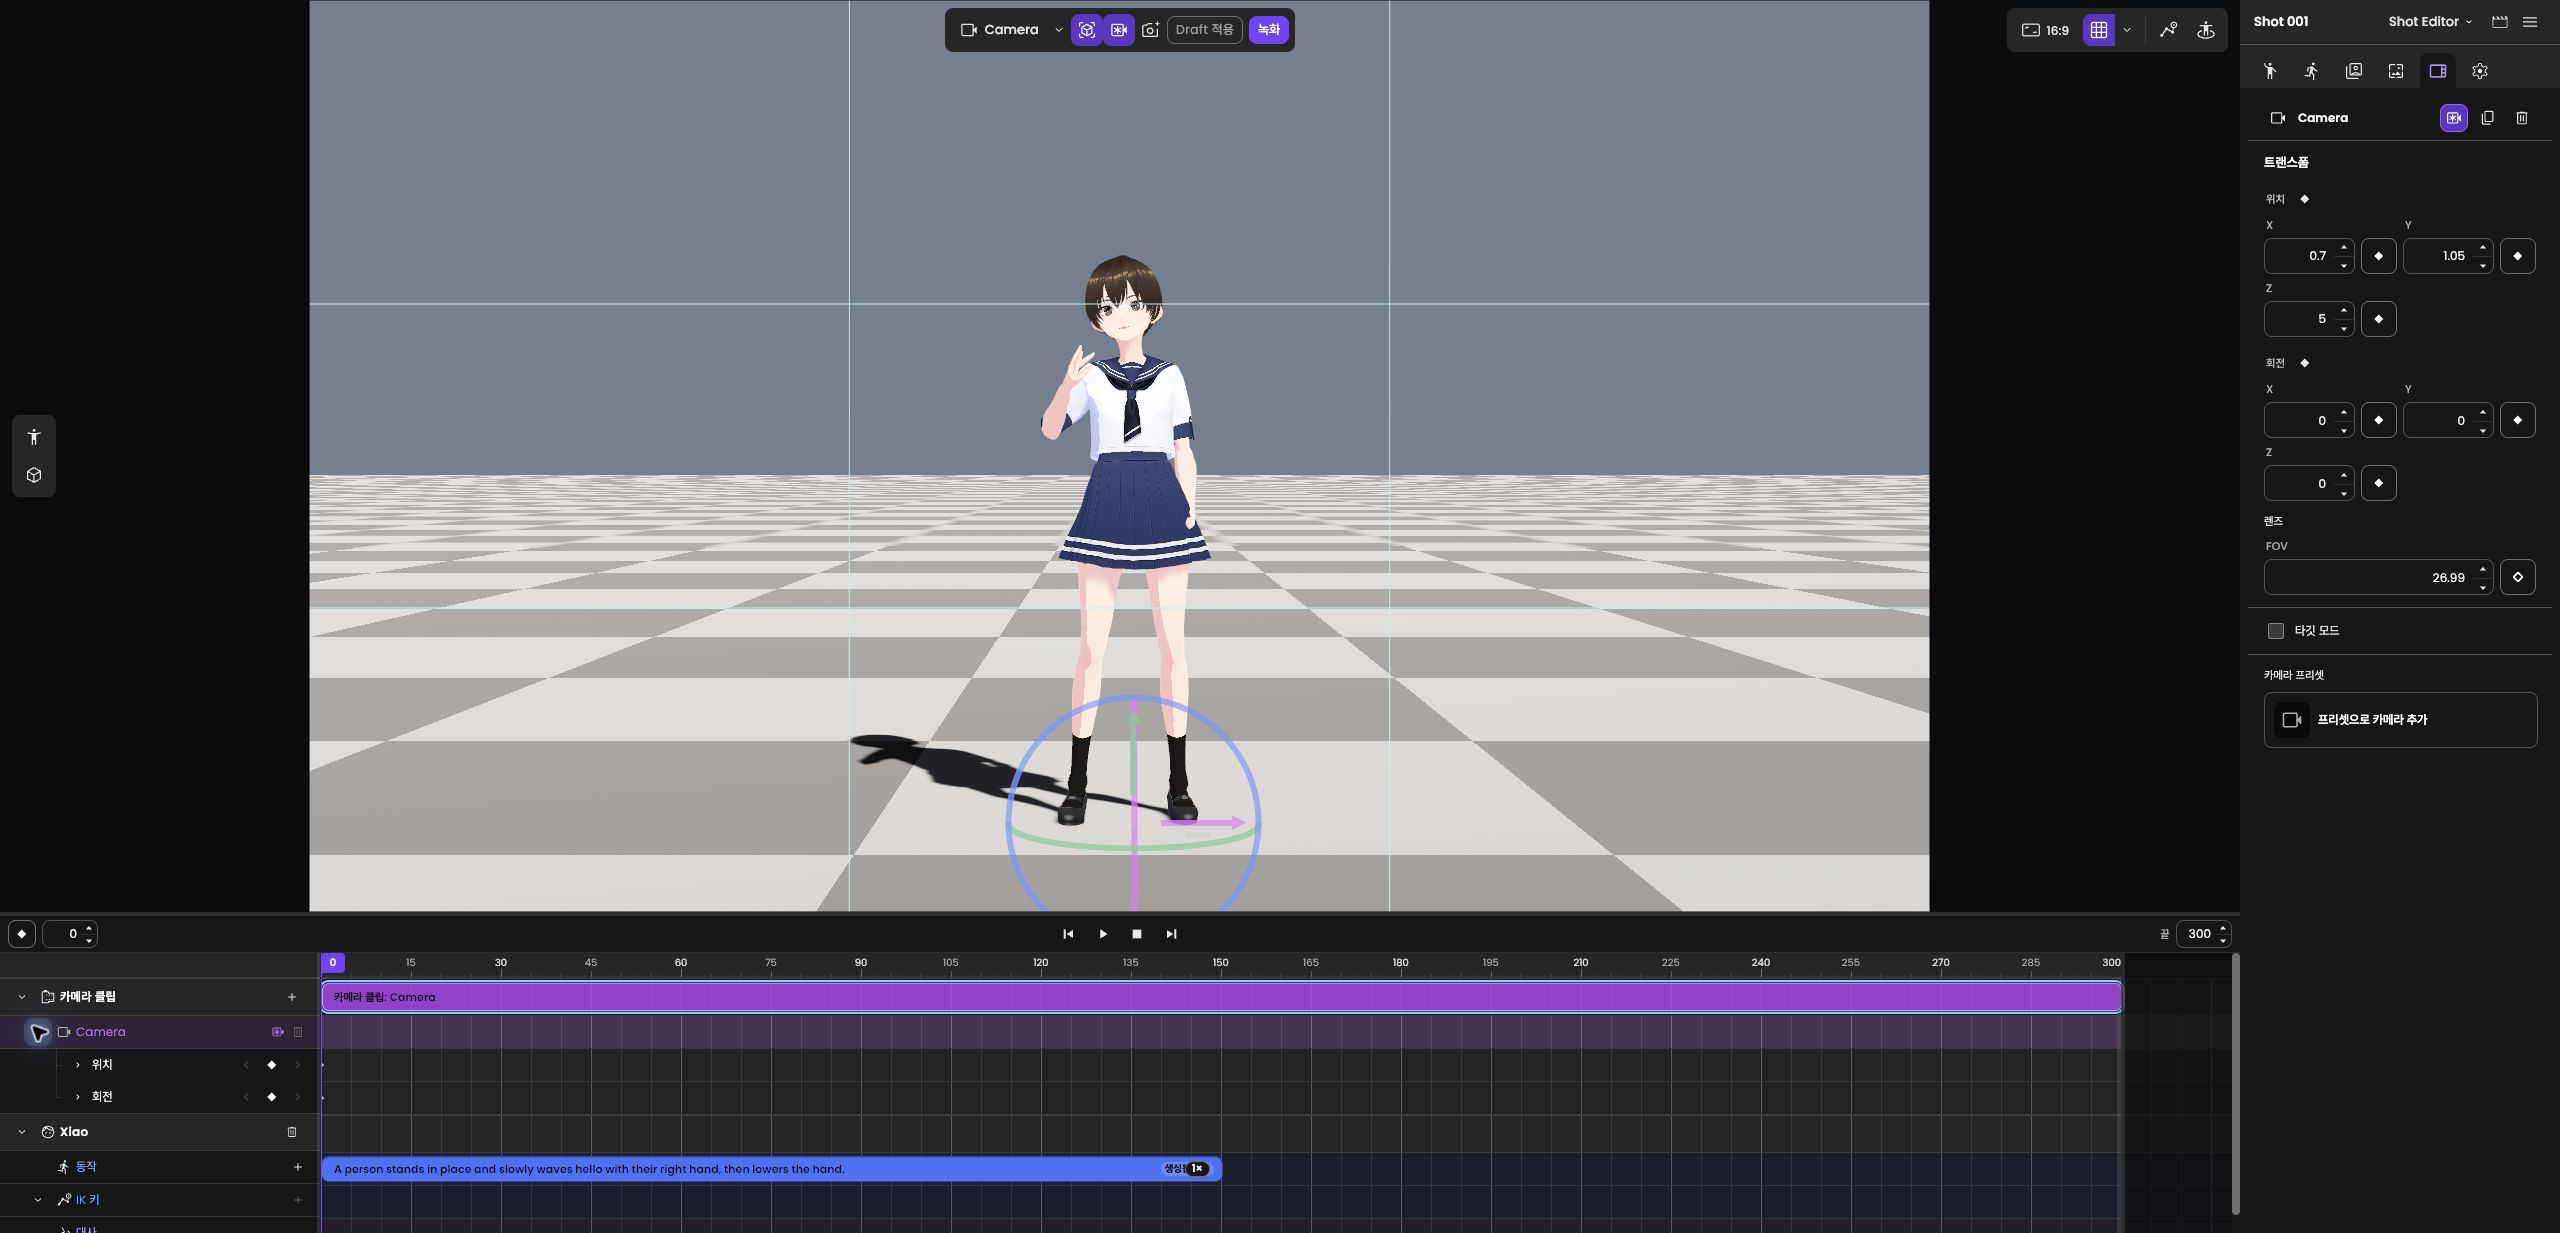
3. Save the next composition — Move to a later frame, enter the position and rotation for the next composition, and save them as a key.
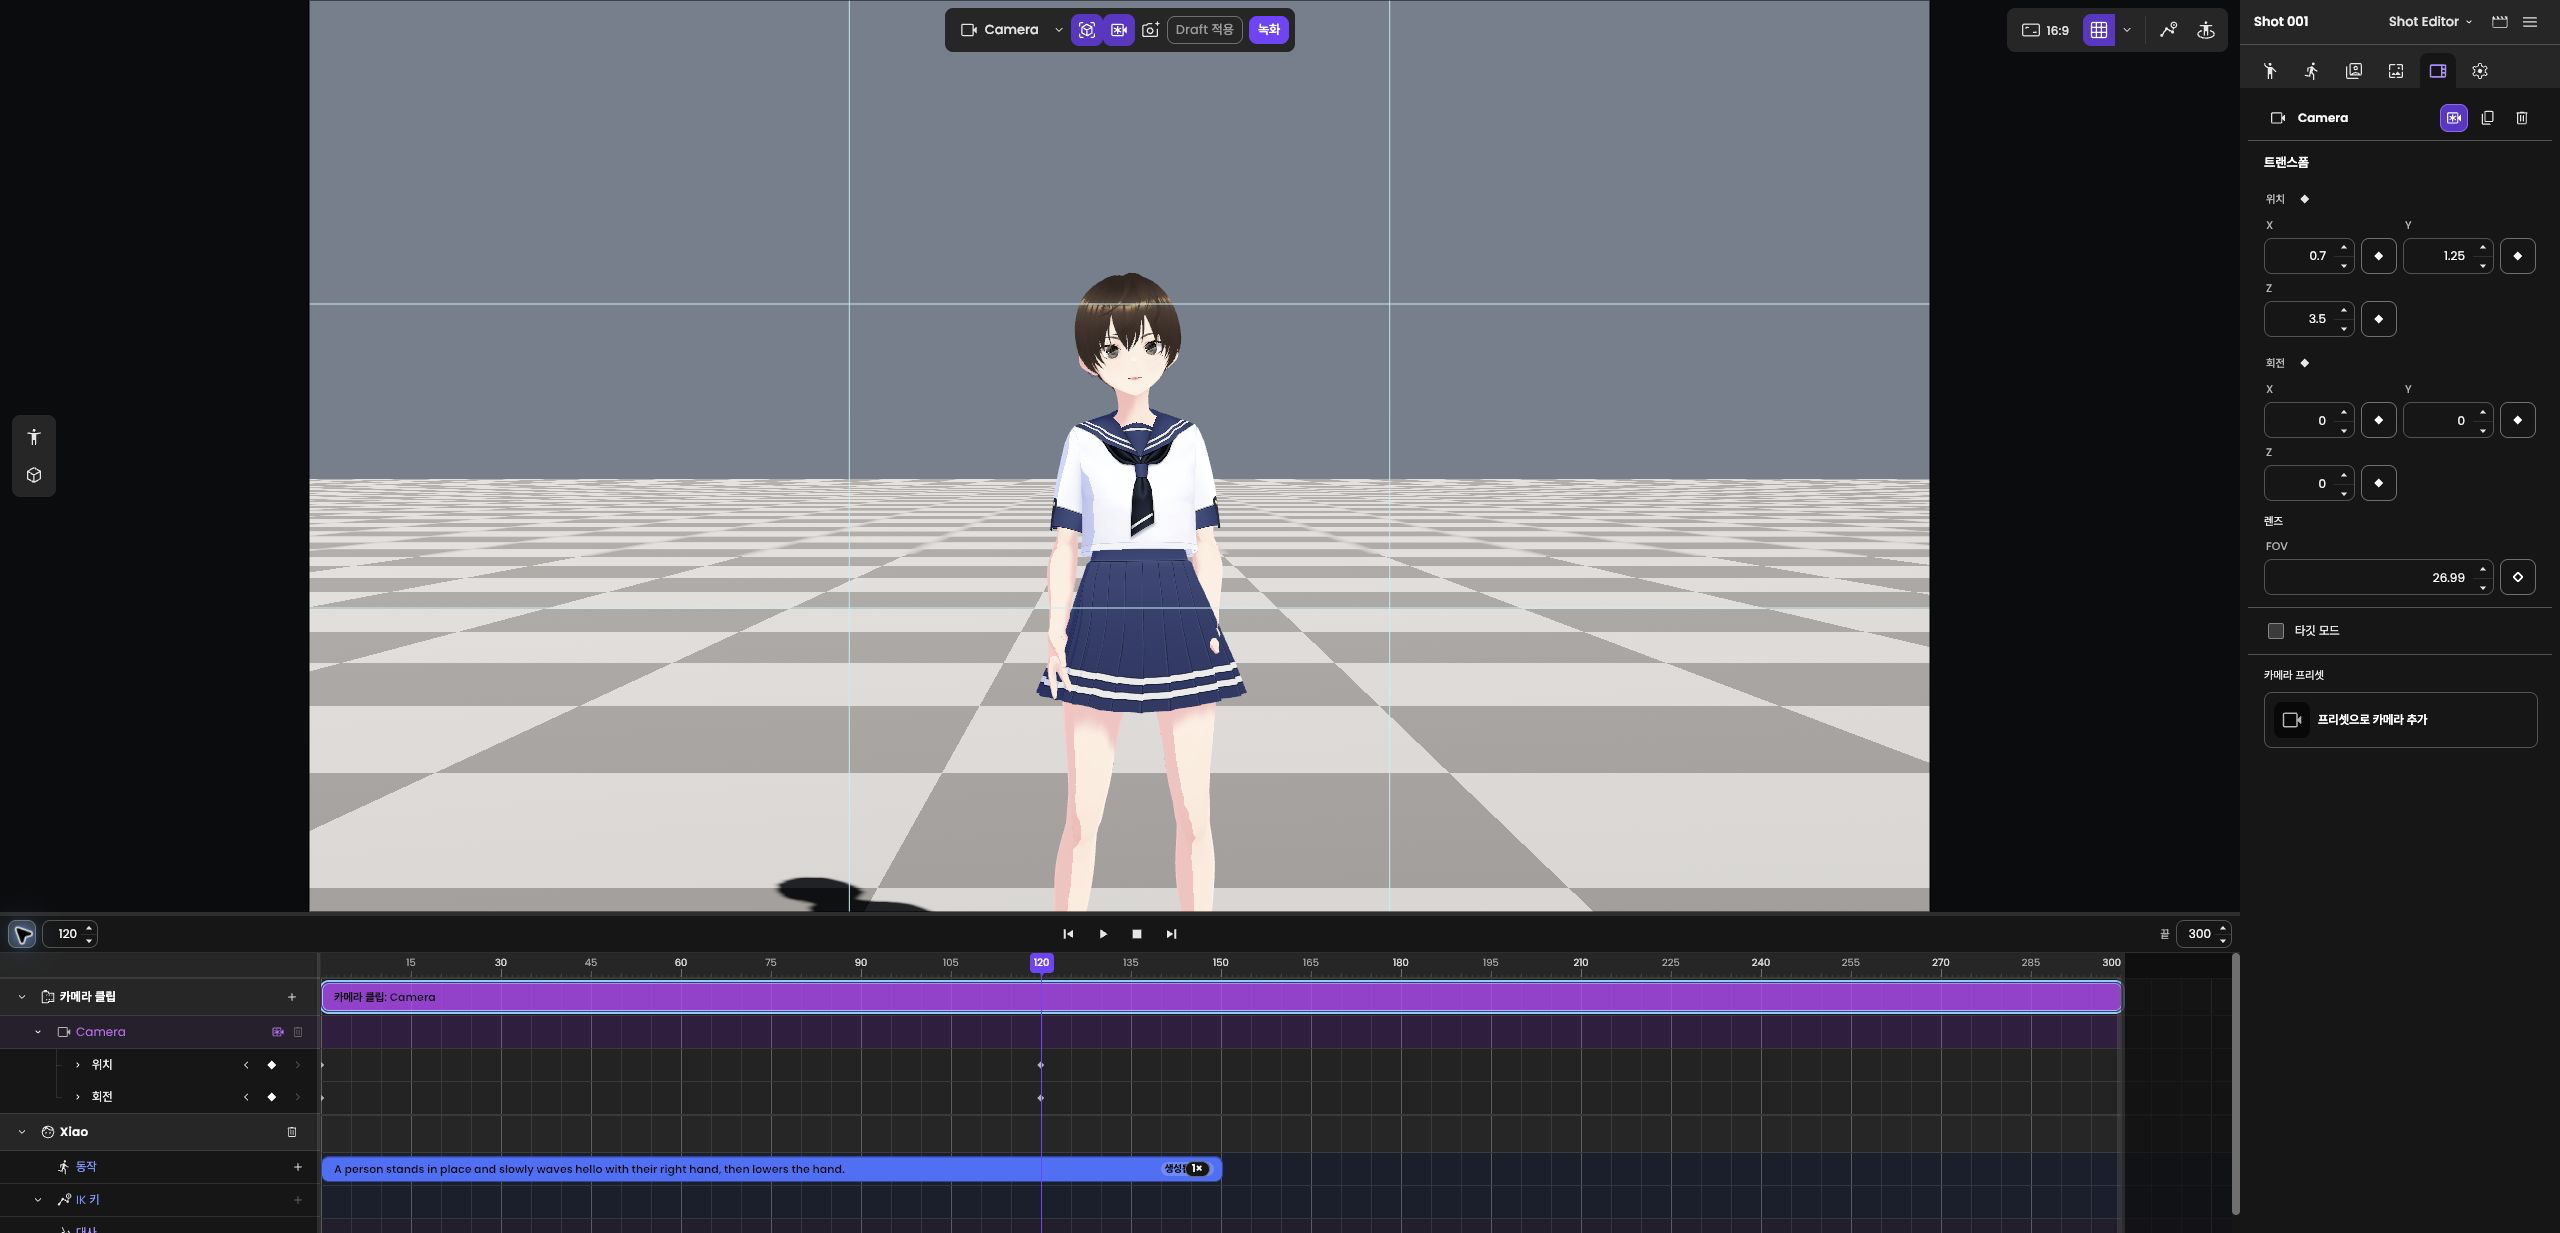
Composition values, FOV, and multiple cameras
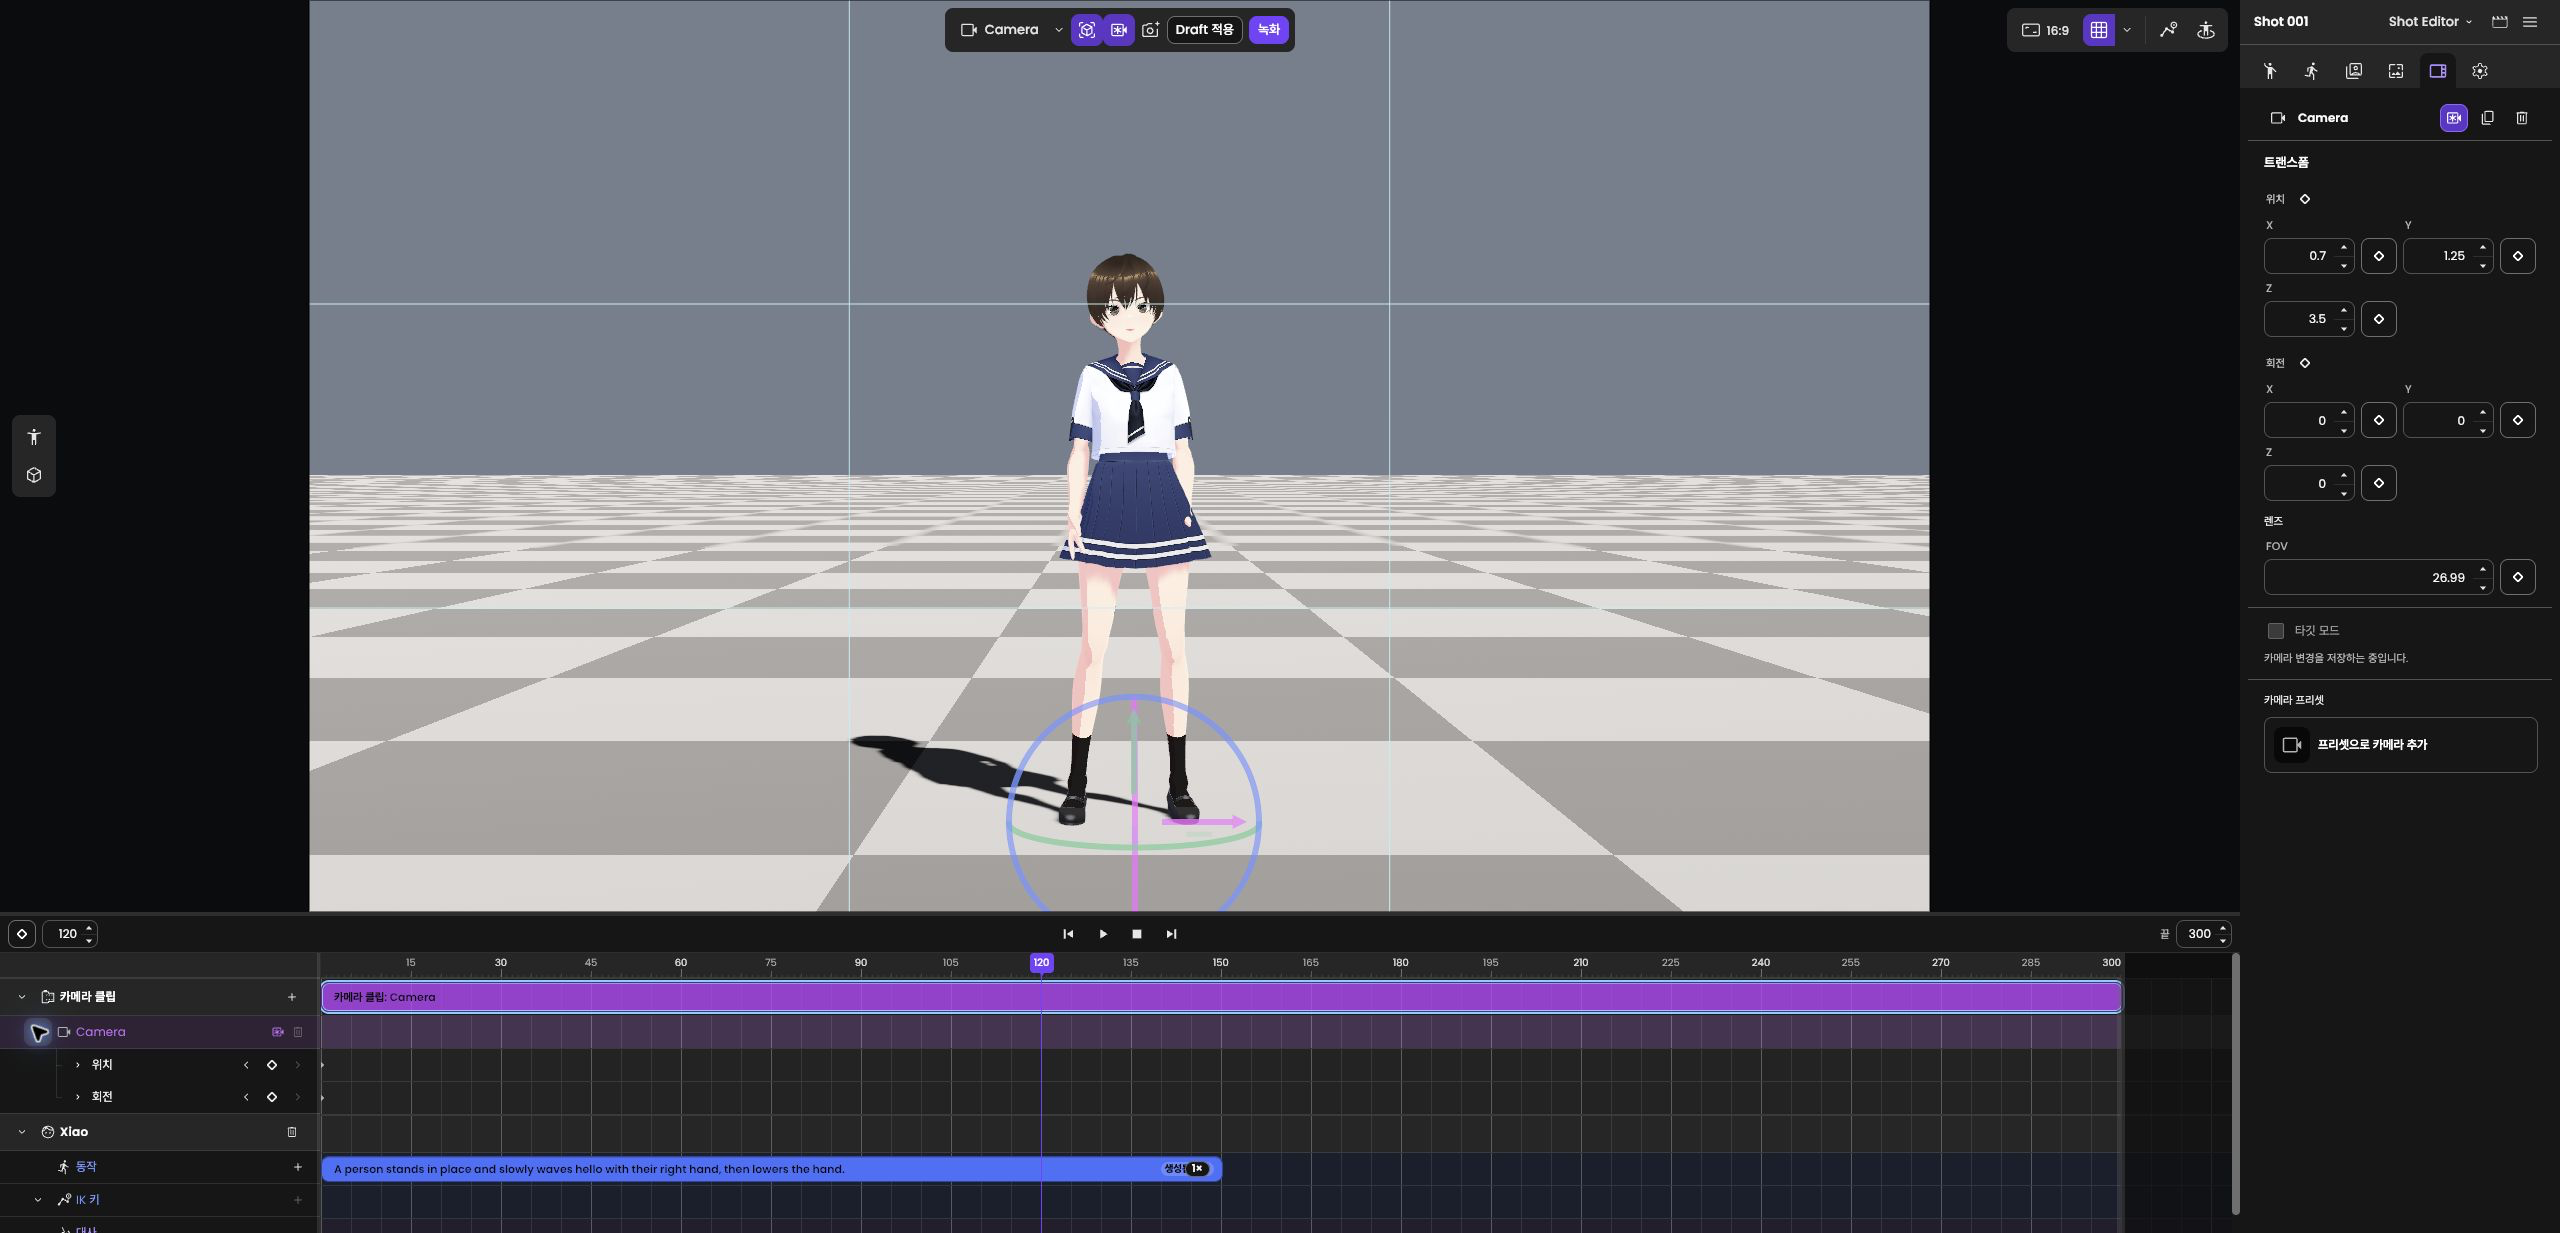
Enter position and rotation values in Properties, then save a key. If you saved position and rotation keys together, save any changed FOV separately.
If there is no camera, add one first. With multiple cameras, also specify the main camera to use for the current interval.
4. Check the movement — Play between the two keys in the timeline camera preview. Confirm that the camera keys appear at different frames and that the composition changes as intended.
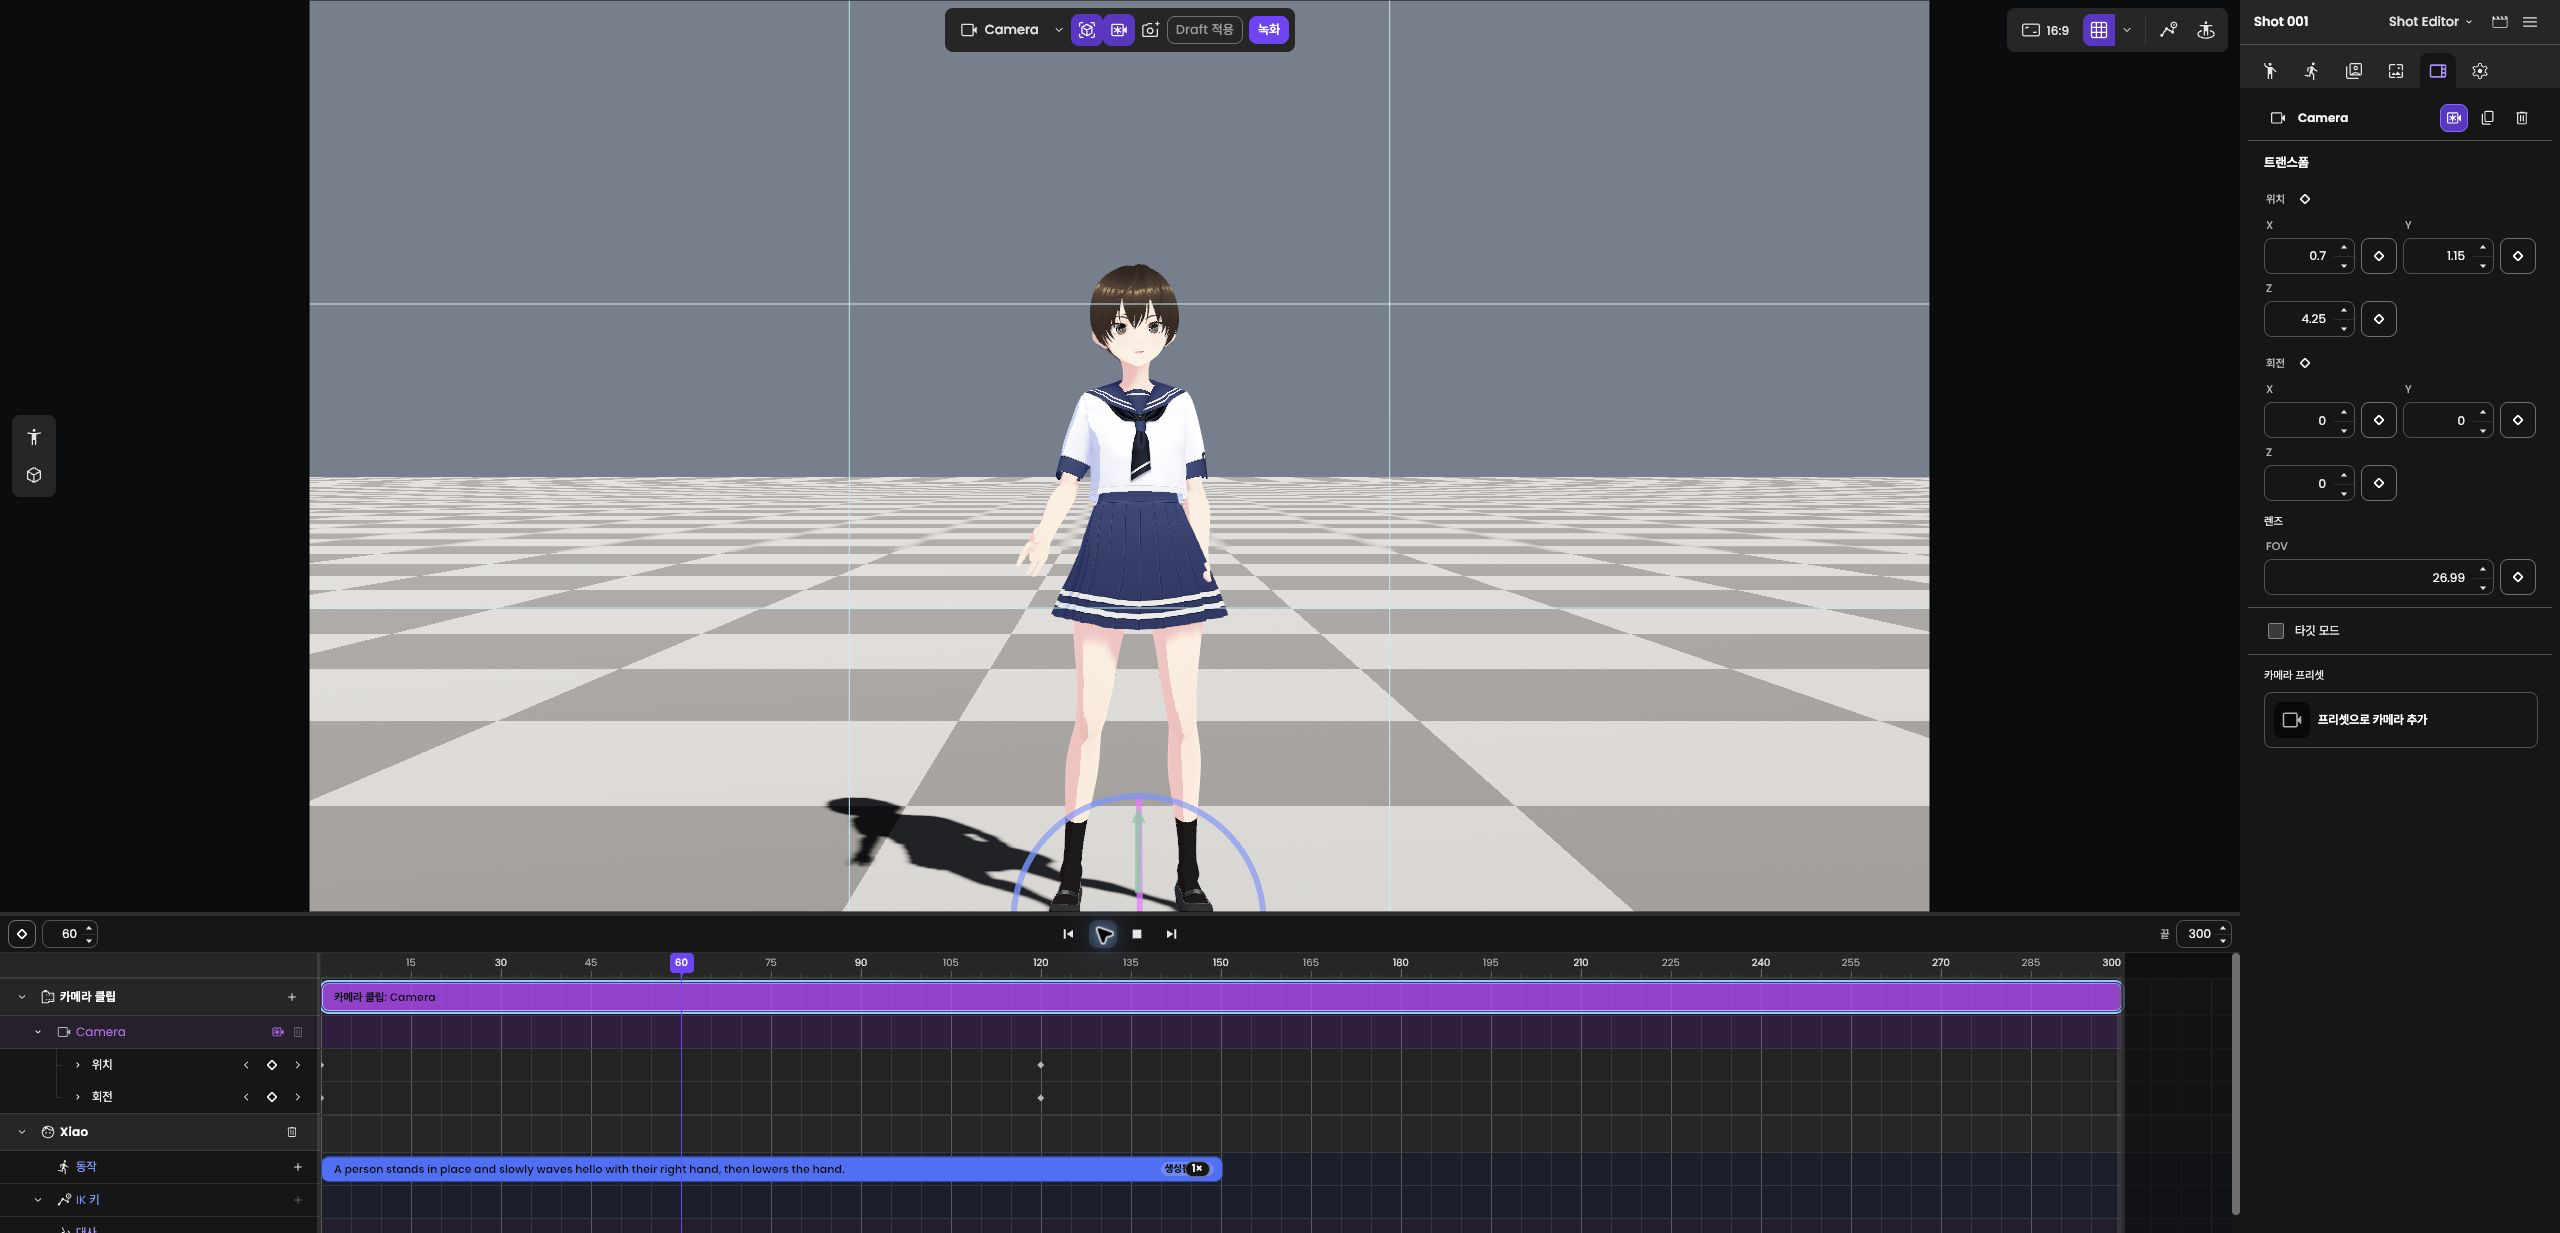
Refine camera movement
Stop playback and go to the frame you want to edit. Adjust its values, save the key again, and play the surrounding interval to check the movement.
4.5 Save and resume your work
Save your edits and keep them in a bundle file that can be reopened for further work.
1. Save your work — File → Save and confirm the Saved status.
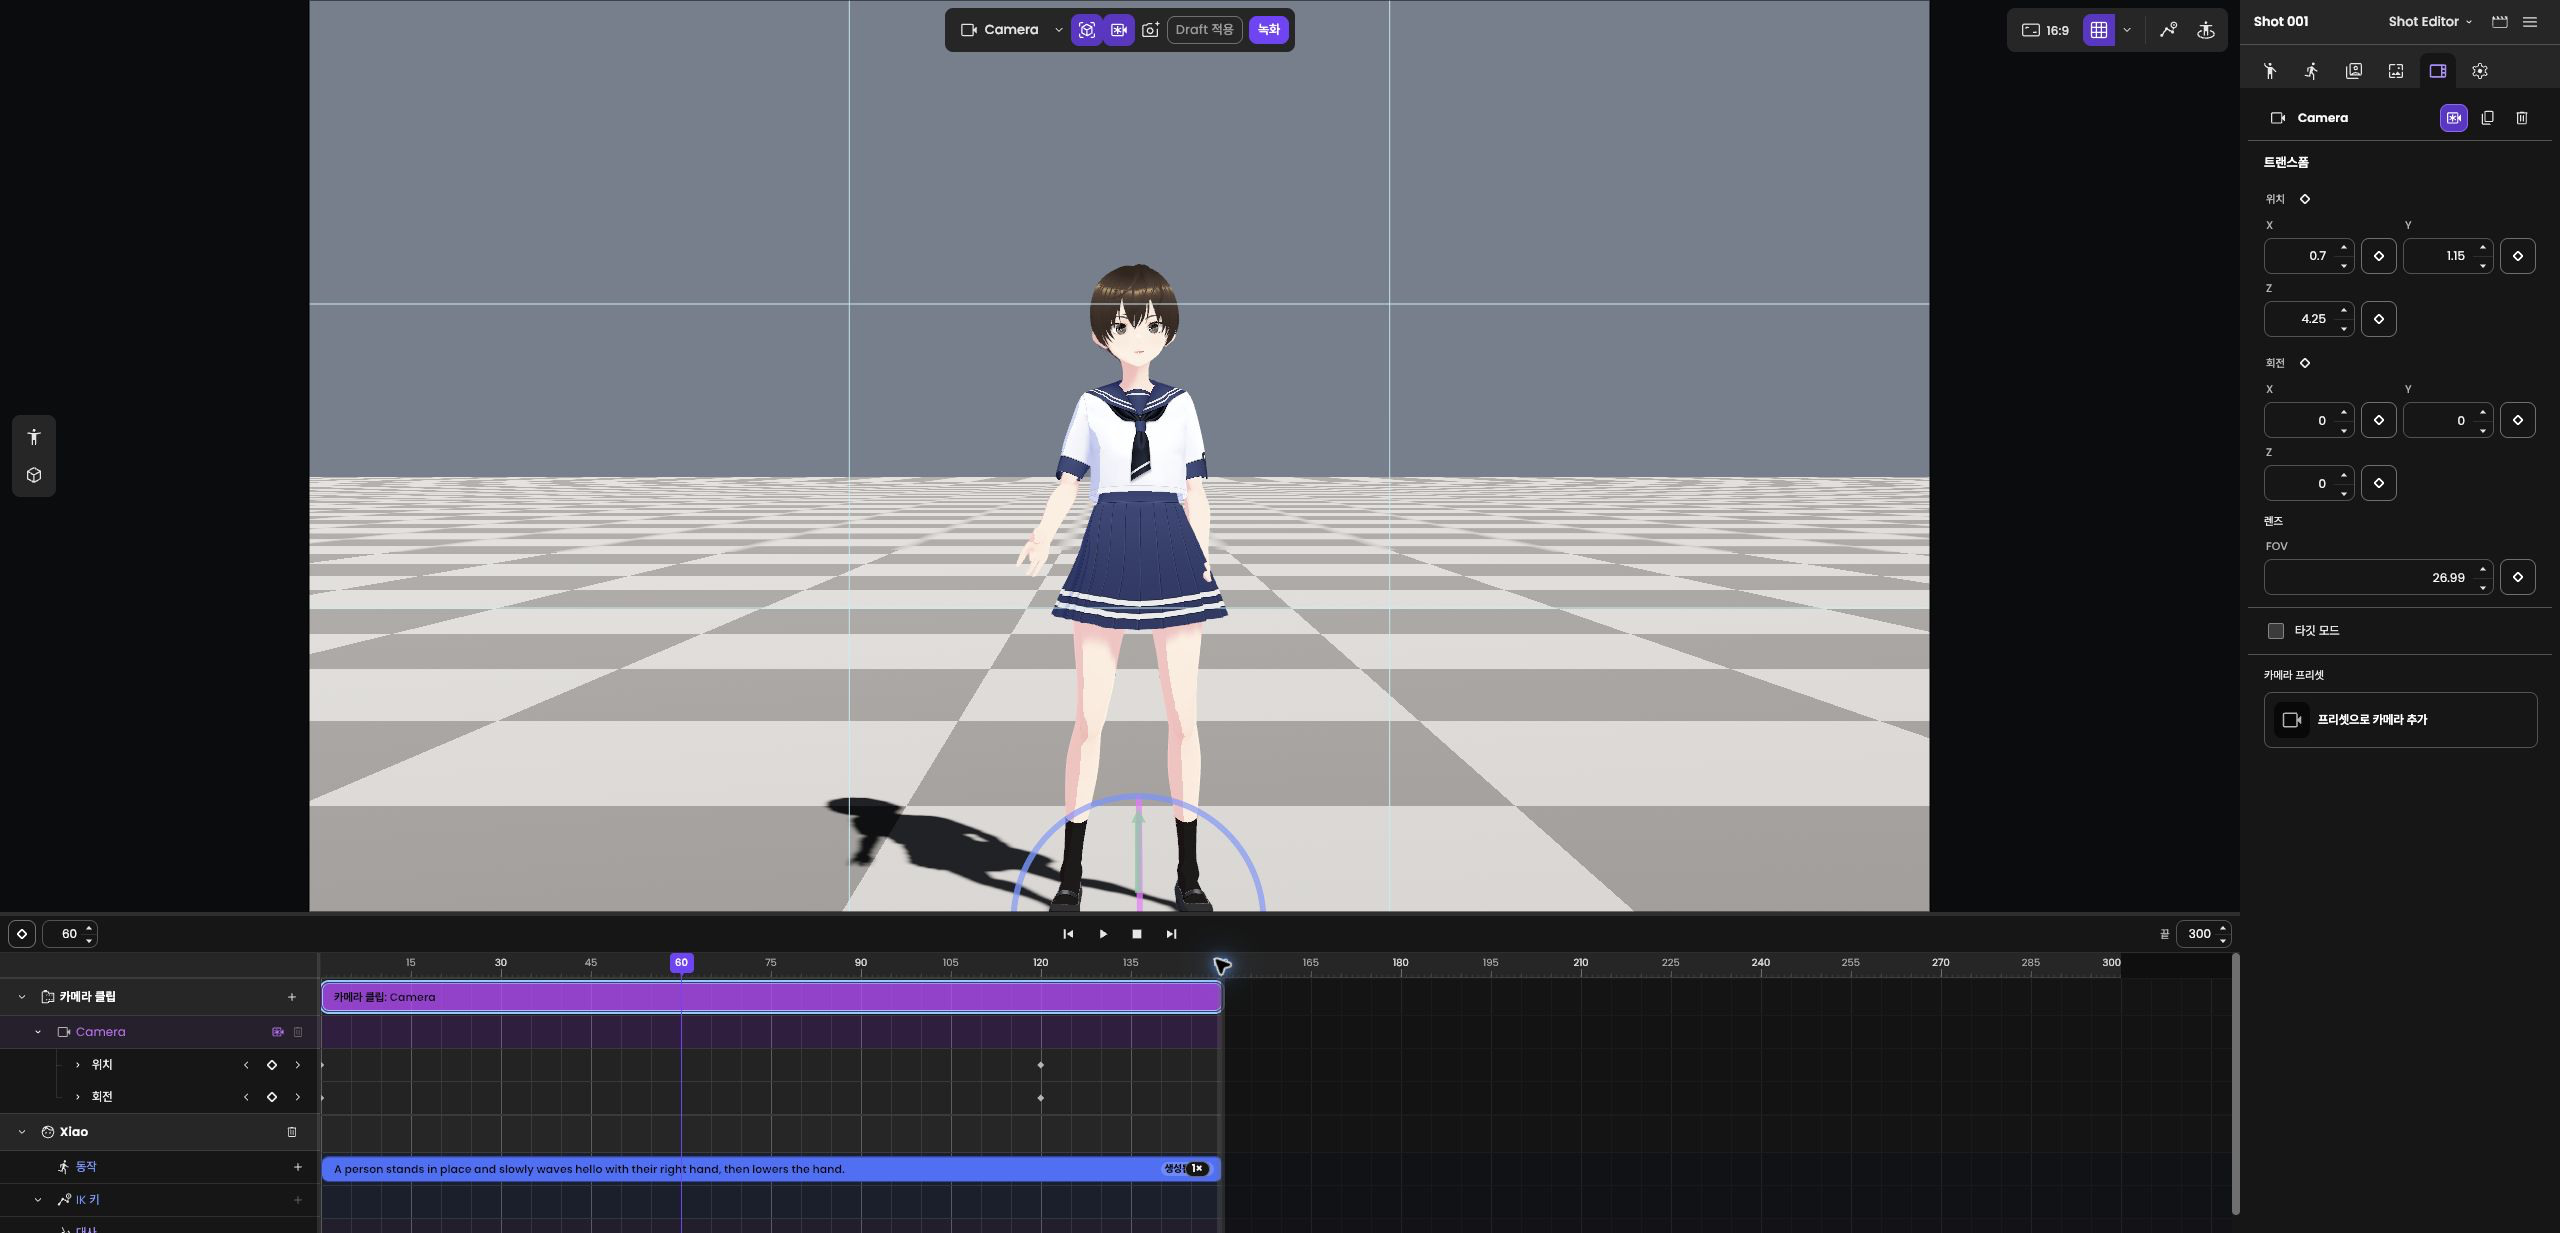
2. Keep an editable bundle — File → Export to download an editable .shotloom.zip bundle.
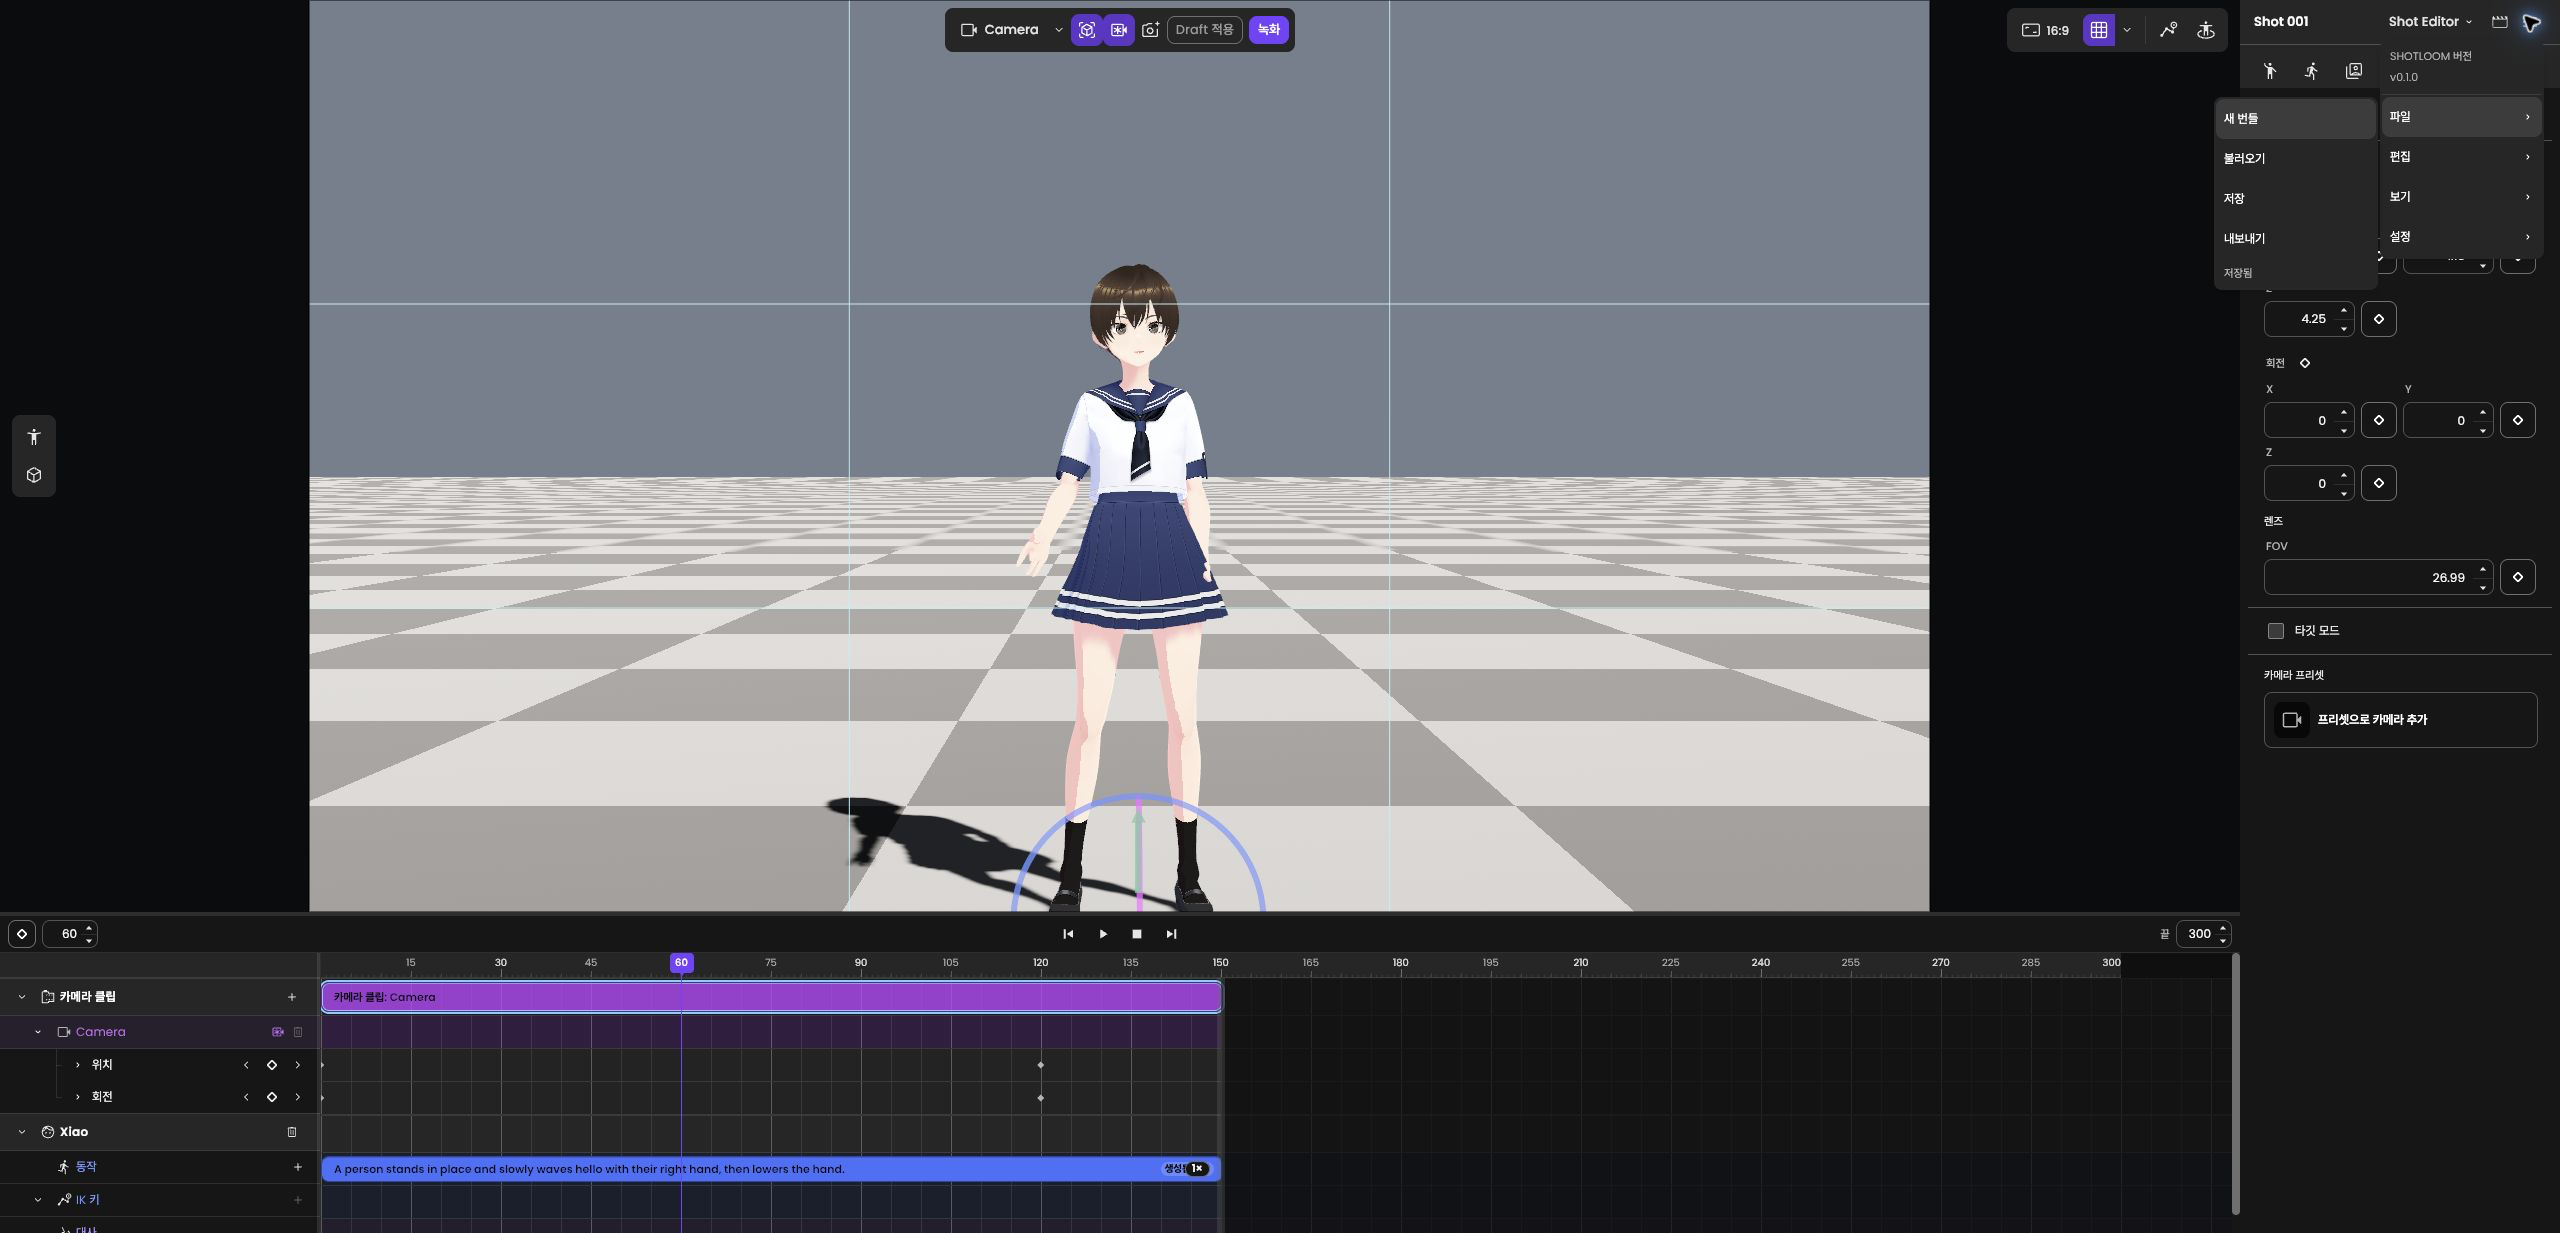
3. Reopen your work — File → Import to reopen the saved bundle. Check that characters, clips, and camera keys are preserved, then continue editing.
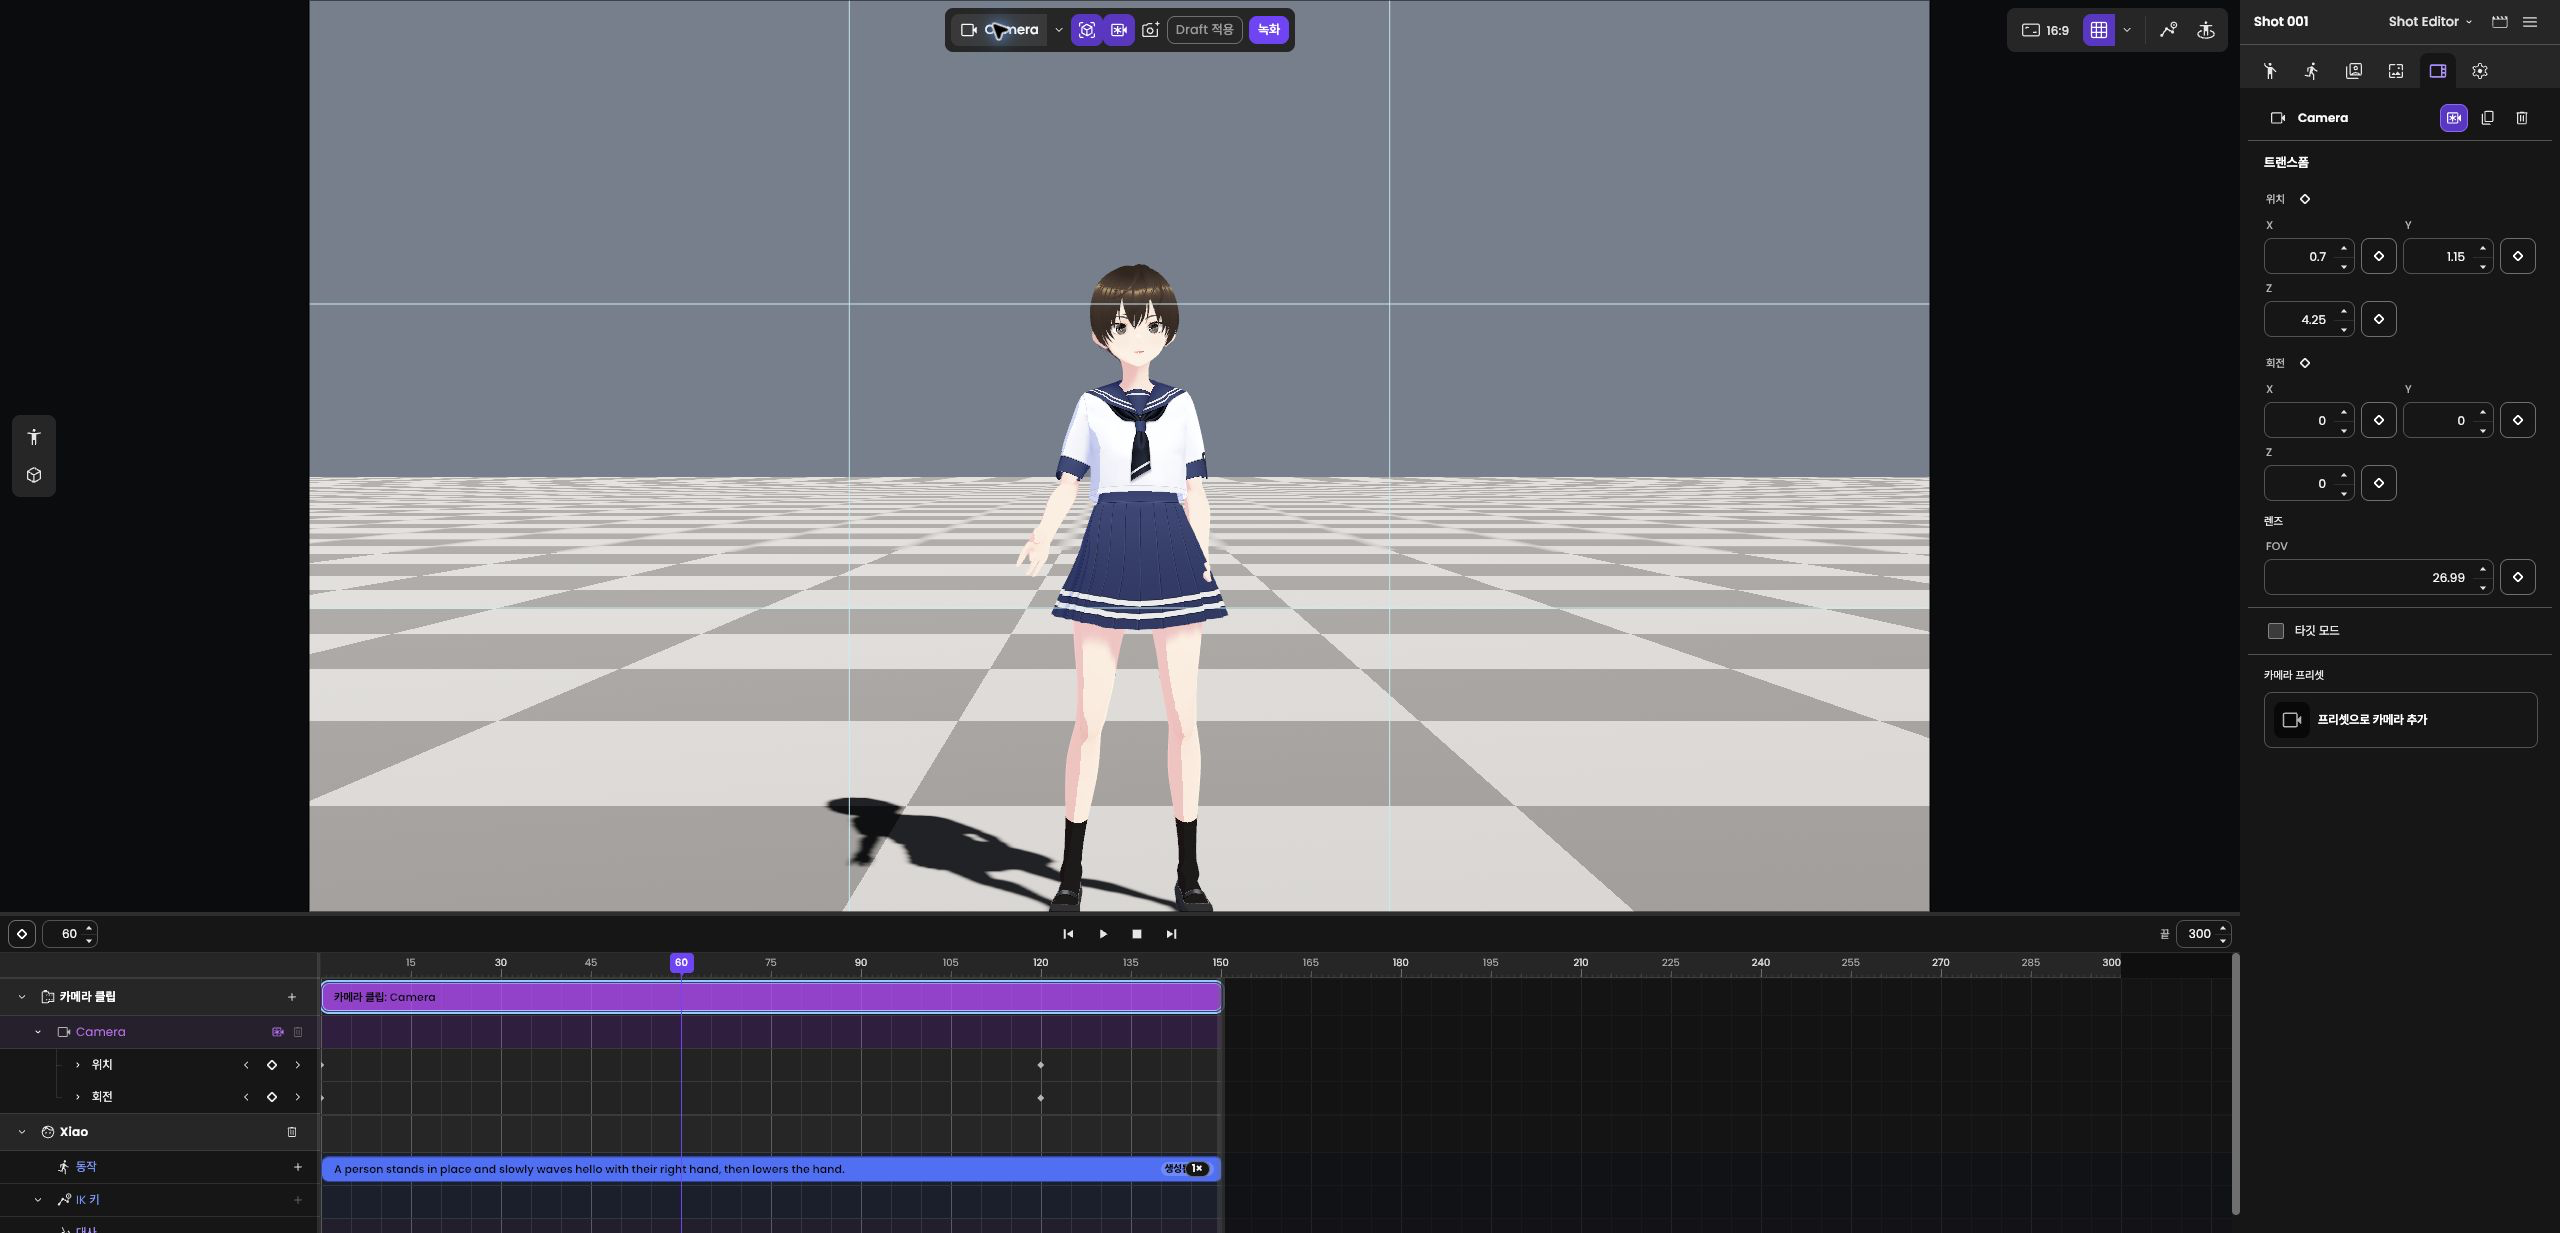
Prepare savable work and verify reloading
Work in a bundle that can be saved. If using a temporary Preview, first prepare the work in a new or imported bundle.
Return to the same frame as before saving to compare whether character, clip, and camera edits were preserved.
4.6 Export your results
Export the edited Shot as the camera's first and last frame images and a video.
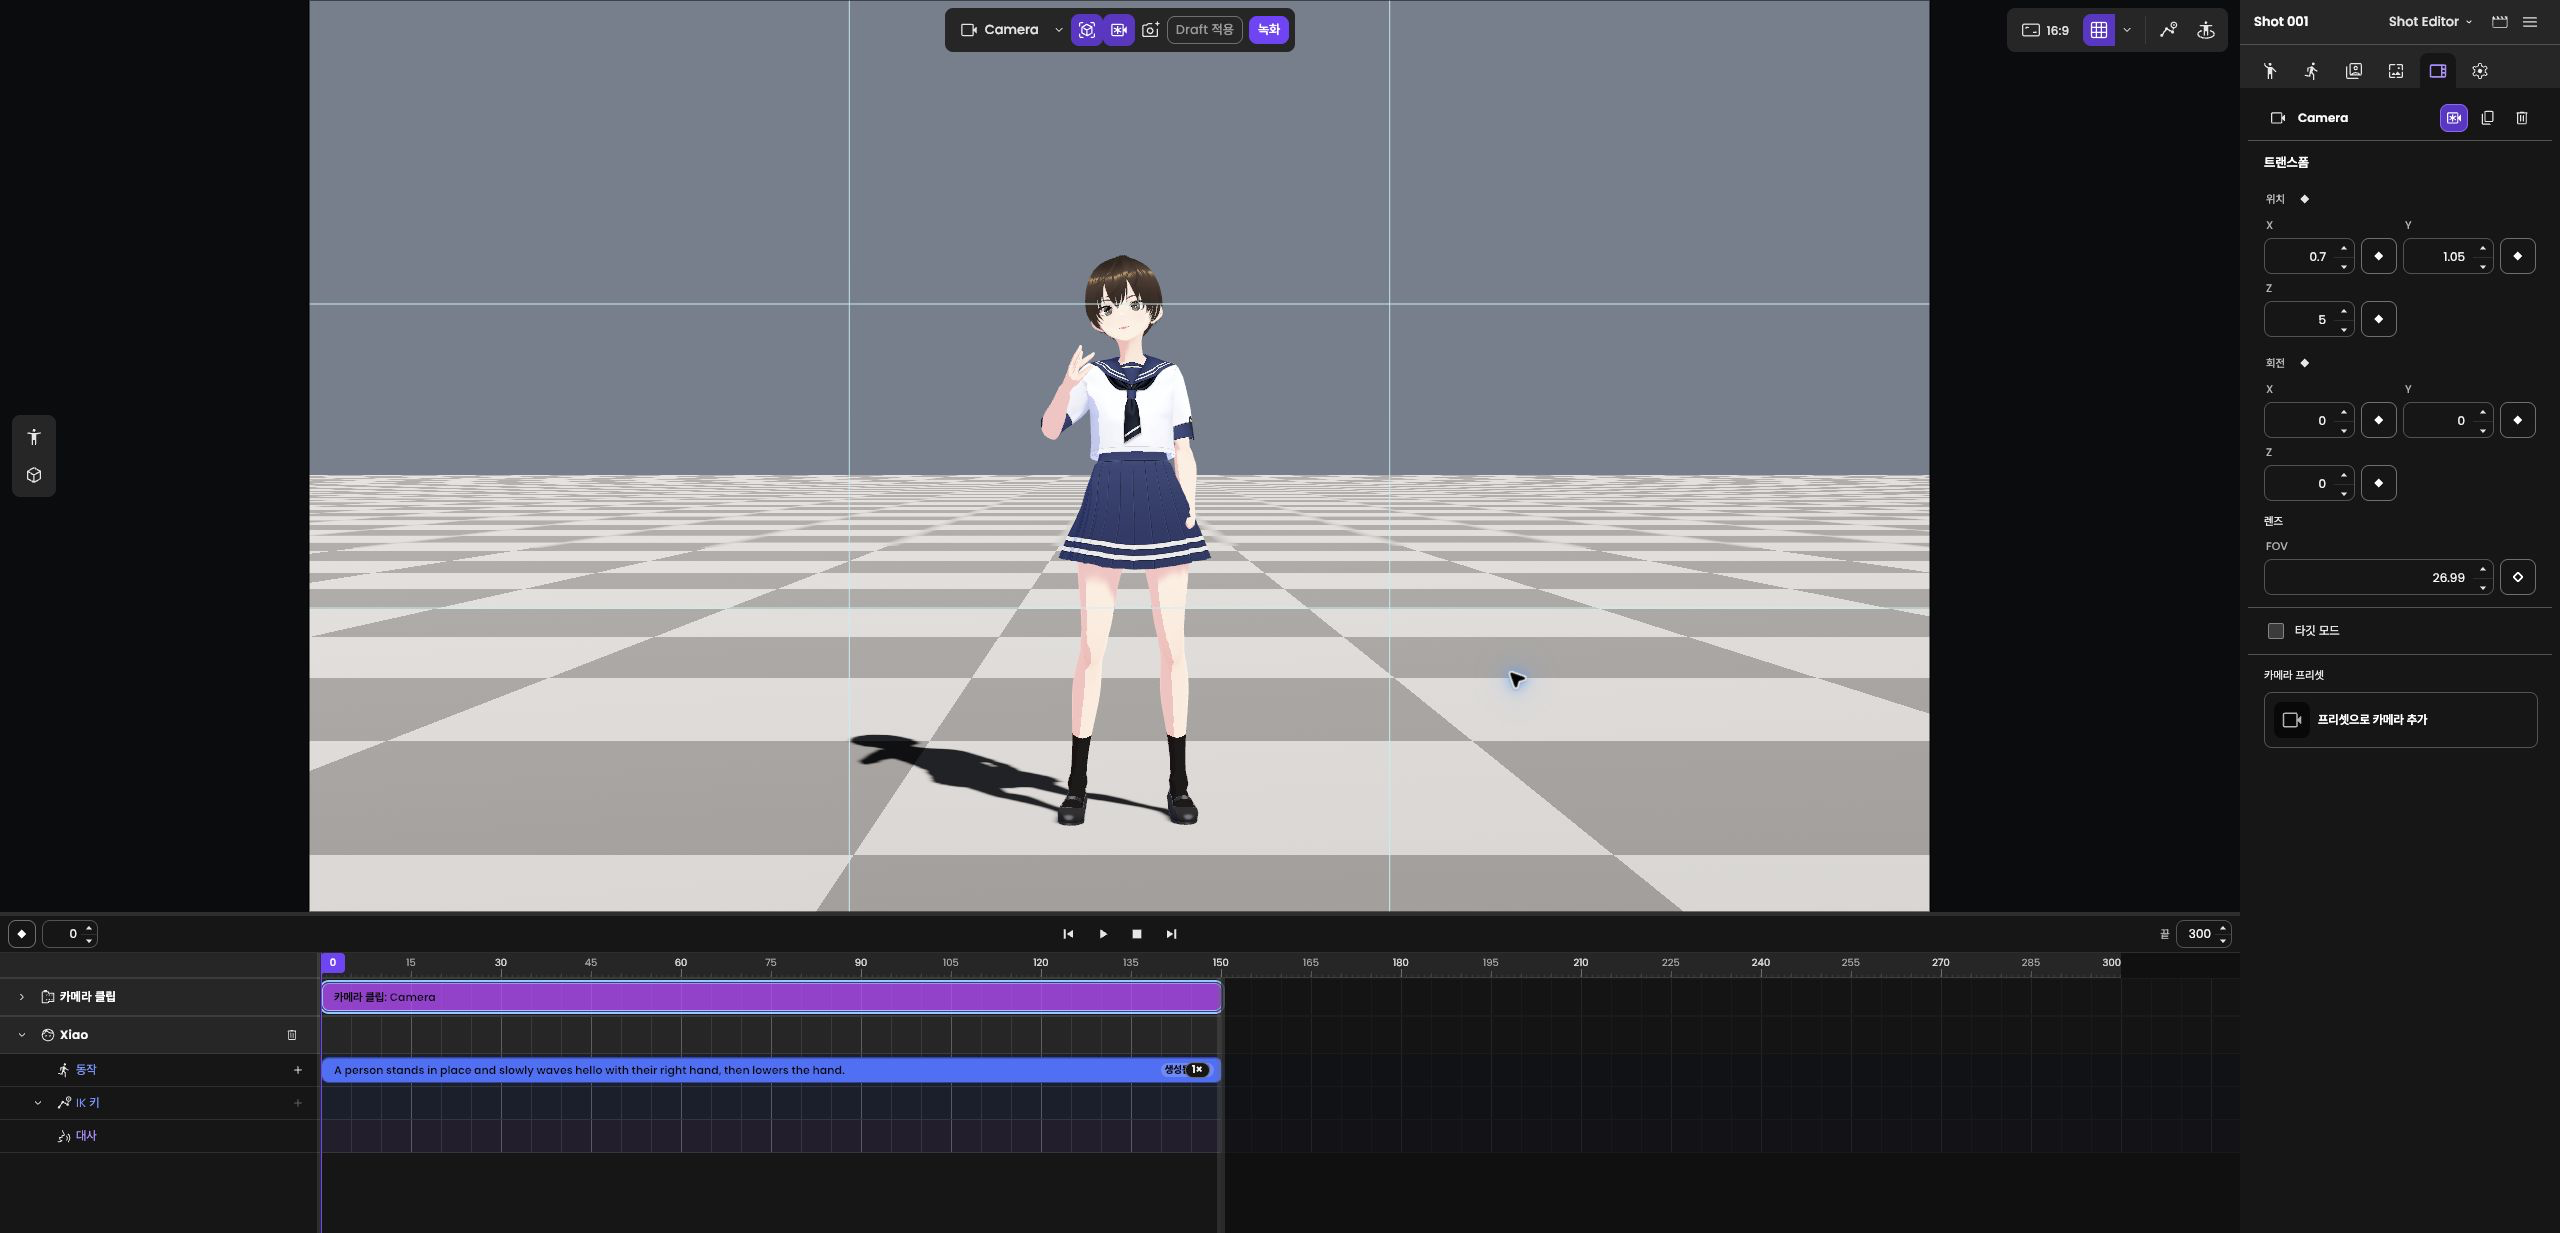
1. Run camera export — In the camera export tools at the top right, click Export and choose a folder to save the files. File → Export is used to keep an editable bundle.
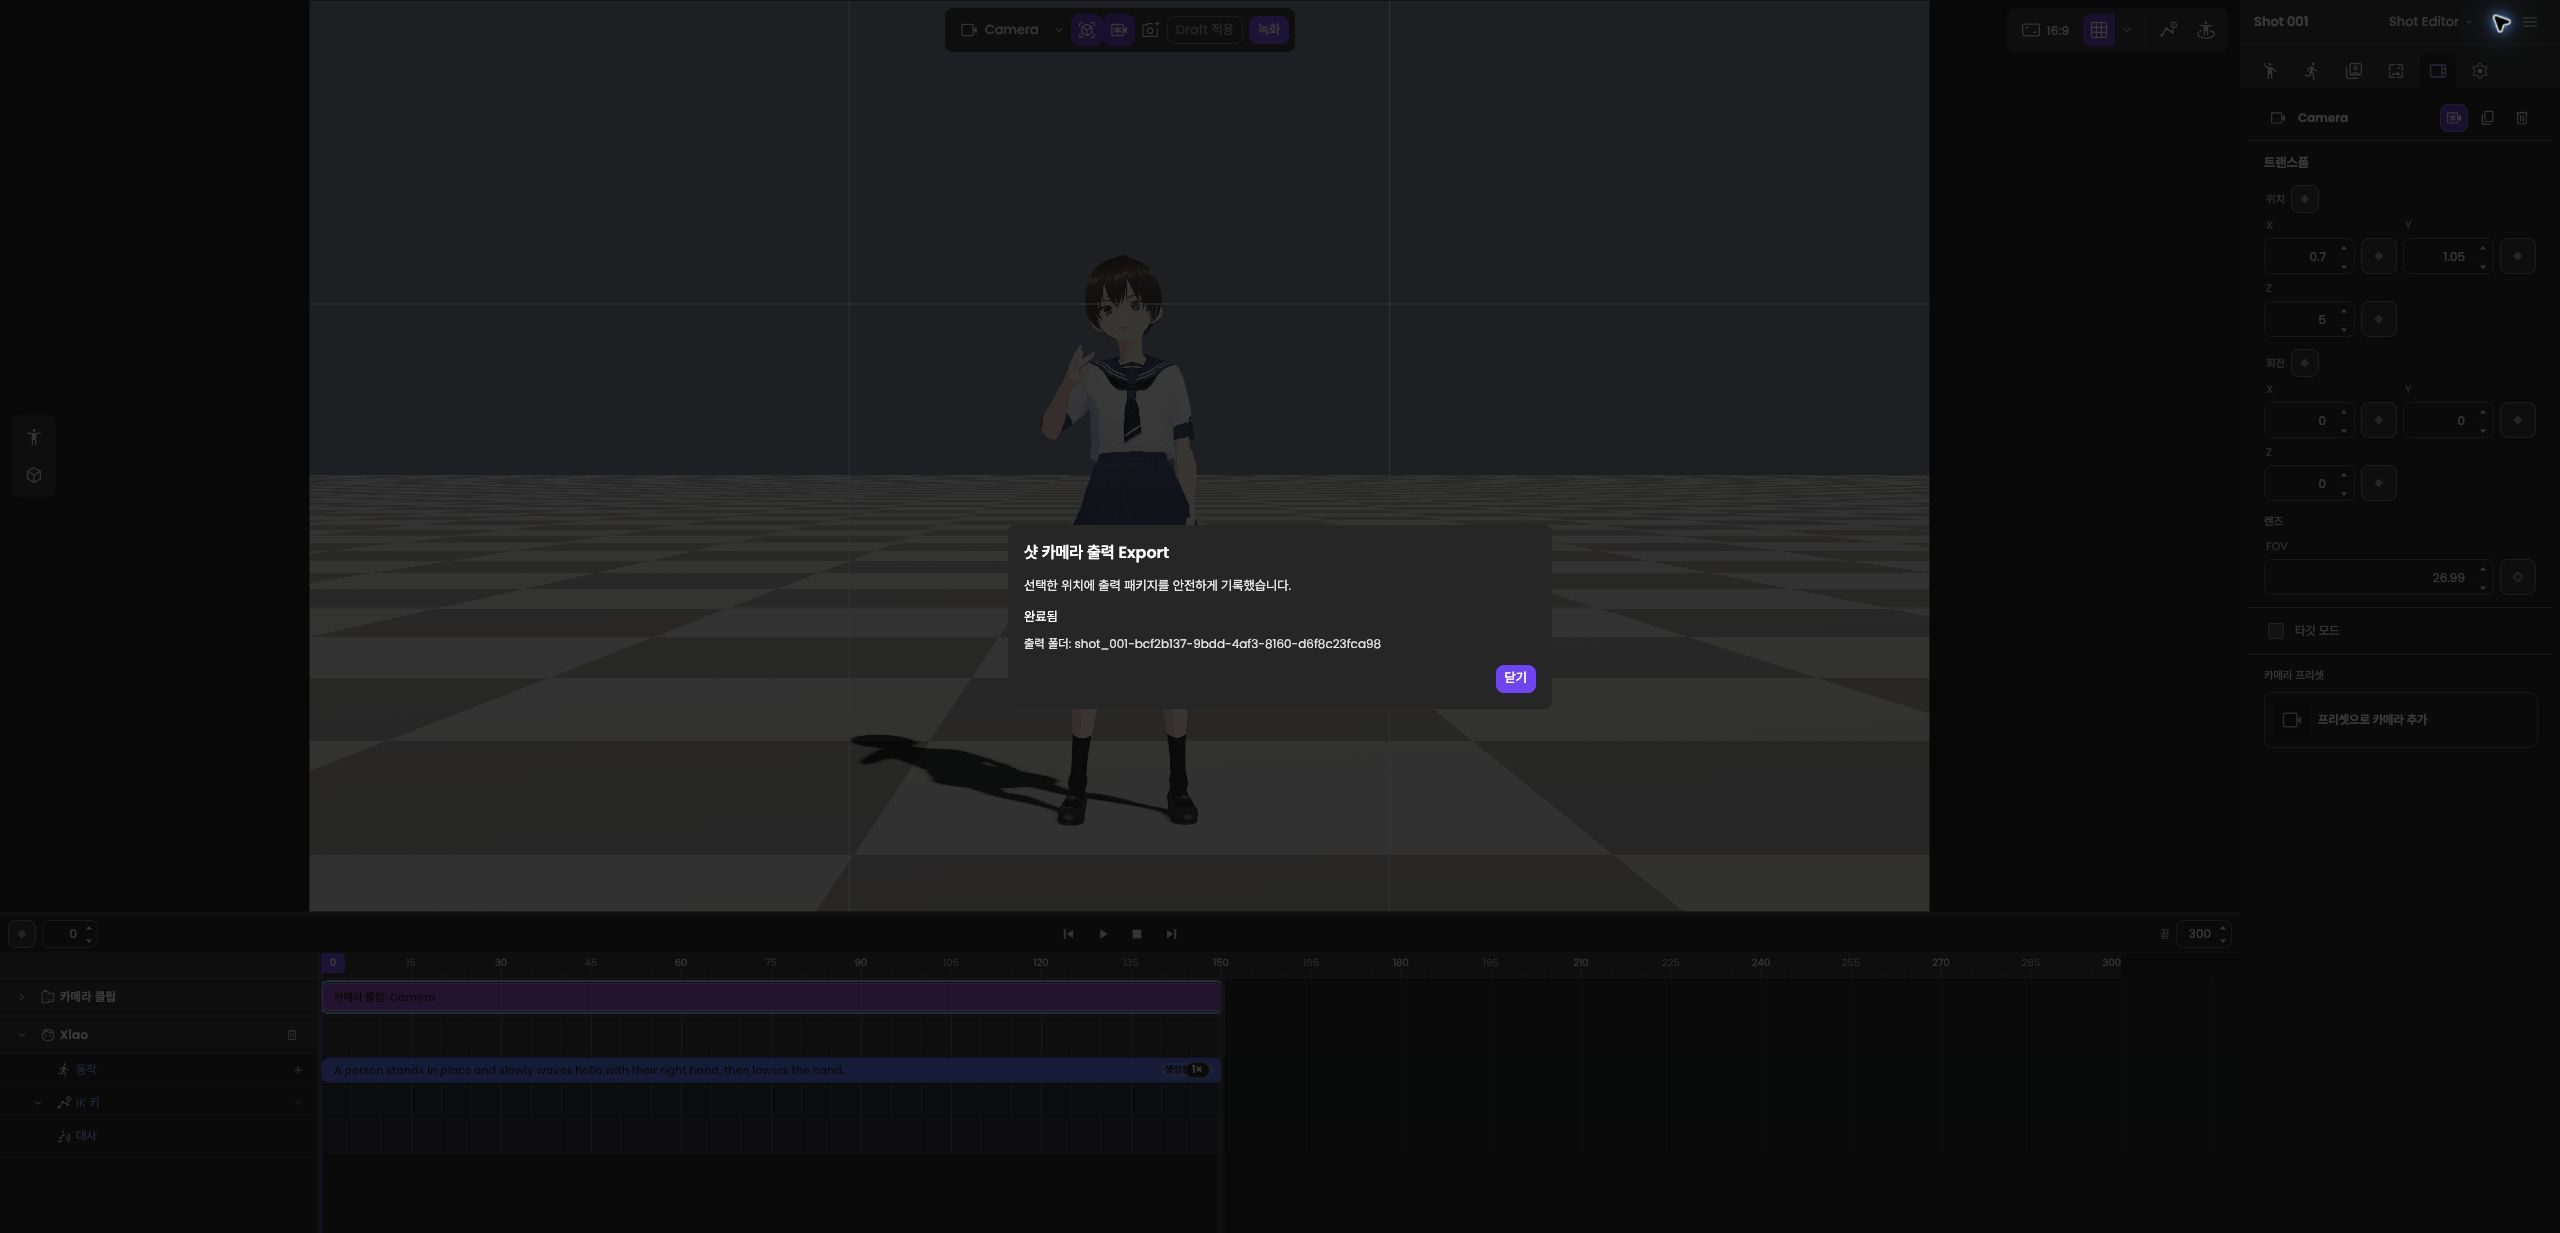
2. Confirm export completion — Wait for export to finish and check the completion message.
Export completion message
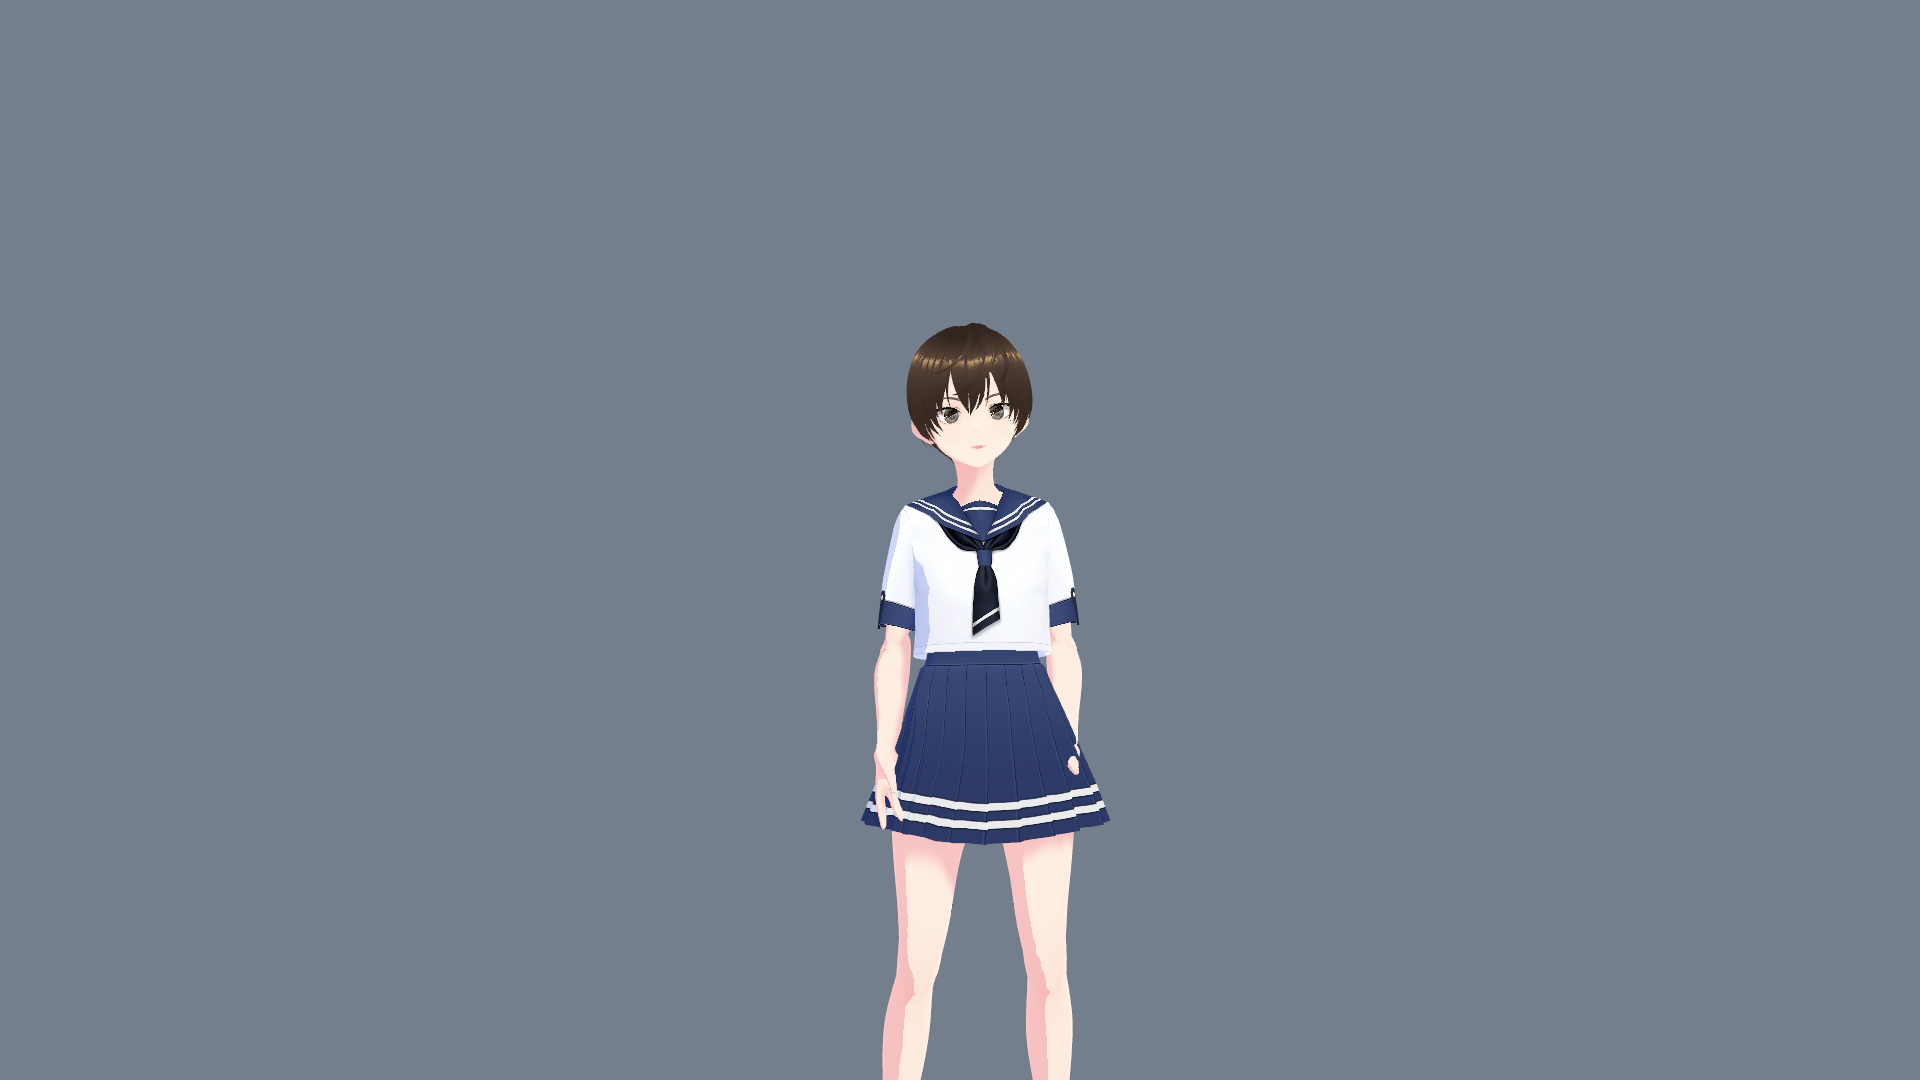
3. Review the output — Open the first-frame PNG, last-frame PNG, and silent WebM to review the images and movement. The example below is the exported last frame.
Export preparation and file formats
Run the export when the Shot's camera and playback interval are prepared and camera export is available in the current environment.
Camera export currently provides first- and last-frame PNGs and 1920×1080 silent VP9/WebM video.
4.7 Connect SceneGen results to CineV
From your directed scene, use SceneGen to generate video and add the final frame of the result to the CineV storyboard.
1. Direct the scene — Edit the characters and camera to create the desired composition. A before-and-after camera comparison for this example is shown in Featured results above.
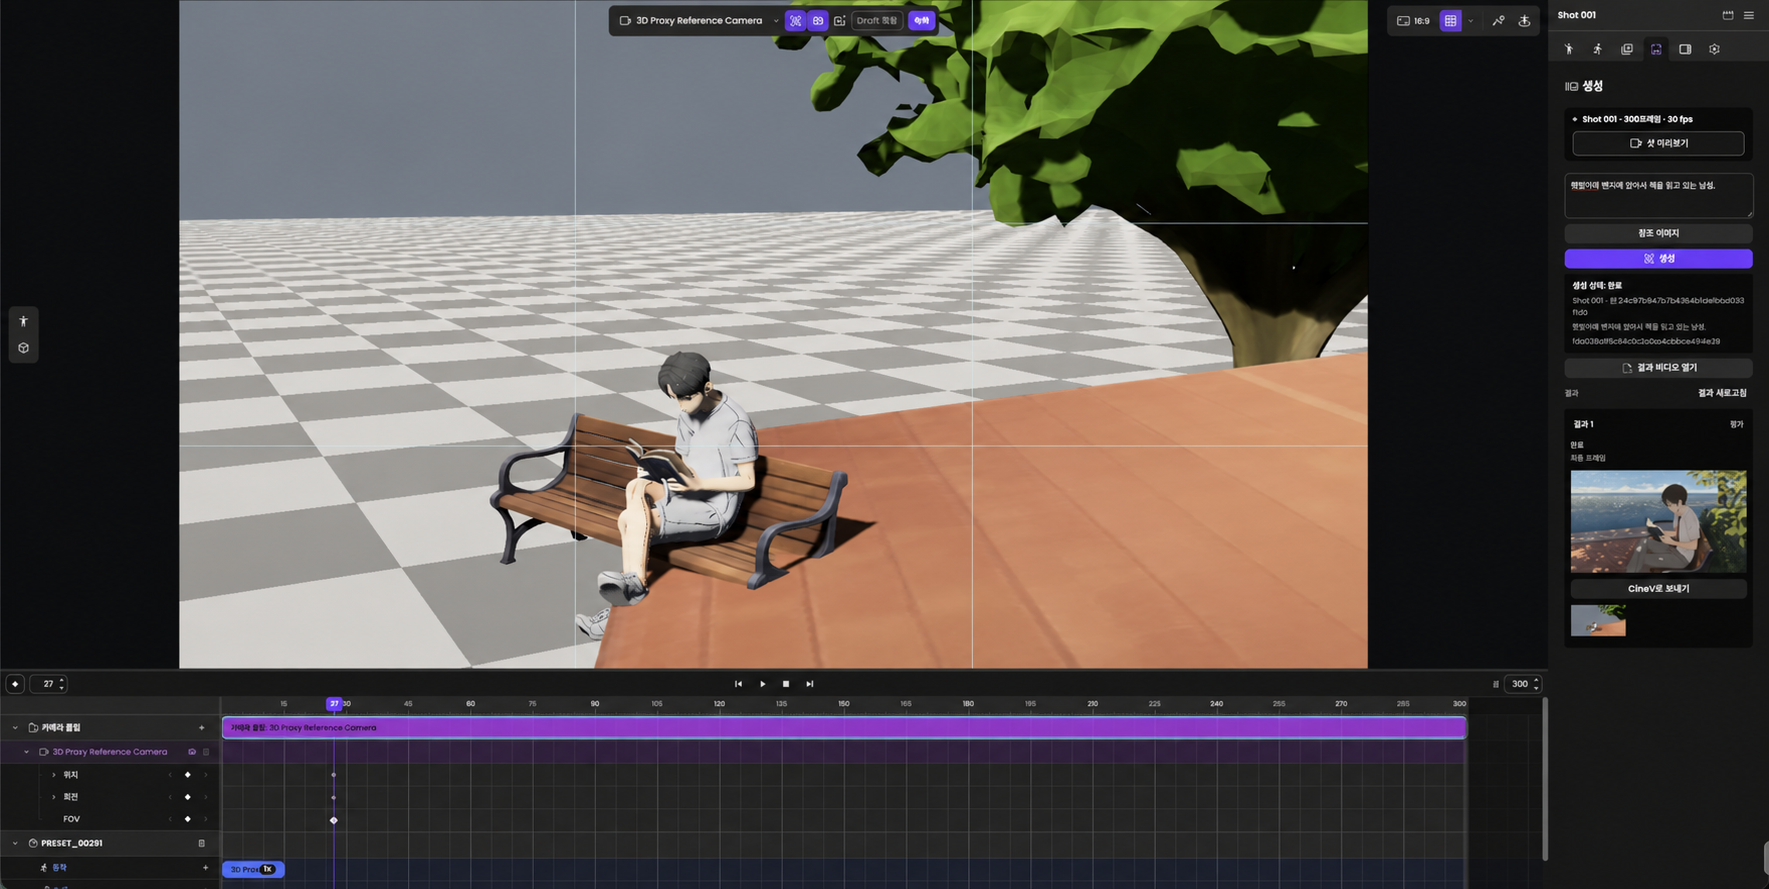
2. Generate with SceneGen — On the right, open the SceneGen tab. Describe the mood, lighting, and character actions, or add reference images, then click Generate.
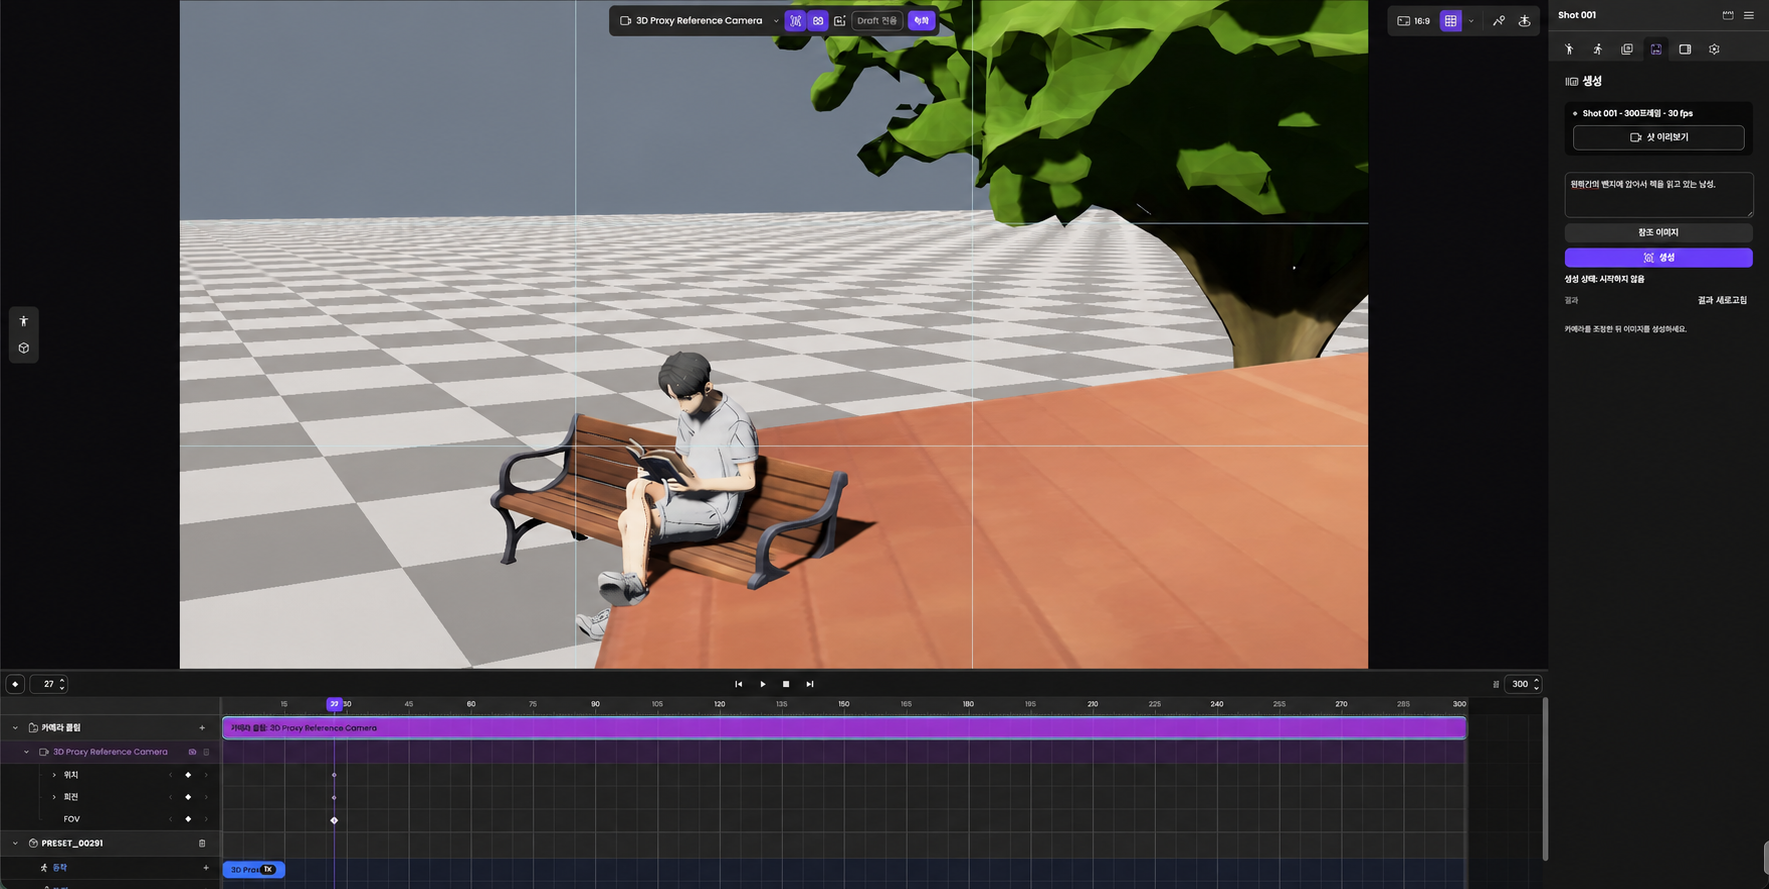
3. Review the generated result — Once generation finishes, review the video and last-frame image in the result card. The example result video appears near the beginning of this document.
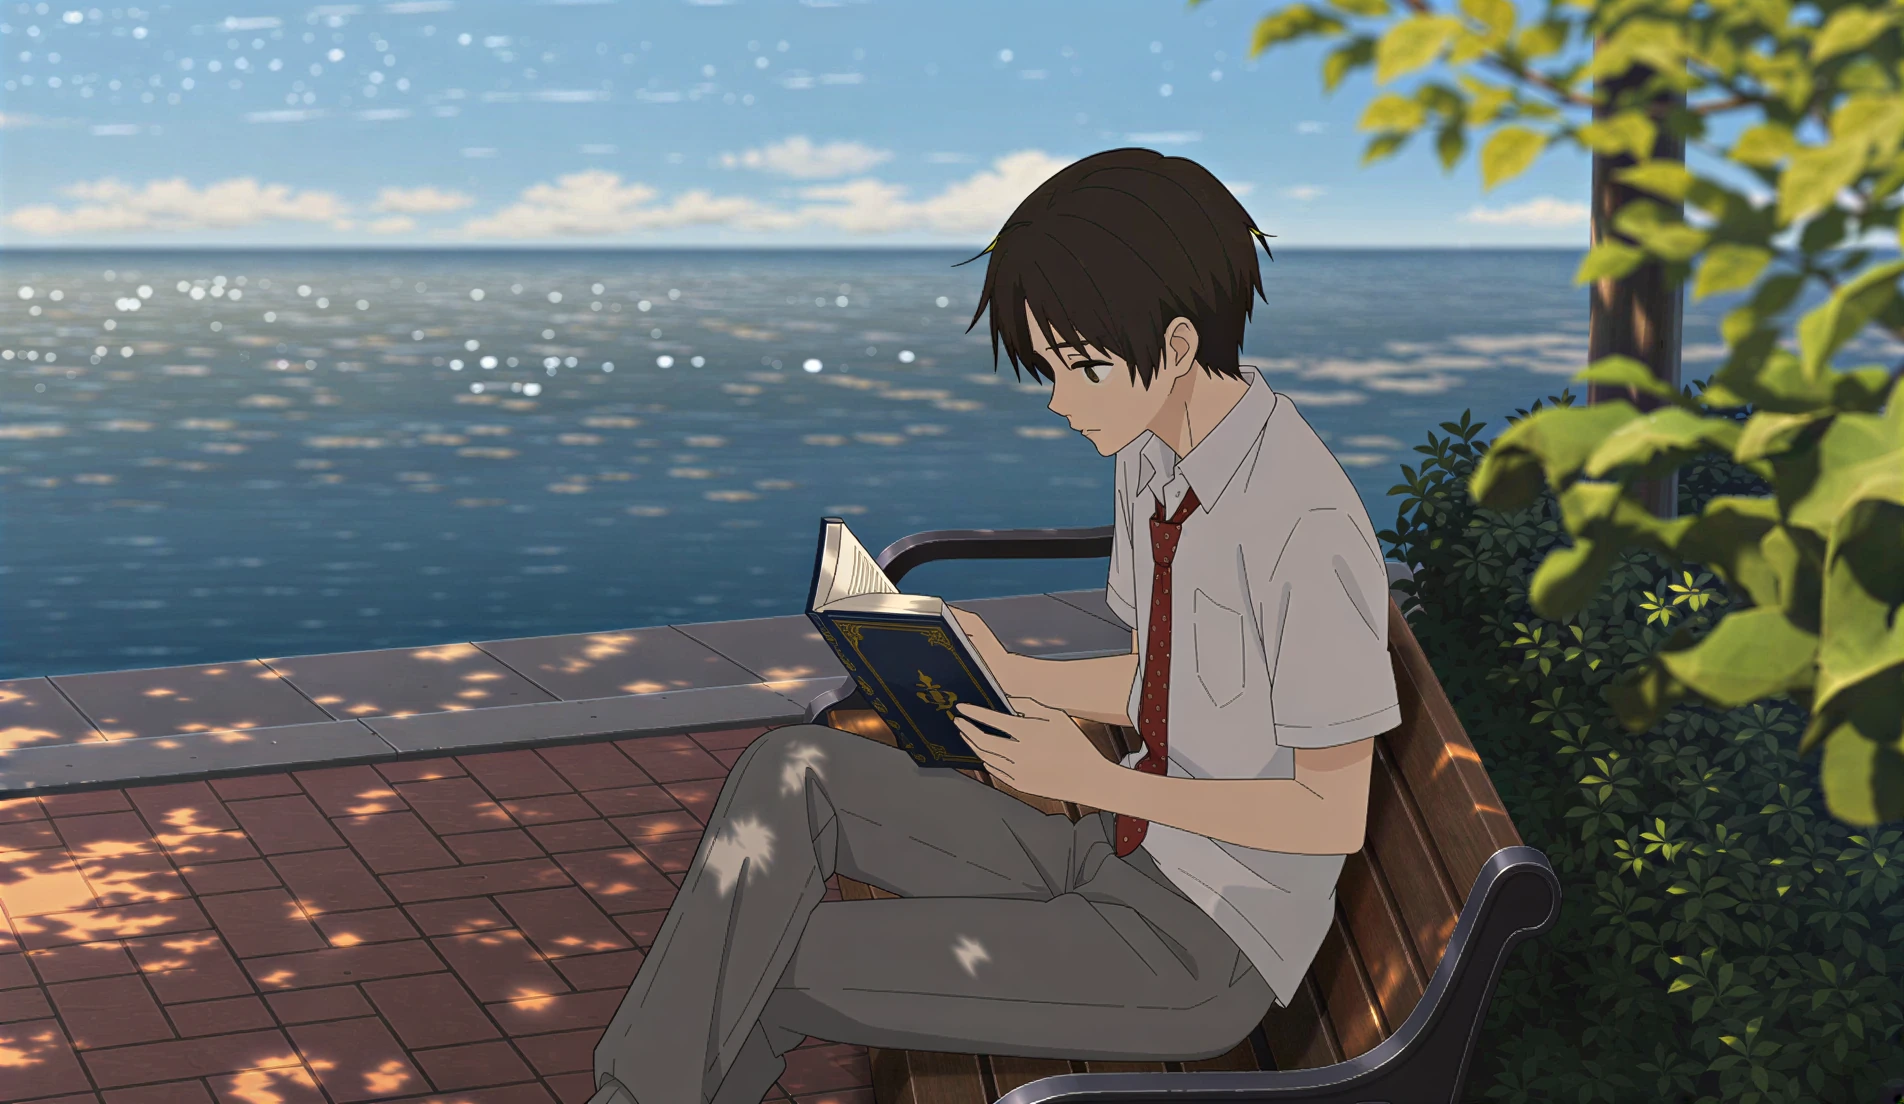
4. Send to CineV — On the result you want to use, click Send to CineV to transfer the final-frame image of the generated video.
5. Check the storyboard — Return to CineV and confirm that the transferred final-frame image has been added to the storyboard.
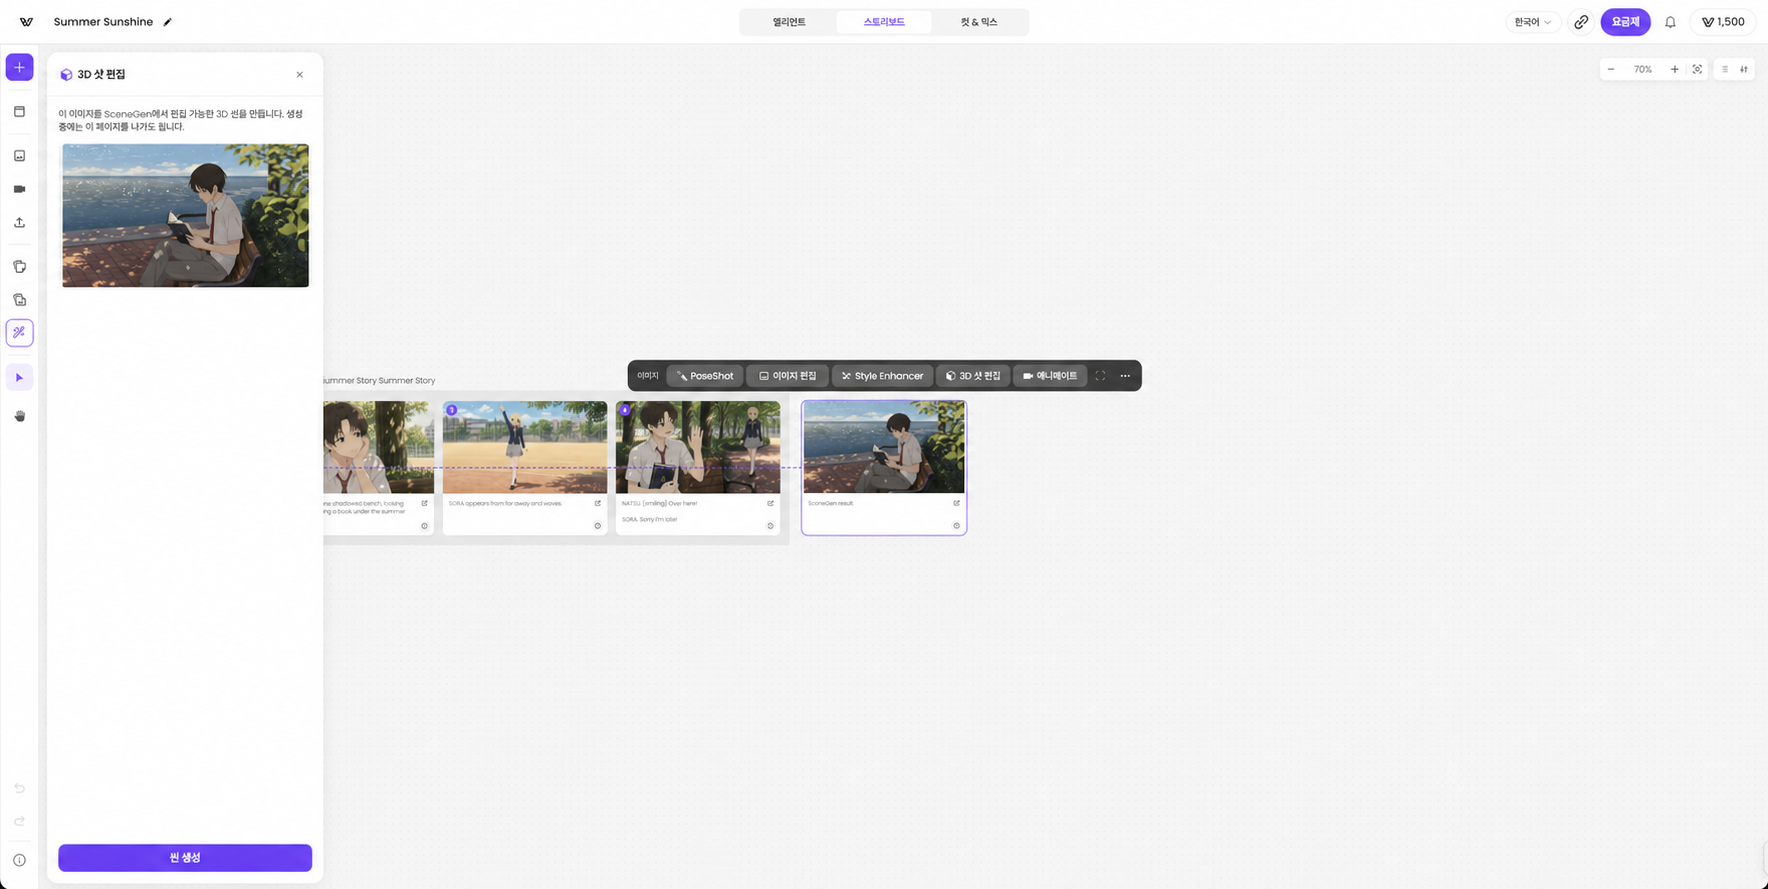
6. Start the next edit from the new image — Select the image added to the storyboard and run 3D Shot Edit → Generate Scene → Open in Shotloom. As in 4.1, generate a 3D scene from the new image, then edit character actions and camera composition again.
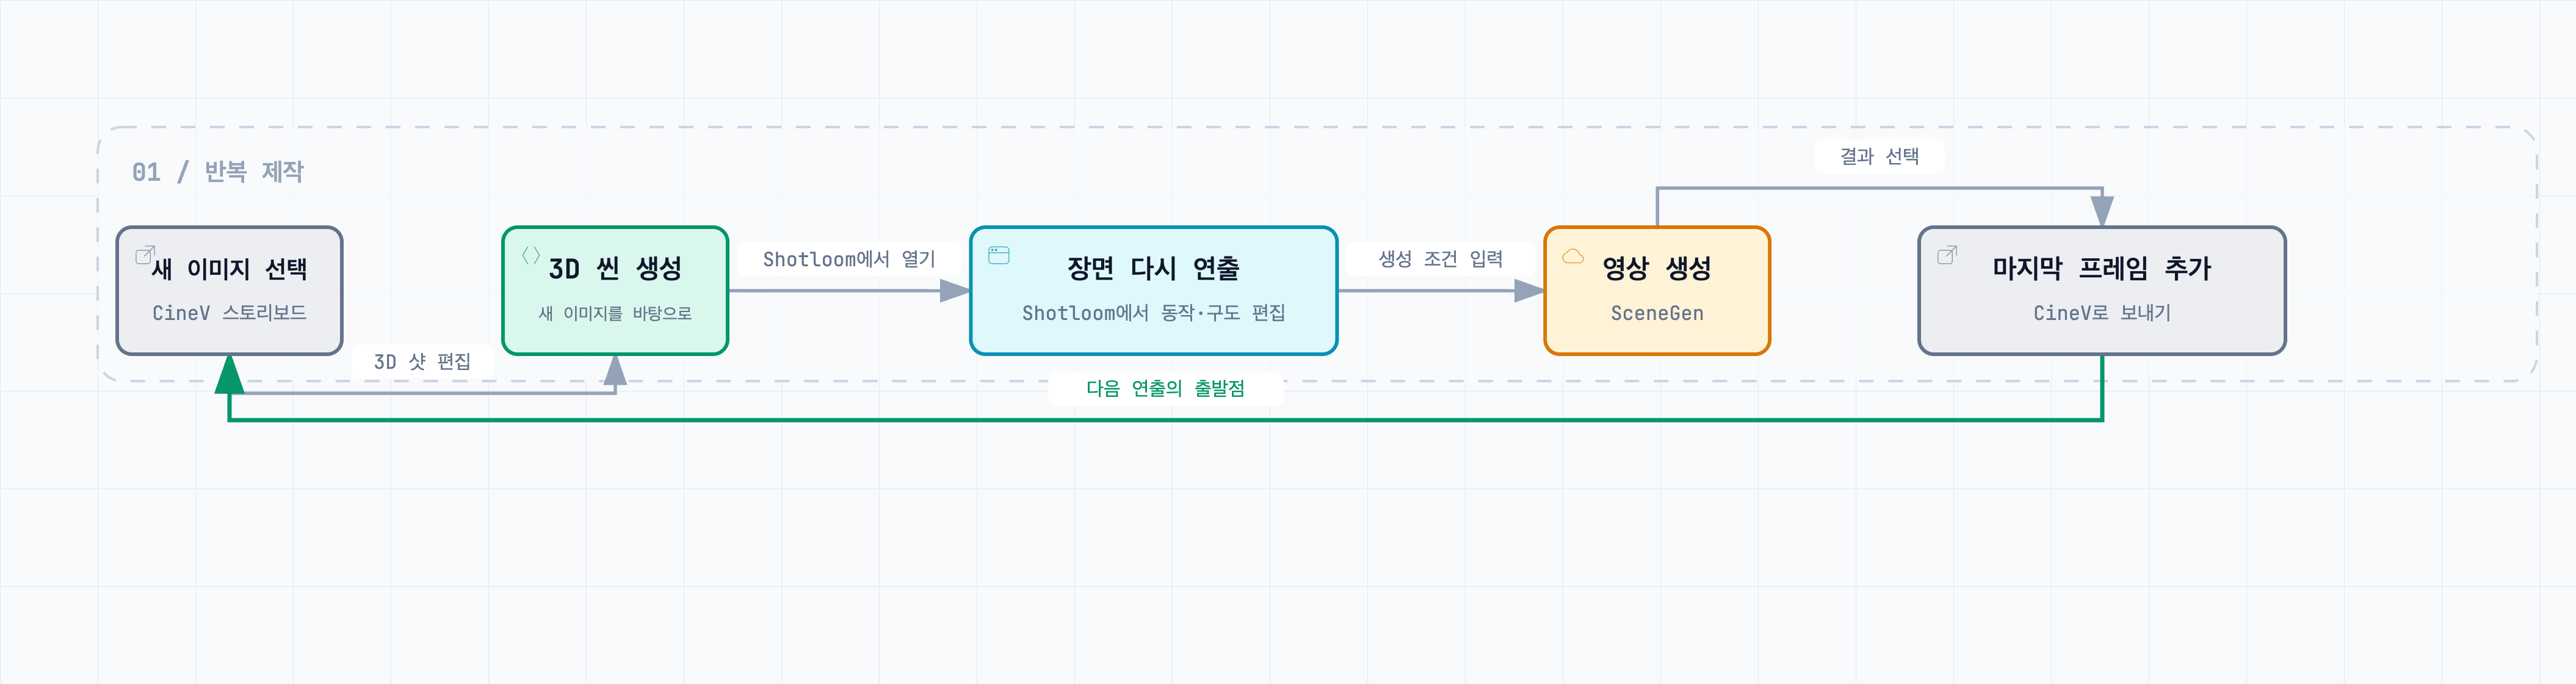
You can also generate these results with SceneGen and send the final frame to CineV. Each generated result becomes the starting point for directing the next scene, allowing you to develop it through the same iterative production workflow.
5. Glossary
| Term | Meaning |
|---|---|
| Shotloom | A 3D scene direction tool for editing character placement, actions, and camera composition. |
| CineV | A service for managing storyboard shots and production work. Send shots to Shotloom for editing, or receive the last frame of a generated result and add it to the storyboard. |
| SceneGen | A feature that generates video from the scene edited in Shotloom and the supplied generation settings. |
| Shot | The unit for editing one scene. Character actions and camera direction are composed within this unit. |
| bundle | A format containing characters, clips, cameras, and other work so it can be reopened and edited. Editable bundles are stored as .shotloom.zip files. |
| Timeline | The editing area where character actions and camera compositions are arranged over time and specific moments can be played or reviewed. |
| Performance Clip | An action clip applied to a character's timeline. After reviewing a generated motion candidate, specify the target character and application interval to add it. |
| Camera key | A point storing camera position, rotation, and other values at a specific frame. Place keys at different times to create changes in composition over time. |
| Pilot view | A way to edit composition while viewing the scene through the selected camera. |
Saving, exporting, and generating
| Action | Purpose and output |
|---|---|
| File → Export | Download an editable Shotloom bundle. |
| Camera Export | Export the edited 3D scene as first- and last-frame camera PNGs and a silent WebM video. |
| SceneGen generation | Generate new video from the scene and generation settings. |
| Send to CineV | Transfer the last-frame image of the selected SceneGen result to the CineV storyboard. |